Using photo masking in Gimp to make your Stable Diffusion image generation workflow easier
Put a mask on

Sometimes I will like one part of an image and something else in another from my Stable Diffusion generations. I recently started using Gimp's masking utility to help with my workflow. The reason is that with masking I can take all the good parts of one image and then combine them with another to make a better image.
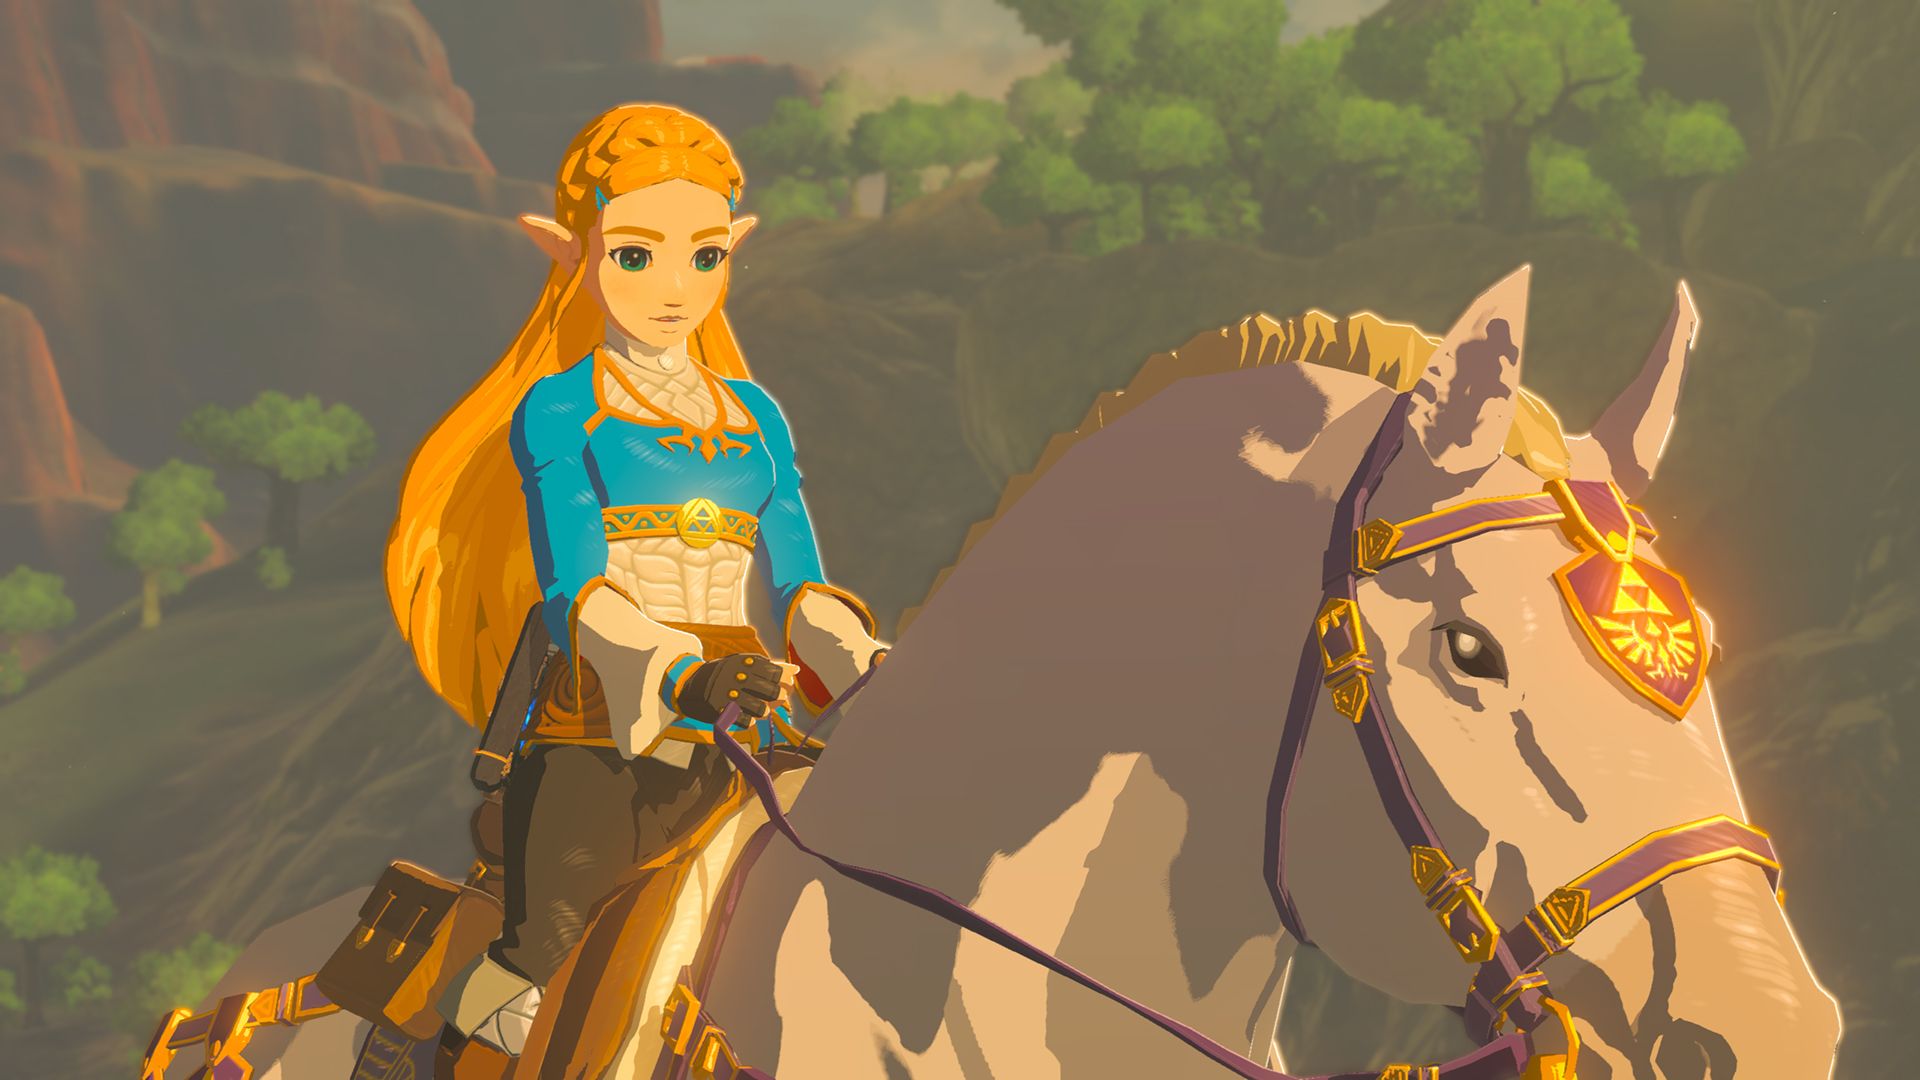
In this post I will be using this screenshot of Zelda on a horse from The Legend of Zelda: Breath of the Wild and make her "real".
First what is Masking in Gimp?
A mask is an extra alpha layer (think invisibility cloak) that you use either black or white colors to reveal the underlaying image.
Images have a thing called an alpha channel and it controls the transparency of the image.
White pixels say to the program show the image and black pixels say make it invisible.
You can read more here:
https://www.gimp.org/tutorials/Layer_Masks/
and here
https://thegimptutorials.com/how-to-mask/
Do the Work:
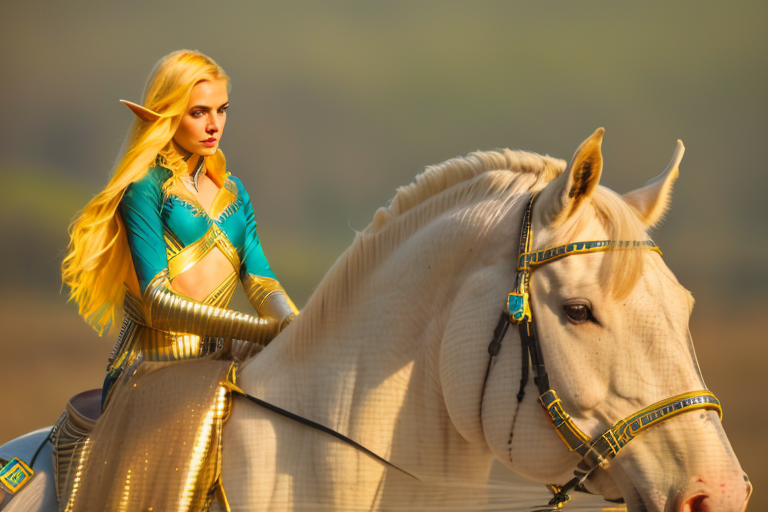
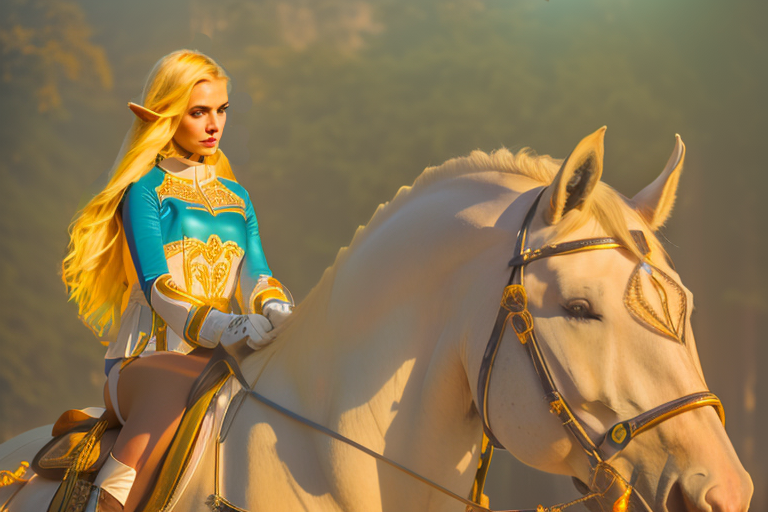
I generated a bunch of images and locked on to the following two.
For this example, I liked the horse in the original, but the Zelda in the other.
By using a masking layer I was able to mix both images together.
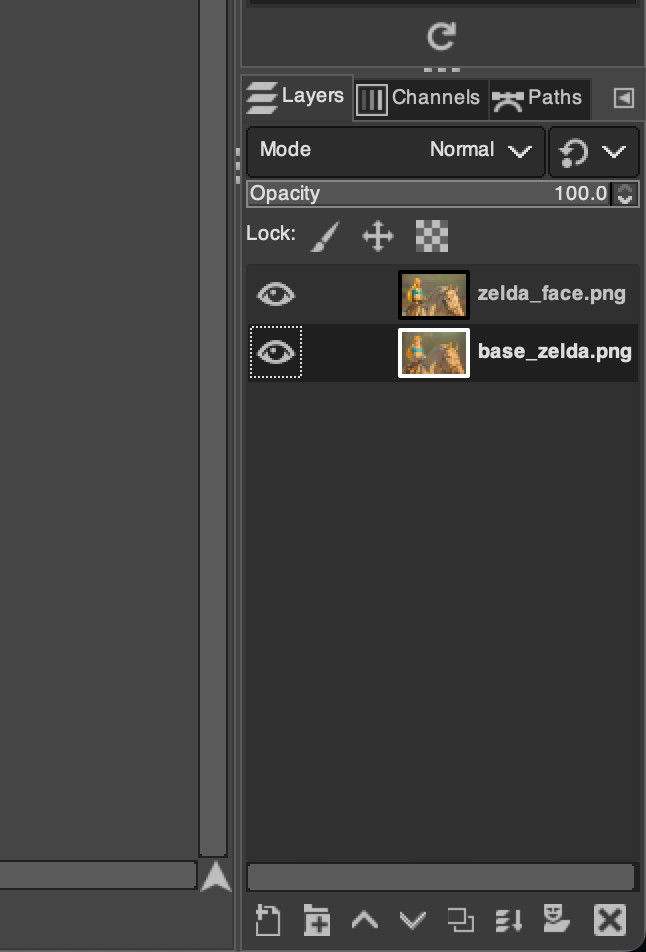
base_zelda

zelda_face
Open both images in Gimp with the "Open as layers" selection under File.
Set the base_zelda image to the bottom of the layer stack
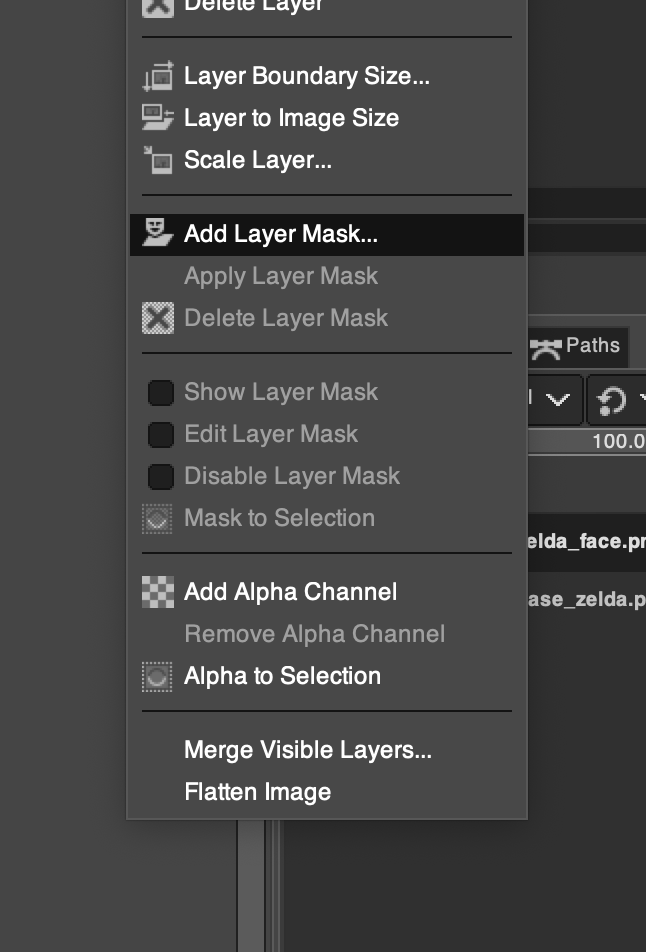
right click on the zelda_face image, and select "add layer mask"
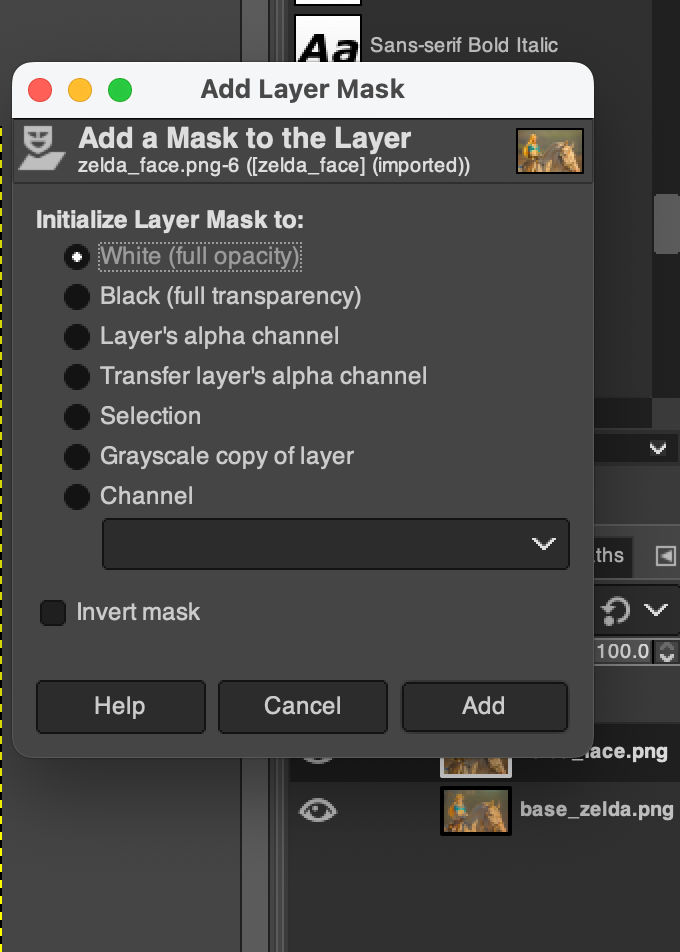
select white (full opacity), then click add
Now with the mask setup, use the paint tool to reveal the horse underneath, magic!
You can see the mask layer by right clicking on the layer and selecting "Show mask layer"
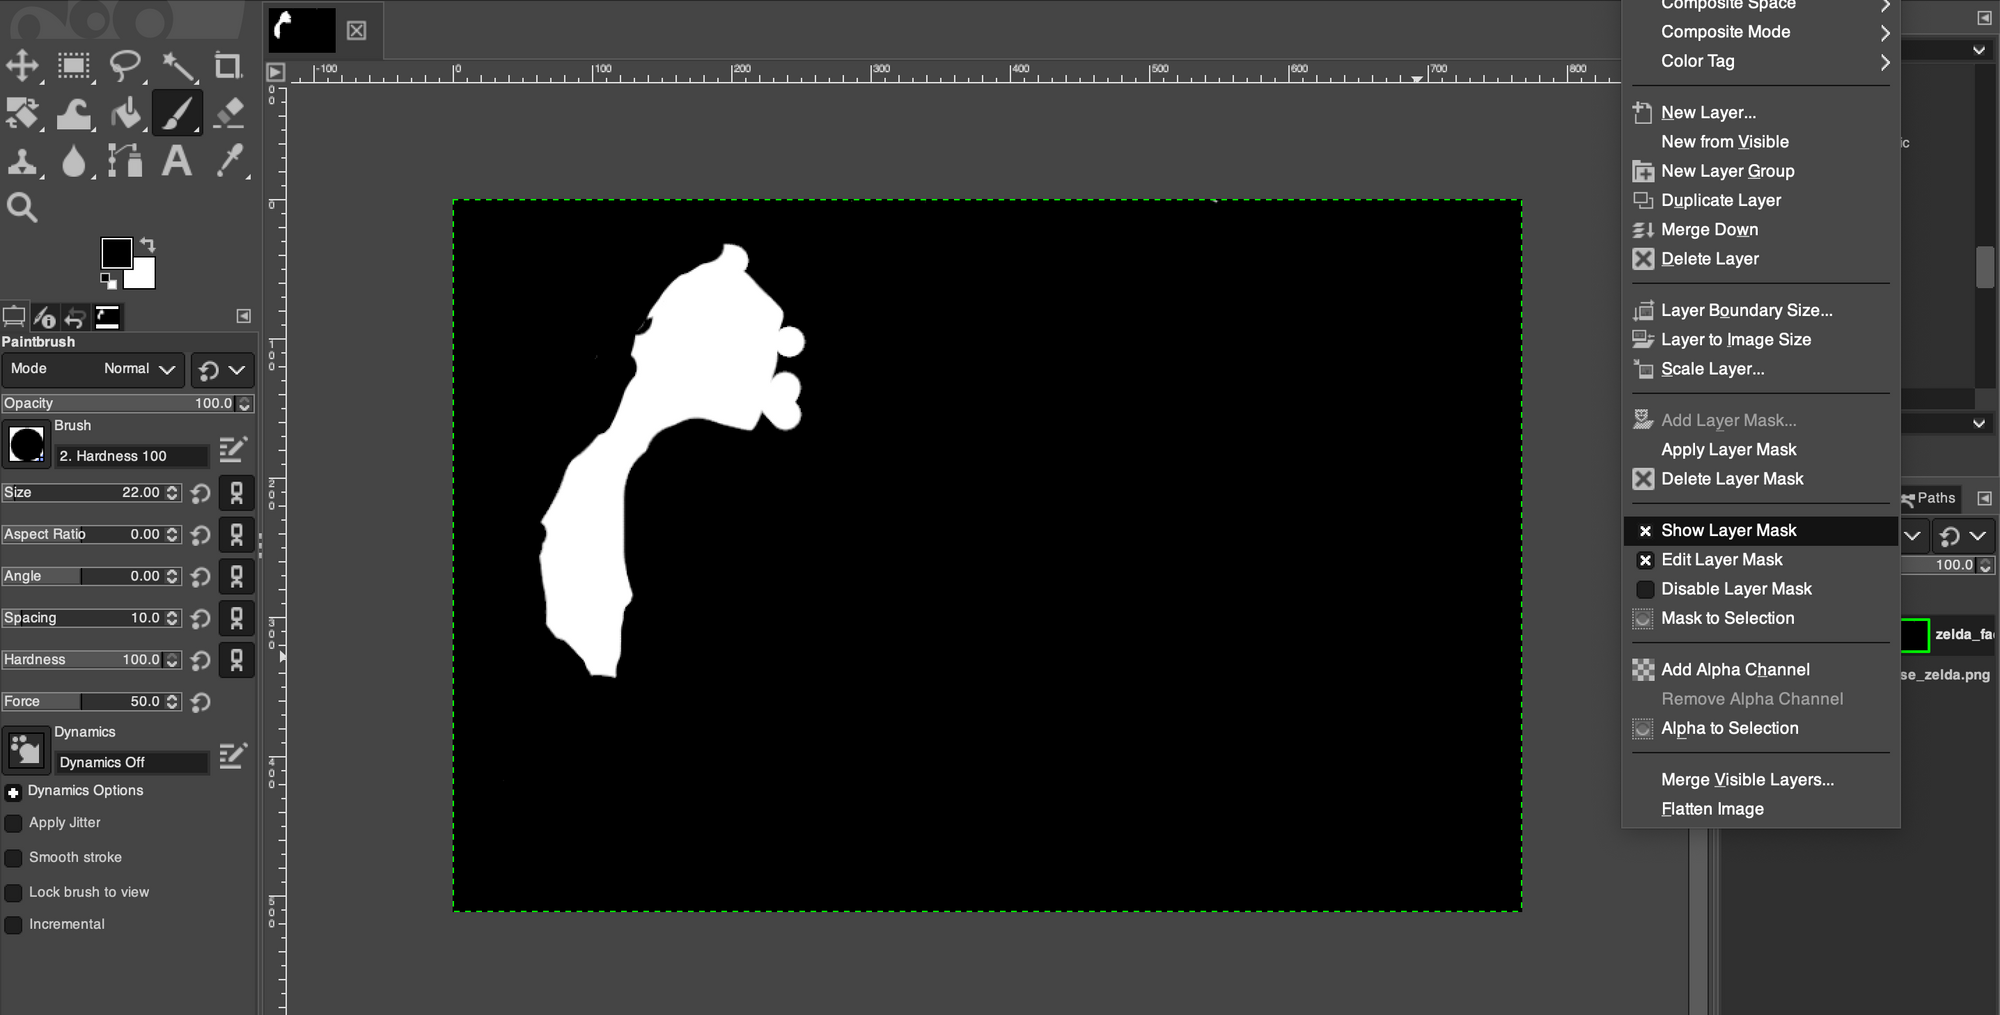
As you can see from the mask I painted most of the image to reveal the underlying image and just kept the head and hair from the top image.
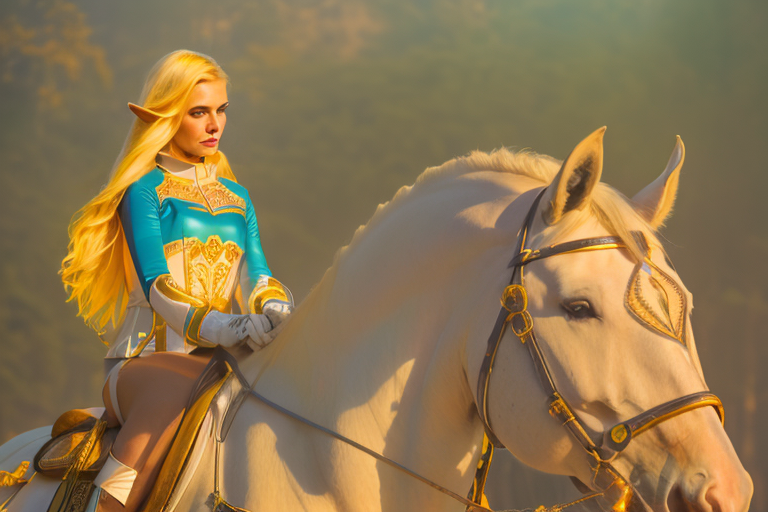
Final image for now
zelda_masked.png
Once that was done I exported the image and sent it over to Automatic1111 image to image. Using img2img and ControlNet I processed the image again with
very low settings. The low settings keep the main gist of the image and just kind of smooth it all together nicely.
zelda_merged.png
For the next steps I would either upscale or do some more generations, but for now this looks good.