Adding AI to my AI Art worklfow with Ollama and a multimodal LLM

I've wanted to find a easy way to post the images I create with Stable Diffusion to my other blog ephergent. The previous process I was using was a bit slow and tedious because it was manual. This new way is meant to automate that process with a little help of a multimodal LLM.
What does multimodal mean?
In the context of a Language Model (LLM), multimodal refers to the model's ability to process and understand information from multiple modalities or sources. In a traditional sense, language models primarily deal with textual data, analyzing and generating text based on the input it receives.
A multimodal LLM, on the other hand, extends its capabilities beyond text and can effectively handle diverse forms of input, such as images, alongside textual data. This means the model is equipped to comprehend and generate responses based on a combination of both text and visual information. This additional capability allows the model to engage with and interpret a broader range of data, making it more versatile in understanding and generating content across different modalities.
Let's take a look at how I previously would post my images to ephergent.com.
First I would open the image in an editor and then save it from a PNG to a JPG to make the page load times faster.
Once saved, I'd create a blog post the normal way in Ghost.
Then dream up some idea for the image caption and the write something about the image along with a copy of its prompting and generation data.
Once I was done I'd publish the image to go live on the site.
The Basic Steps:
- Edit image from PNG to JPG
- Create Ghost post
- Upload image
- Write a title
- Write a blog post (with image generation data)
- Publish the post
Now let's talk about the automations I built to save a heck of a lot of time:
First we need to make a directory for Automatic 1111 to save the images.
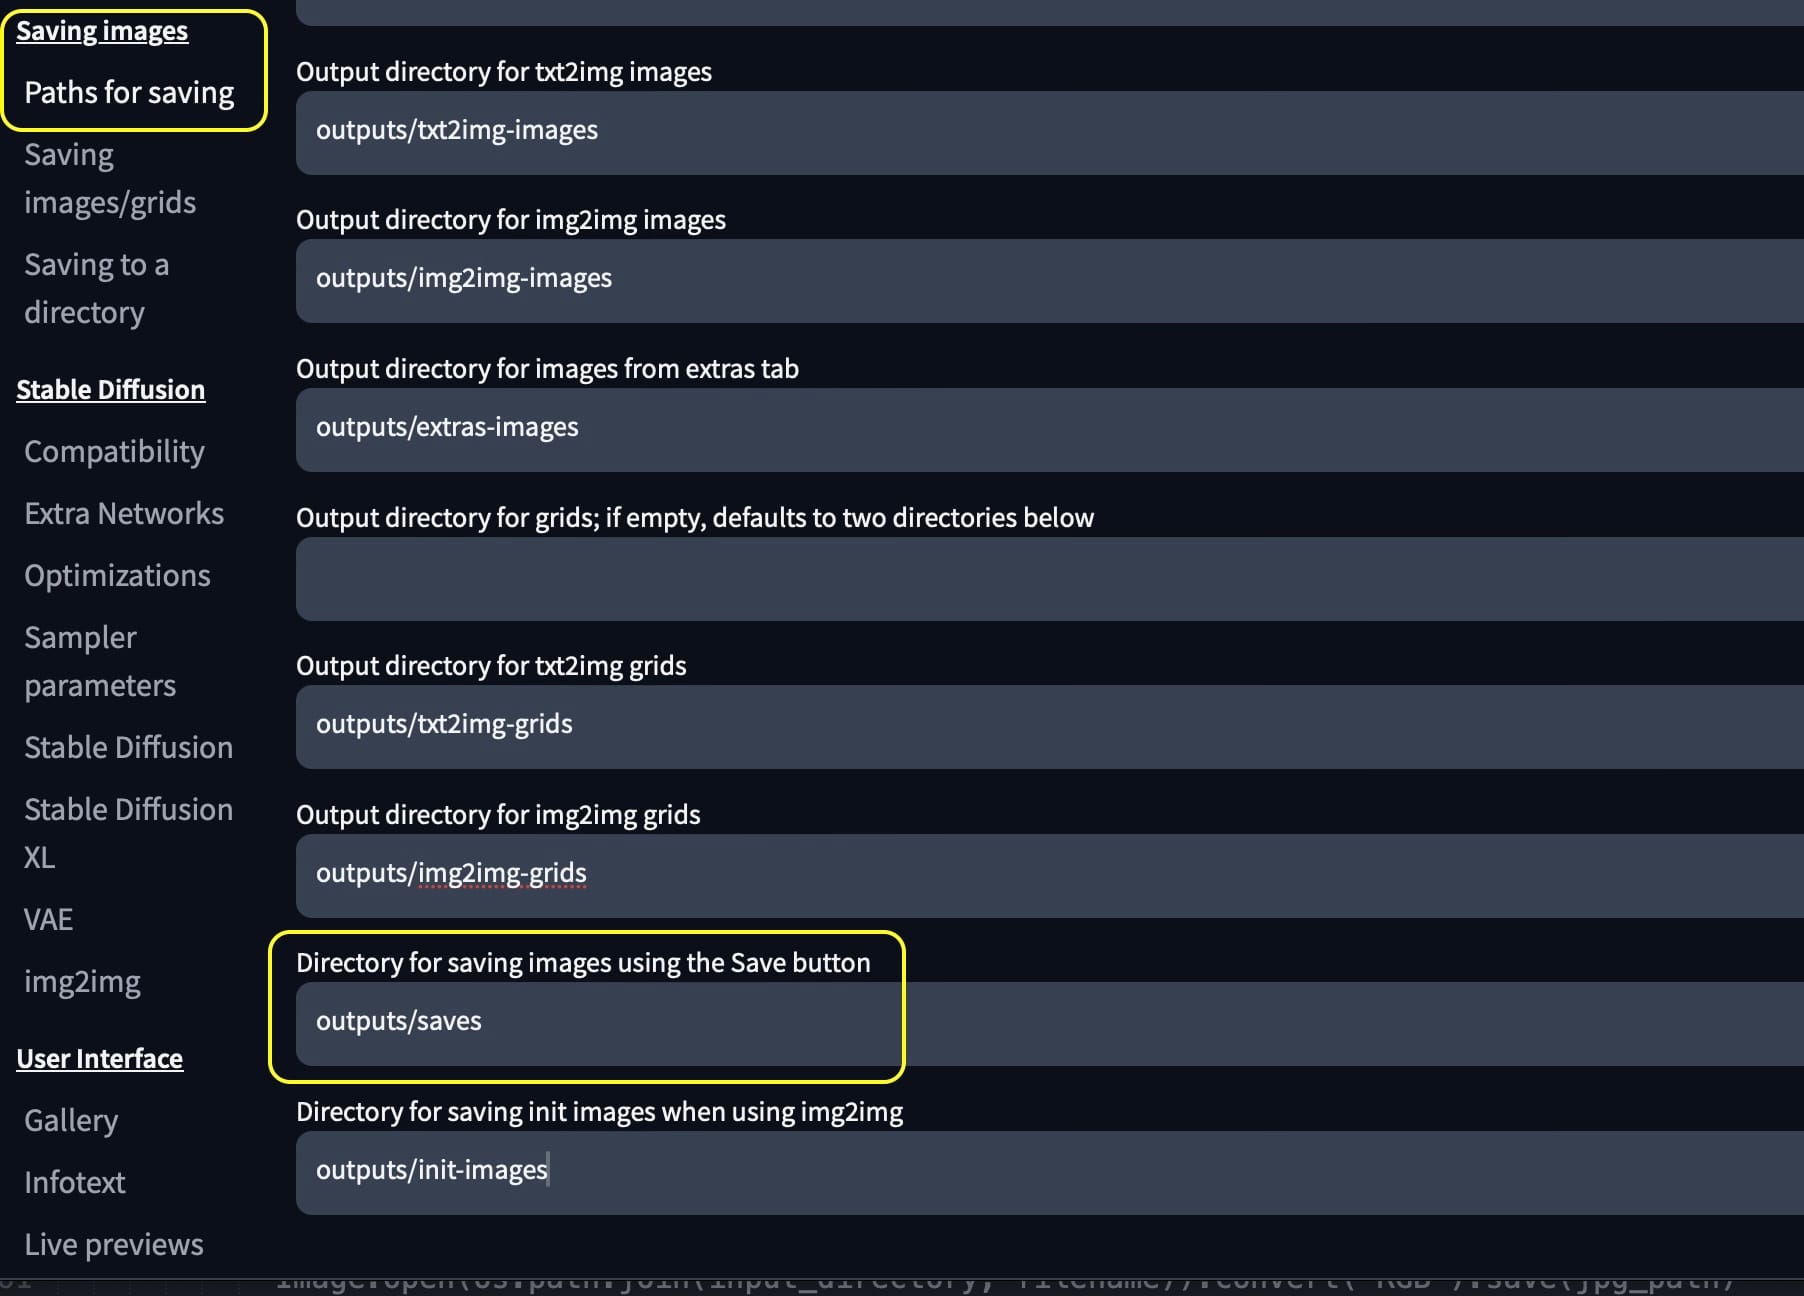
In the settings > Saving images > Paths for saving > "Directory for saving images using the Save button". Set this to a directory where you'd like to keep you images, it will also be our input_directory in my script.
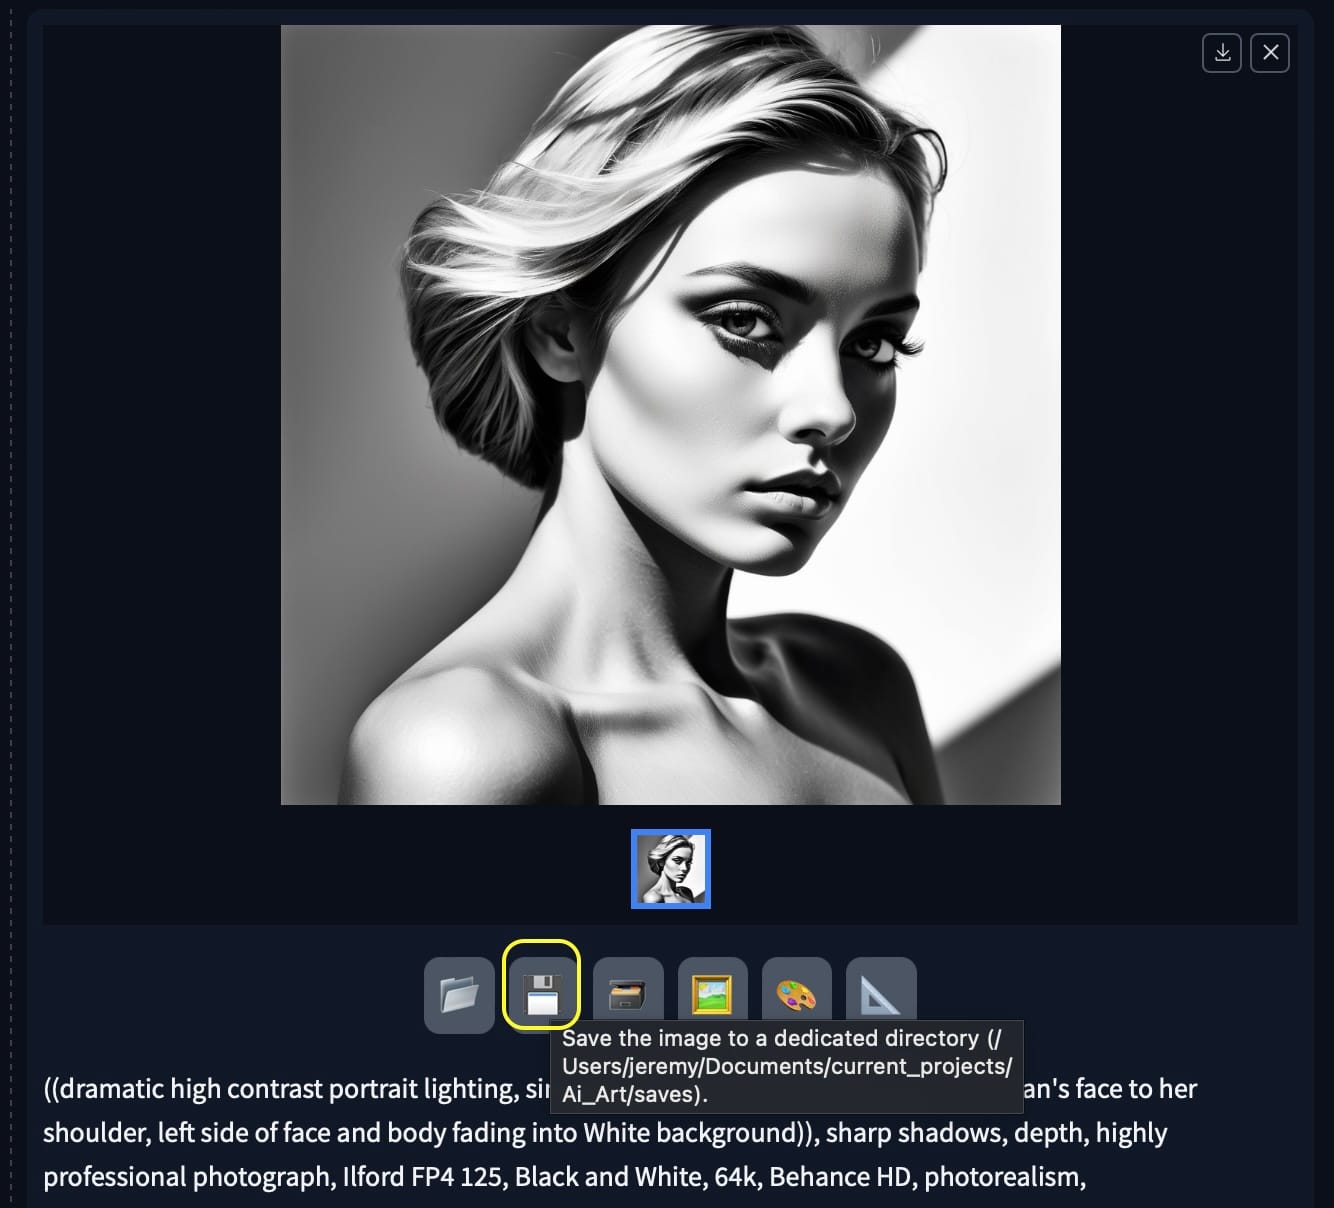
Now that we have that sorted anytime we hit the floppy disk to save it will go to the input_directory automatically.
Editing the image from PNG to JPG
I am using a Python package called Pillow to automatically open the image, then save it as a JPG in a new temporary directory. We rename the image and the associative text files to the same base name for ease of scripting.
In Automatic1111 I have it export a image with its seed and prompt as the file name. I also have it export the generation data into a text file and name it the same as the image.
In Automatic1111 settings set the image filename pattern to [seed]-[prompt_spaces] that will save the seed and gen data in the filename, we will use this later on.
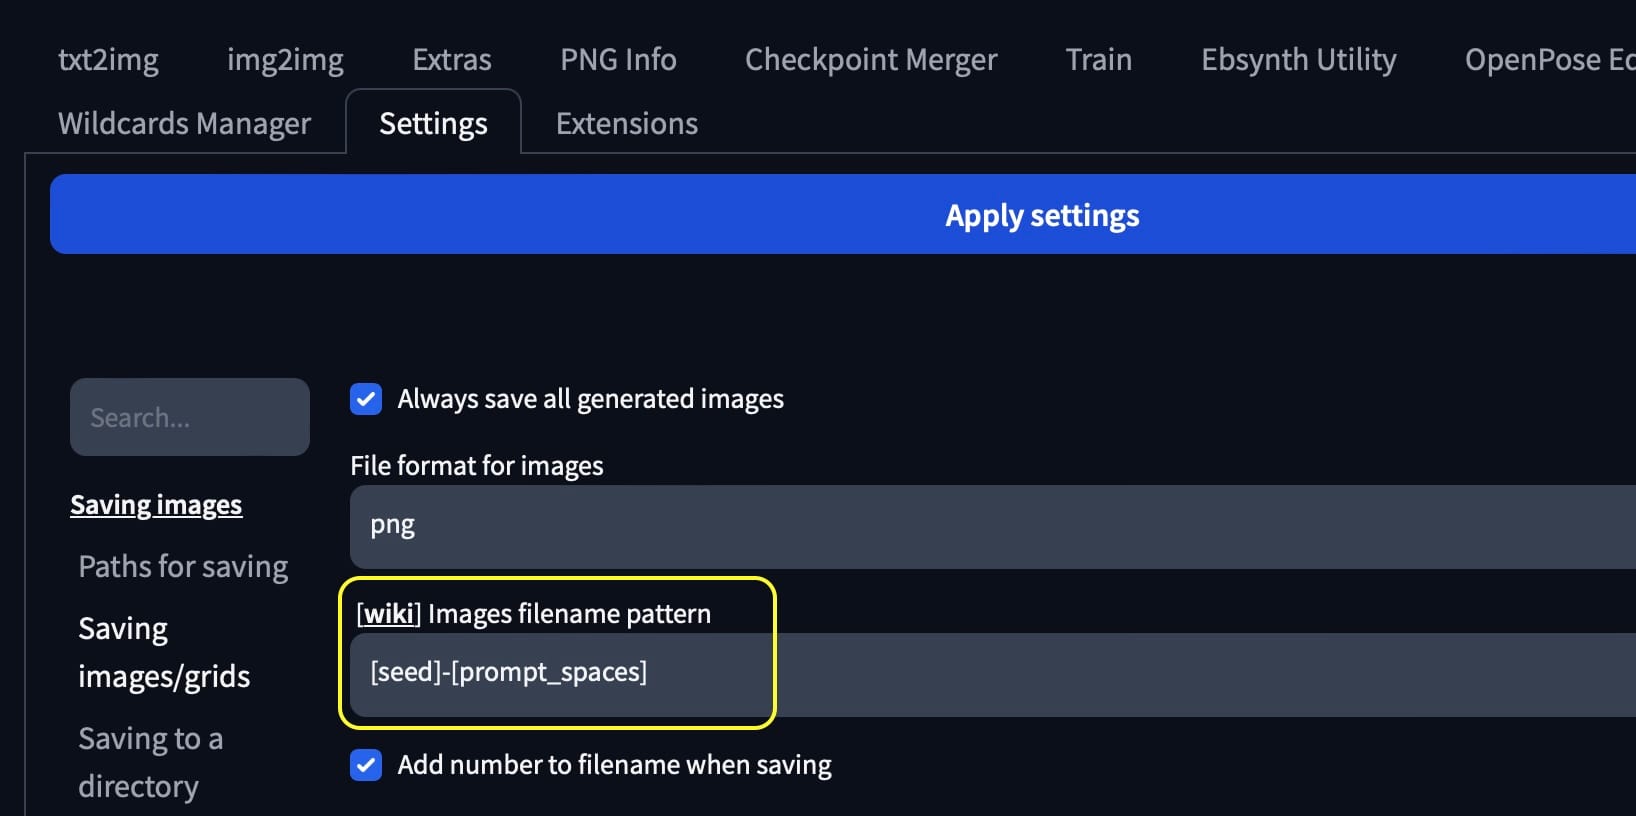
Also search for "Create a text file with infotext next to every generated image" to dump the generation data to a text file.
The following part of the script loops through all images in the input_directory,
creates a base name on the first 16 characters [seed and image number]
then saves the PNG to a JPG to the output_directory and finally copies a txt file with the original file name over to the output_directory
neat eh?
from PIL import Image

# Loop through PNG images in the input directory
    for filename in os.listdir(input_directory):
        if filename.endswith(".png"):
            # Convert PNG to JPG
            post_title = os.path.splitext(filename)[0][:16]  # Extract the first 16 characters as post title
            base_filename = f"{post_title}"

            # JPG filename and path
            jpg_filename = f"{base_filename}.jpeg"
            jpg_path = os.path.join(output_directory, jpg_filename)
            Image.open(os.path.join(input_directory, filename)).convert("RGB").save(jpg_path)

            # Copy associated TXT file to the output directory
            txt_filename = f"{base_filename}.txt"
            txt_path = os.path.join(input_directory, os.path.splitext(filename)[0] + ".txt")
            if os.path.exists(txt_path):
                shutil.copy(txt_path, os.path.join(output_directory, txt_filename))
example code
From this point you could just use the Ghost API to create a post and then just post the image as the featured image, but we have a local LLM with the ability to "see" images, why not go deeper?
We'll detour here a second to show Ollama and the Ollama-python package.
You can head over to https://ollama.ai to get more info on it and how to install it on your device. Ollama give you the ability to run LLM inference locally and they make installing LLMs easy!
The model I am using for this exercise is named Llava
https://ollama.ai/library/llava
You can pull it into your device after you get Ollama up and running by running this terminal command:
ollama pull llava
Simple right?
If you'd like to test, just run the model from your terminal, and then ask it about an image:

ollama run llava

>>> write a short CAPTION for this picture.  ./00003-1894254377.jpeg
Added image './00003-1894254377.jpeg'
 A cat wearing a suit and tie working on a computer.

OK, the terminal is cool and all, but it sure would be better to integrate with Python.
Next, take a look at ollama-python
https://github.com/jmorganca/ollama-python
install into your virtul environment:
pip install ollama
With a simple bit of Python, you can generate a text response.
from ollama import generate

image_path = './00003-1894254377.jpeg'

with open(image_path, "rb") as image_file:
    image_data = image_file.read()

article_title = """write a short CAPTION for this picture. """
title = generate(
    model='llava',
    prompt=article_title,
    images=[image_data],
    stream=False
)

print(title['response'])
example code
OK, now we are playing with power! Let's use it.
I begin by looping through all the saved JPG images and text files to create a blog post for each. We use the Ghost admin API to upload the JPG image to the site,
I then take the image generation data from the text file and pull it into a variable
I then pass that data over to a nifty script that will send it to the llava LLM model and generate an image caption then return it as a python dictionary for the rest of the script to ingest.
After the title has been generated I create a Ghost post and publish it with the Ghost admin API.
Finally, after all is done I move the original PNG and text files to my archive directory.
Now that the automation is set, I can run it on a daily basis with crontab and any images I save will automagically appear on my art site: https://ephergent.com
If you'd like to see the code, check it out in my GitHub:
https://github.com/BitsofJeremy/sd_image_processing_and_upload
I plan on adding some new features once I figure them out, but wanted to get a post out there and make the code public as I've been just geeking out about this for awhile now.
If you have any questions, feel free to reach out on my main site https://jeremyschroeder.net or hit me up on X.
Have fun.