Unlocking the Magic of AI Art Remixing with a Thoughtful Workflow

As experts in the field of AI art and creativity, we constantly search for captivating images within the community. These digital masterpieces often serve as our muses, sparking our collective curiosity to explore the realms of remixing and extending their artistic potential.
Over the weekend we wanted to see if we could come up with a nice workflow to remix and extend them. Here's what we found:
1. Discovering the Gem: Find an image on Civitai or Twitter that captures our admiration and remember to bookmark it.
Our journey usually starts by carefully checking out the wonderful collections of AI art made by fellow enthusiasts on platforms like Civitai or Twitter. These places are full of amazing artwork that sparks our imagination. When we find an image that we really like, we make sure to save it for later.
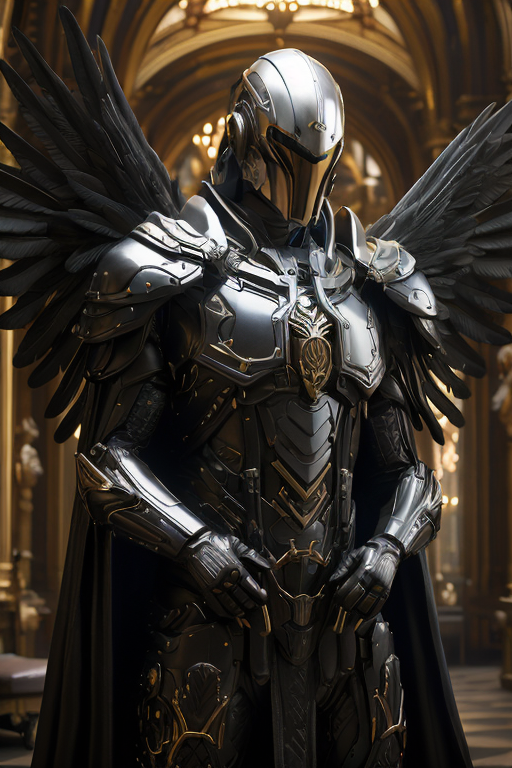
We will work through the following example:
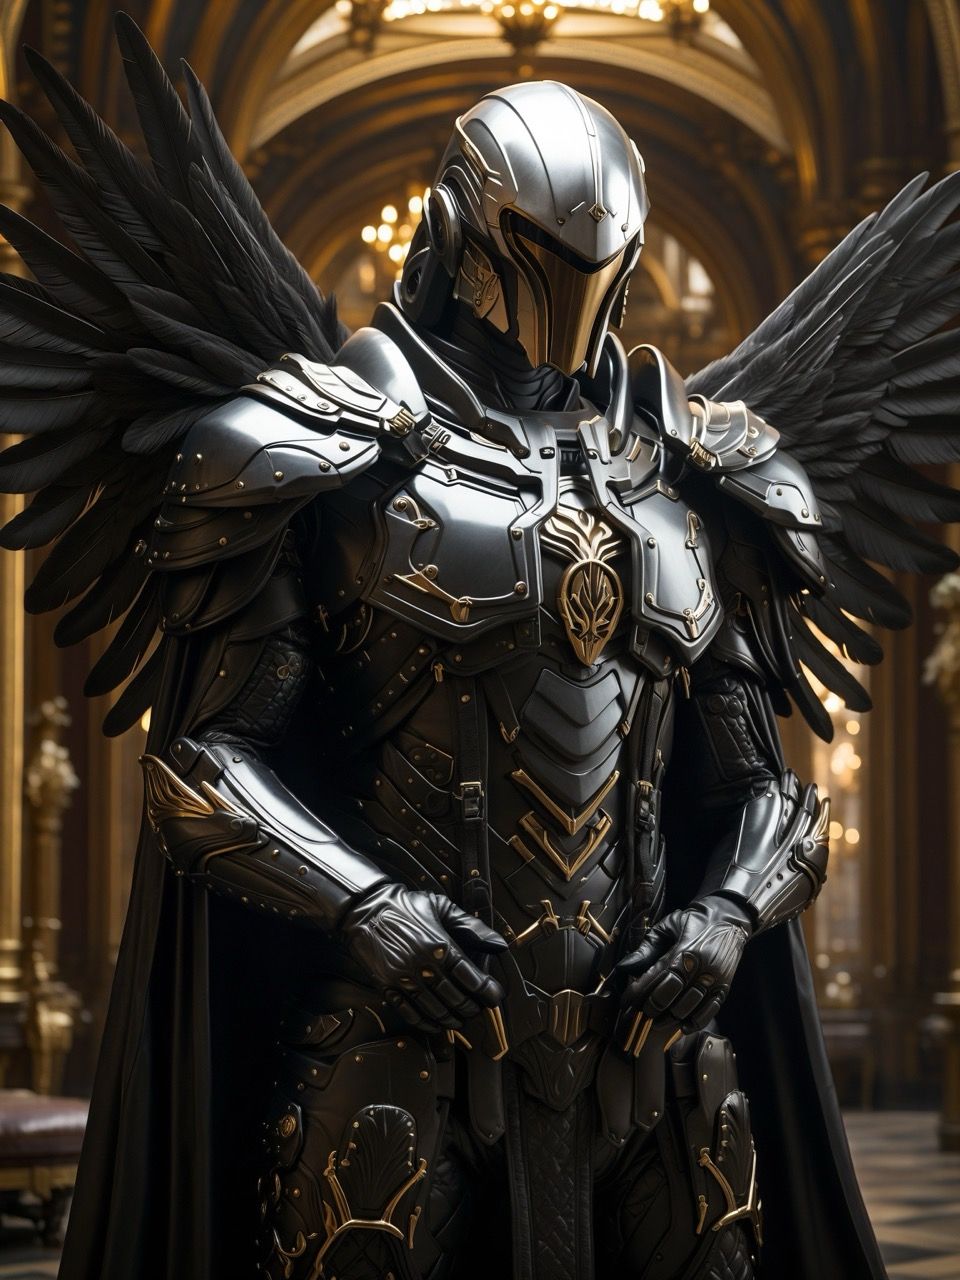
Note: After searching through our feeds, we just cannot find the original post for this image, if this is your image, please reach out, so we can added the tweet here and give you credit.
2. Understanding the Image: Check the image details to see how big it is.
To get ready for our creative work, it's important to know the size of the image. This information helps us make informed decisions, especially if the original image is quite large and might need some resizing to fit our vision, and notably into the ControlNet models correctly.
We'll use some Python to figure it out:
from PIL import Image

img_name = 'WingedKnight.png'

def get_image_dimensions(file_path):
    try:
        with Image.open(file_path) as img:
            width, height = img.size
            return width, height
    except Exception as e:
        print(f"Error: {e}")
        return None, None

# Example usage:
width, height = get_image_dimensions(img_name)
if width is not None and height is not None:
    print(f'Image dimensions: {width}x{height}')
else:
    print('Failed to get image dimensions.')
The output for the code and the WingedKnight.png image is:
Image dimensions: 1344x1792
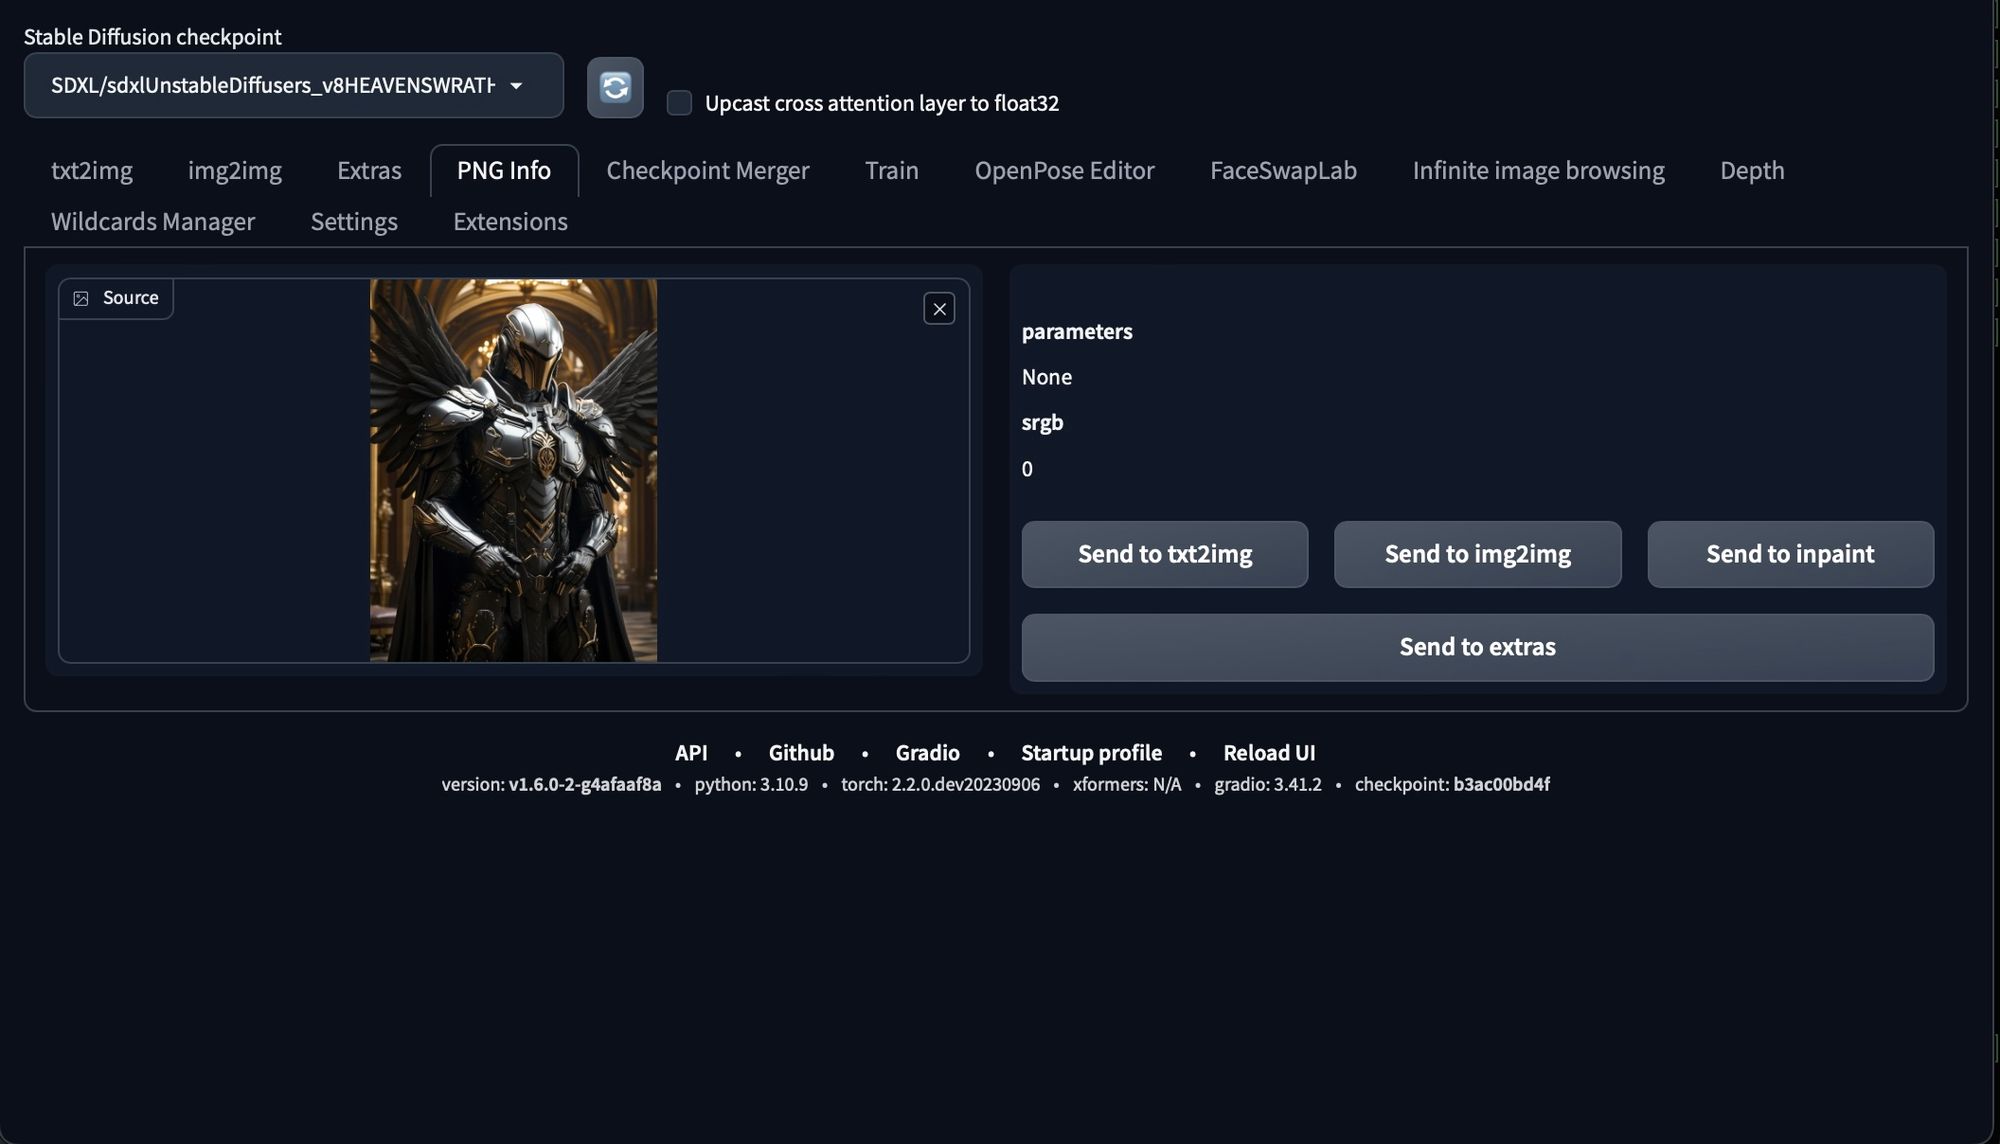
3. Unveiling Hidden Hints: Upload the image to the Automatic1111 PNG tab to see if there are any prompts embedded.
In AI art, sometimes there are hidden hints within the images. Automatic1111 provides a useful PNG tab that can reveal these hidden clues. We make sure to upload the image to this tab to uncover any concealed creative cues.
4. The Power of CLIP: Use CLIP to come up with a good starting idea for your artwork.
Looks, like we don't have the original tweet, or a nice description embedded into the Exif data of the image to go on. Luckily in the img2img tab we have some magic tools. Here, we will use the "Interrogate CLIP" button, a reliable tool that helps us generate an image prompt that match the essence of the image. If you're working with anime or manga-themed images, the "Interrogate Deepbooru" button comes in handy.
We found trying both against the same image may be necessary.
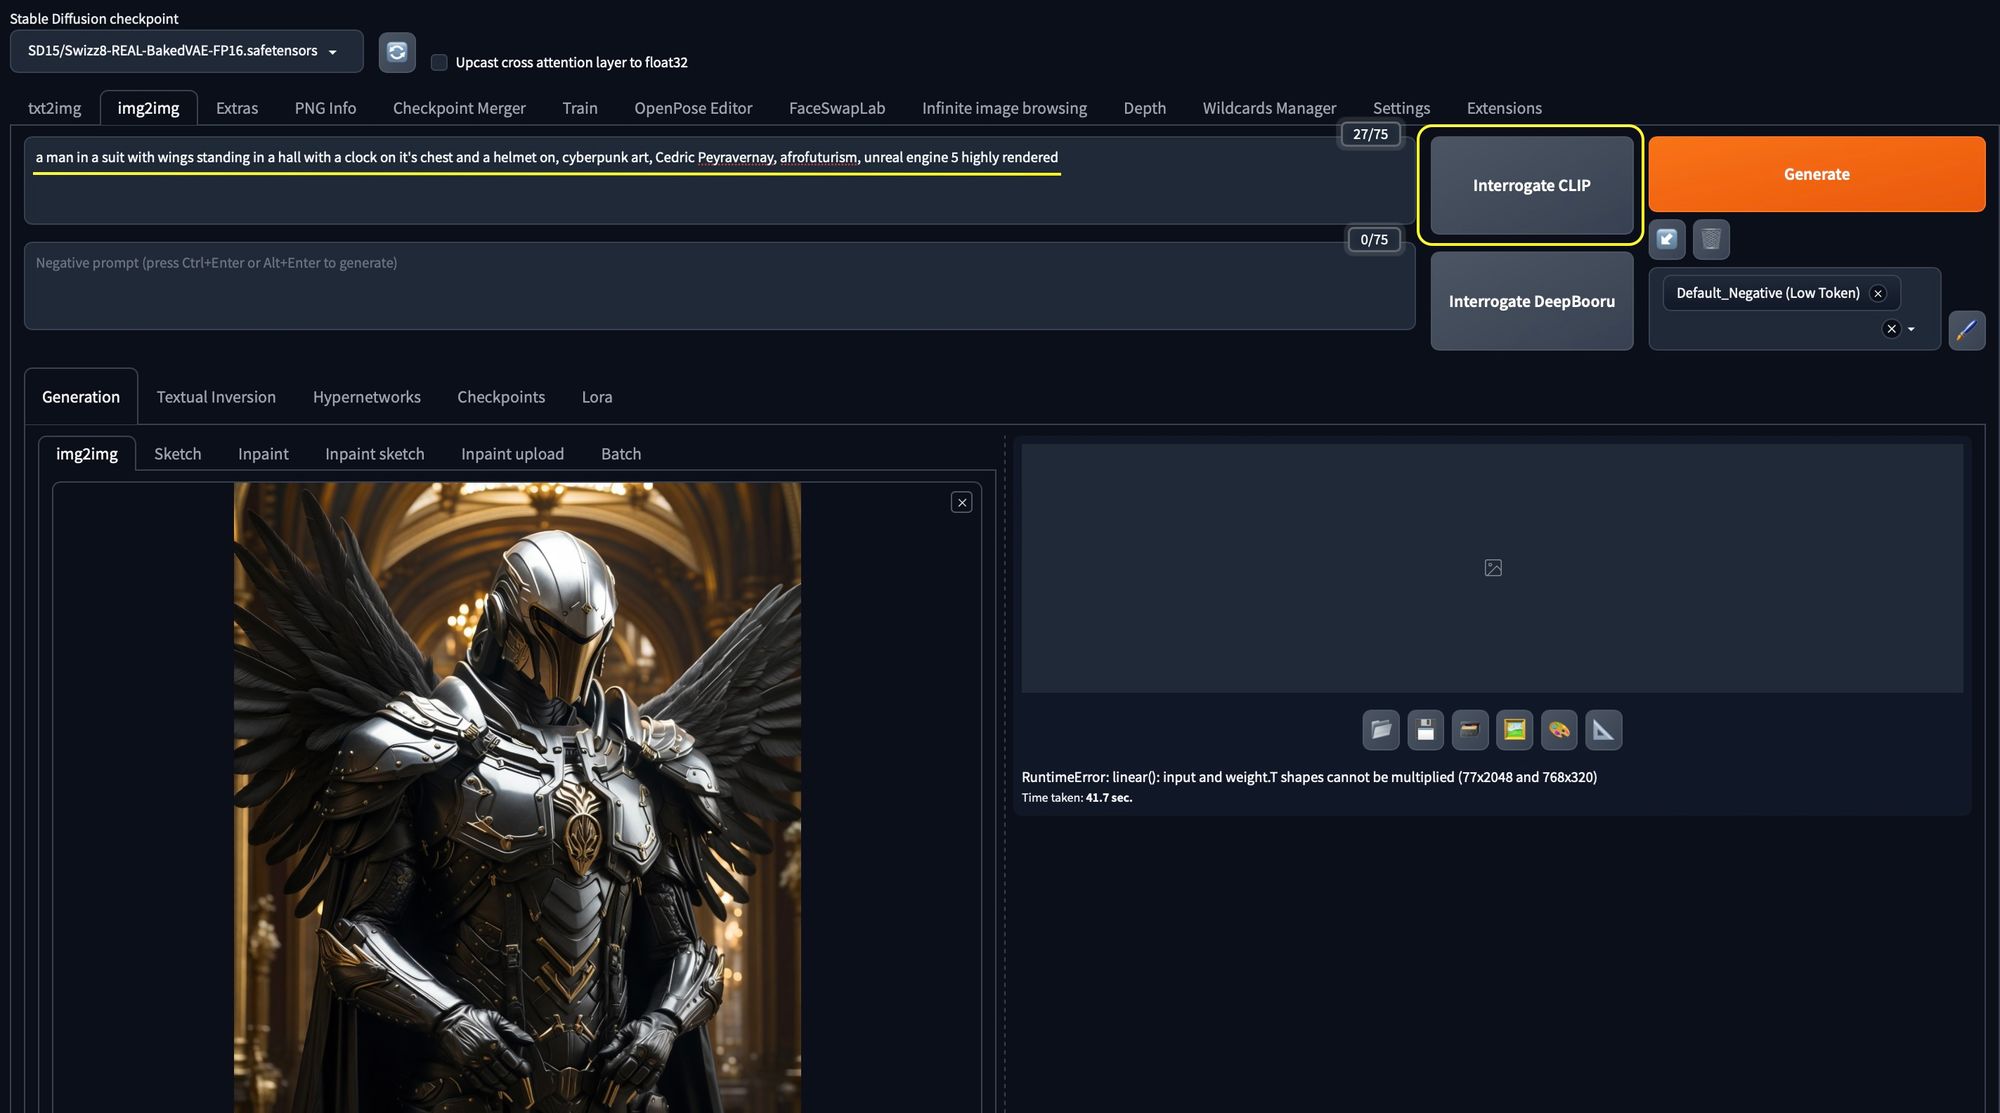
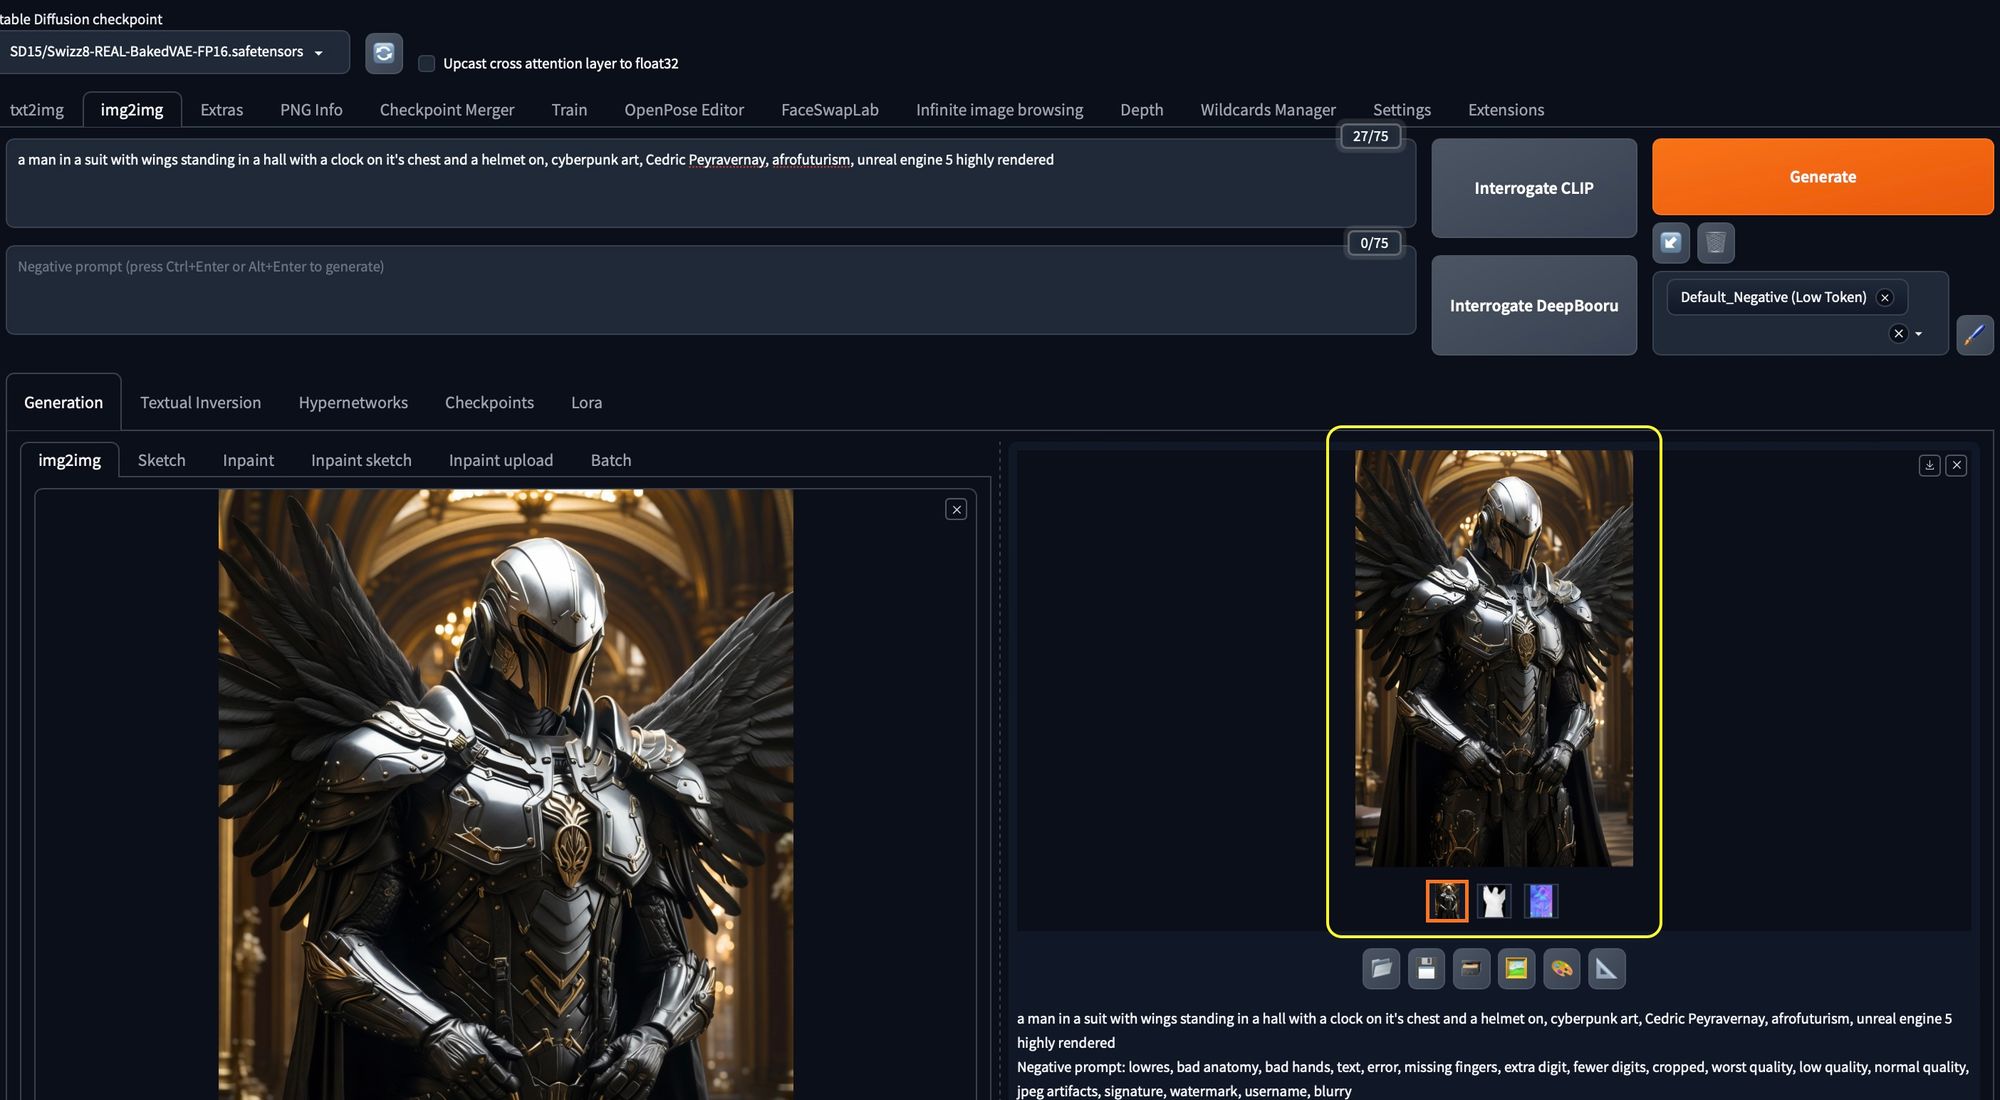
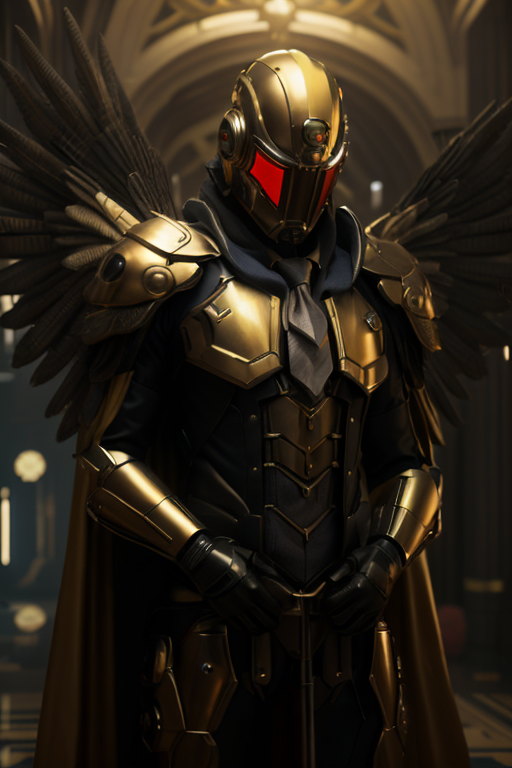
Nice prompt generated:
a man in a suit with wings standing in a hall with a clock on it's chest and a helmet on, cyberpunk art, Cedric Peyravernay, afrofuturism, unreal engine 5 highly rendered
That seems pretty good, let’s run with it. you can either keep the image in the img2img tab or take a chance and start working in the text2img tab. We like consistency so we will stay in img2img.
5. Exploring ControlNet: Distilled essence of the image using Normal and Depth Maps.
To truly grasp the image's core essence, we turn to ControlNet, using both the Normal Map and Depth Map. We typically set the weights between 0.5 and 0.7 and the ending control steps at around 0.6 to 0.7 for both. If you want to replicate a character's poses, you can add an extra ControlNet for OpenPose. The great thing is, as we reduce the ControlNet weights gradually, we allow more room for creativity.
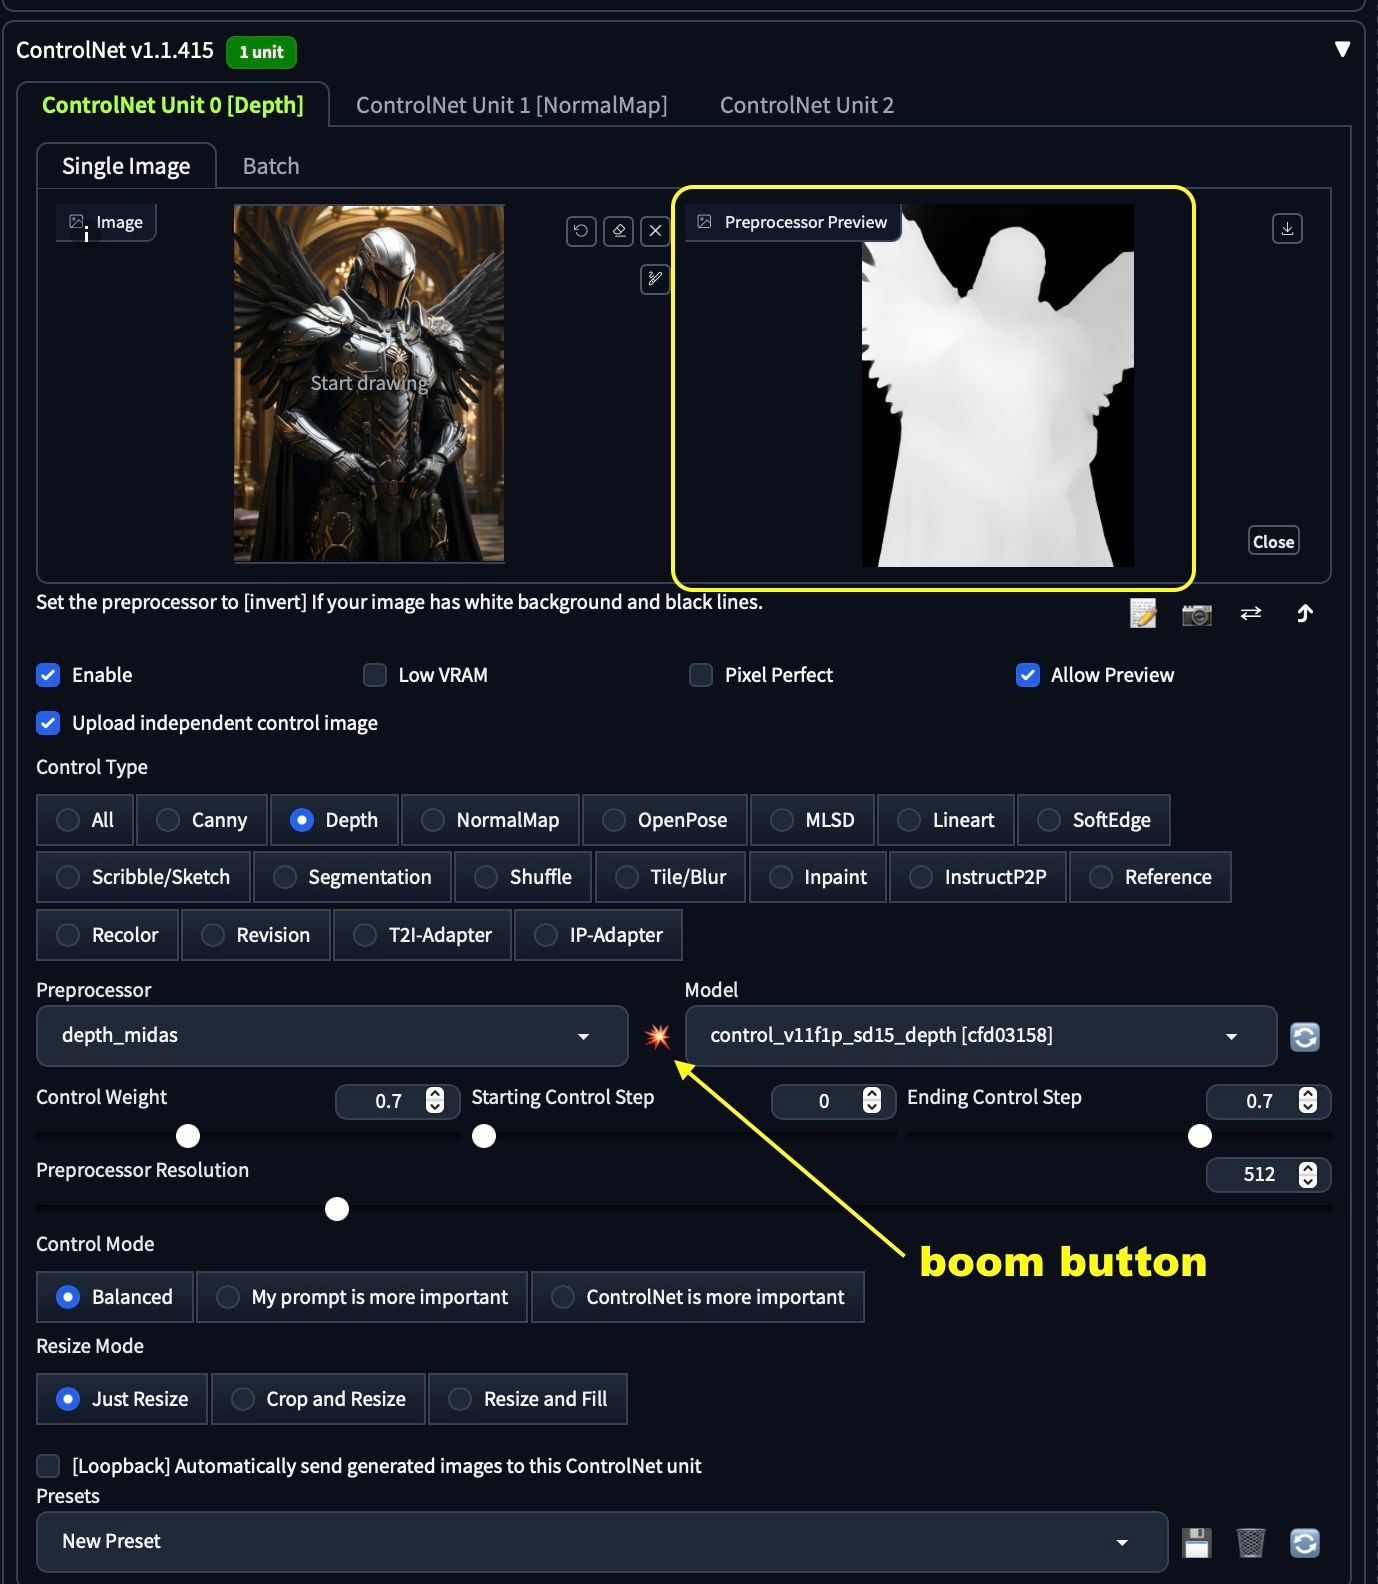
Clicking the "boom button" <– technical term, the depth model will produce a depth map for your preview.
Next, we setup the NormalMap ControlNet:
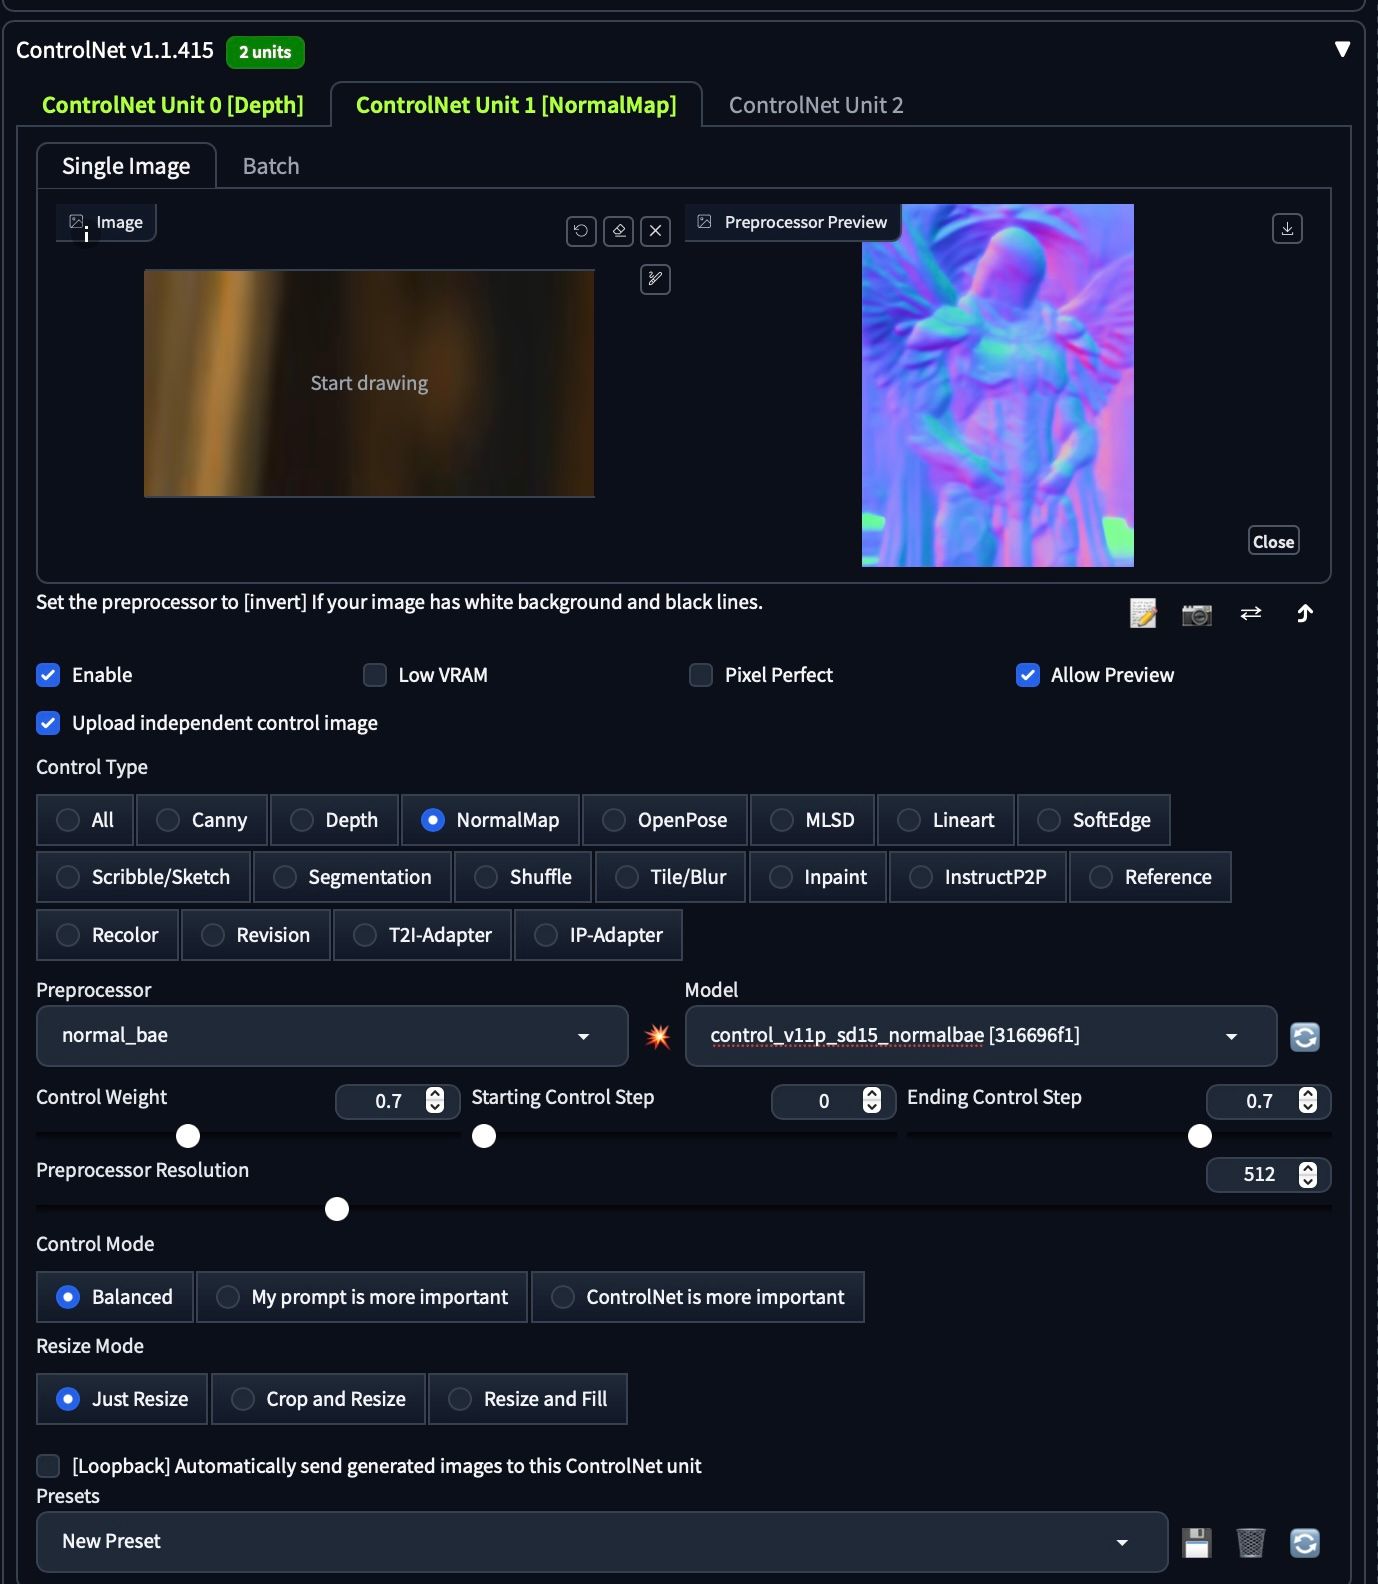
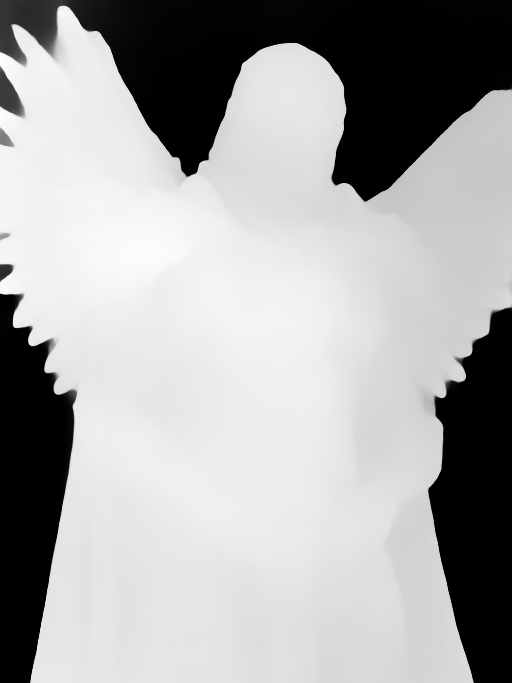
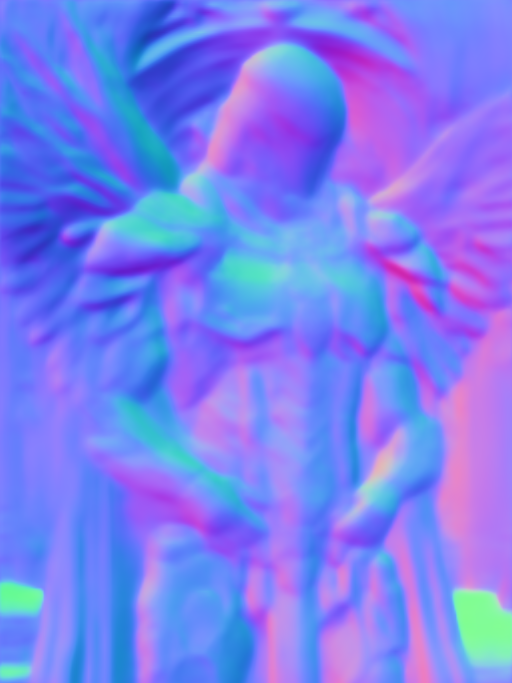
Clicking the "boom button" produces the following NormalMap:
With ControlNet setup, we can begin remixing and playing around creatively.
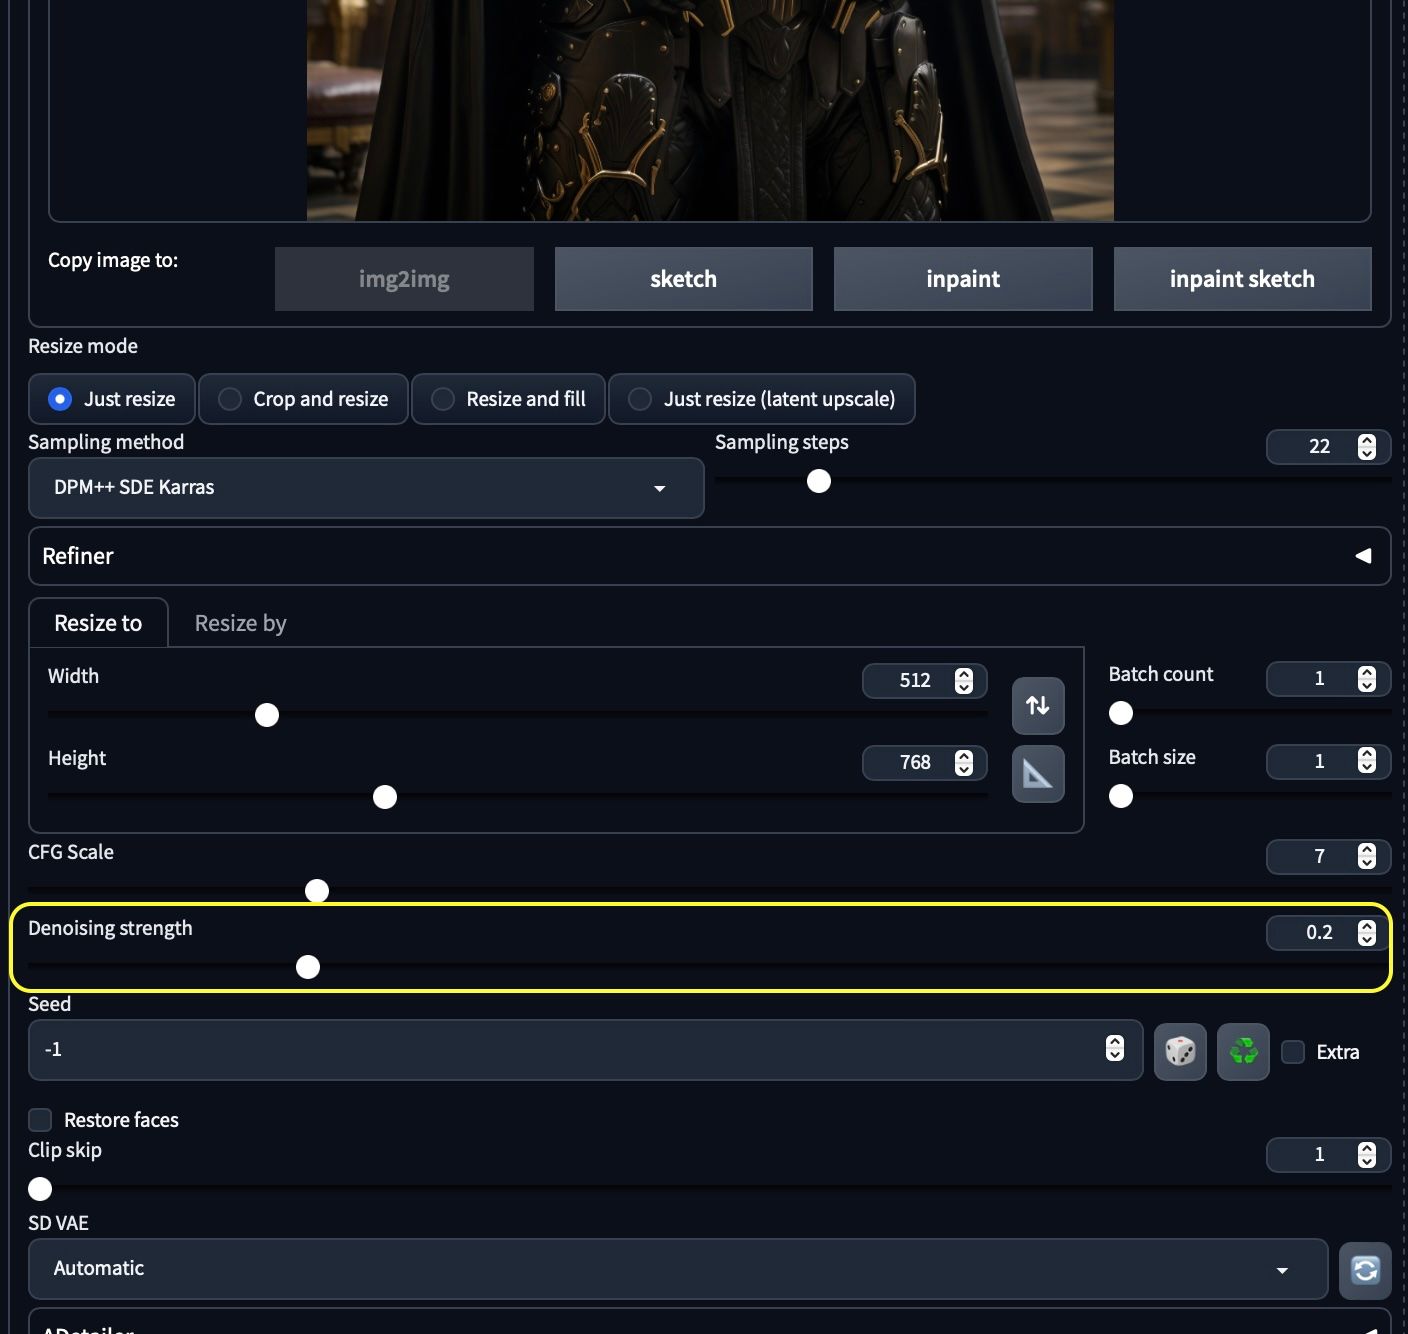
6. Playing with the Noise: Adjust img2img with a higher denoise strength (0.7+).
For the first image we keep the Denoising strength low around 0.2 just to see what we get as a base set of settings.
From the looks of our first image generation, we are on the right path.
settings and image output
For those who want to push the creative boundaries, you can adjust the Denoising strength setting. The higher you go, the further you'll move away from the original image, opening the door to a world of imaginative possibilities.
Next let’s run a test at 0.8 Denoise strength and see what happens:
7. Keep Experimenting: Try different things until you find something you like.
The process isn't complete until you've explored all the creative possibilities. With your settings in place, you can continue experimenting and refining until you achieve a unique artwork that matches your vision.
You now have a few dials to tweak your remix and build upon the shoulders of giants.
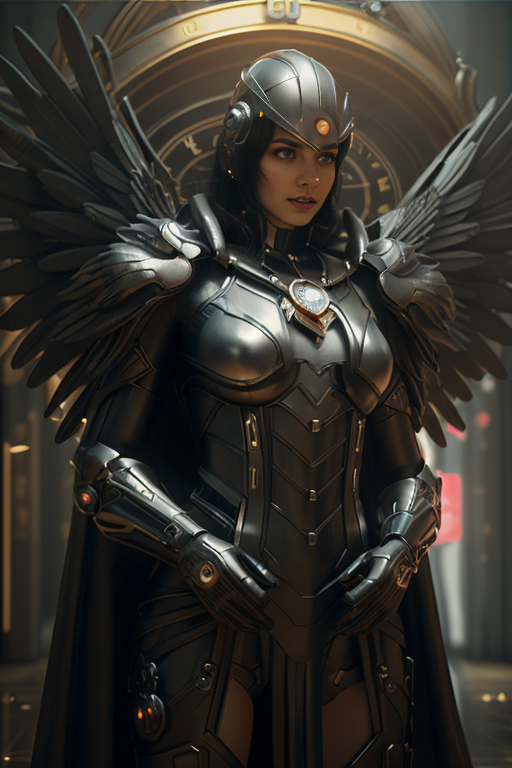
We worked on changing out the gender of the original image, and then adding our friend kat3r1na as the subject, we think she looks mighty resplendent in her winged armor.
In the ever-evolving world of AI art and creativity, this carefully crafted process serves as a guiding light, allowing us to uncover hidden potential in the amazing images we come across. It's a testament to the limitless creativity that AI art offers, inviting you to explore, remix, and create your unique artistic narrative.
We are excited to see what you create, tag us on social media with your creations!