How to use Stable Diffusion without a high end GPU or M1/M2 Macbook via Google Collab
Using Jupyter noteboks to create art
Sometimes, you just want to generate a quick image and other times
you just don't feel like going through the install of Stable Diffusion. With the instructions below you can run Stable Diffusion in a browser but connected to a remote GPU resource.
With the advent of Jupyter Notebooks, data scientists have been able to share code and ideas freely with one another. Google hosts these notebooks and graciously allows us to create our fancy images on their machines.
We will be using a notebook from TheLastBen, but with a twist. Instead of using the Stable Diffusion model from HuggingFace, we will use a curated model from publicprompts.art
Let's get started:
Use your Google account and Open the collab link:


We will be using the microworlds model from publicprompts.art so open that
in a new browser tab as we will be getting to it in a bit.
The first step in this process is to connect the collab to a compute resource [fancy term for remote server]
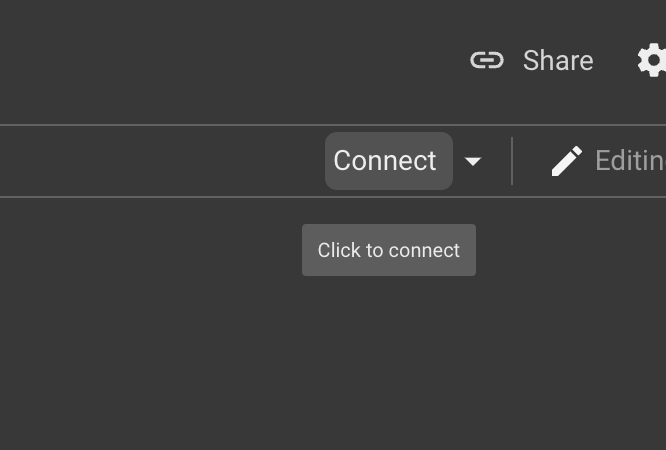
Hit the connect button and then prove to the computer that you are human by training it to cross the road or something.
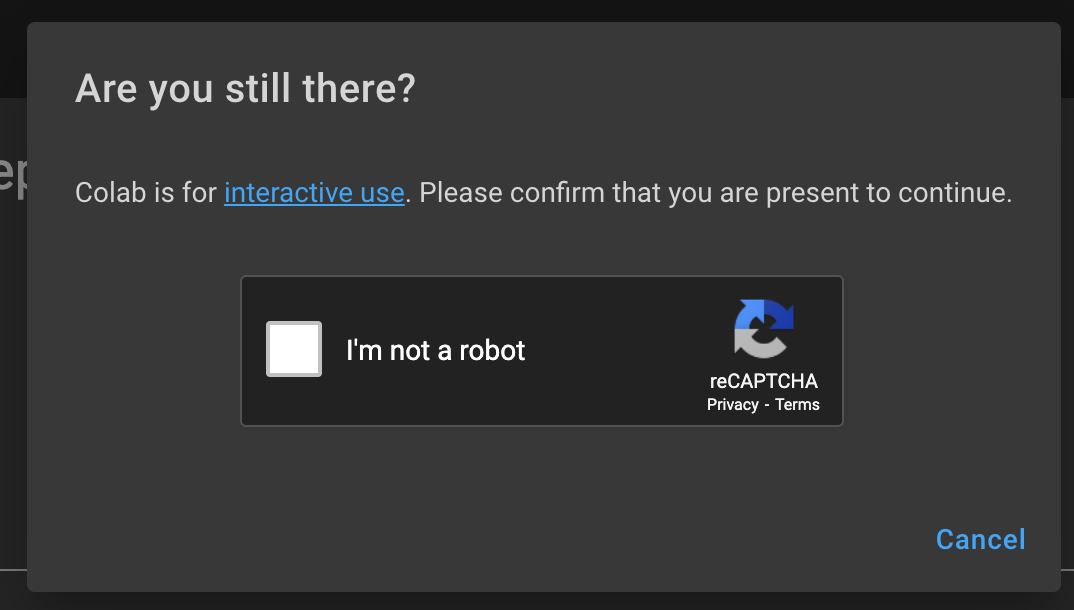
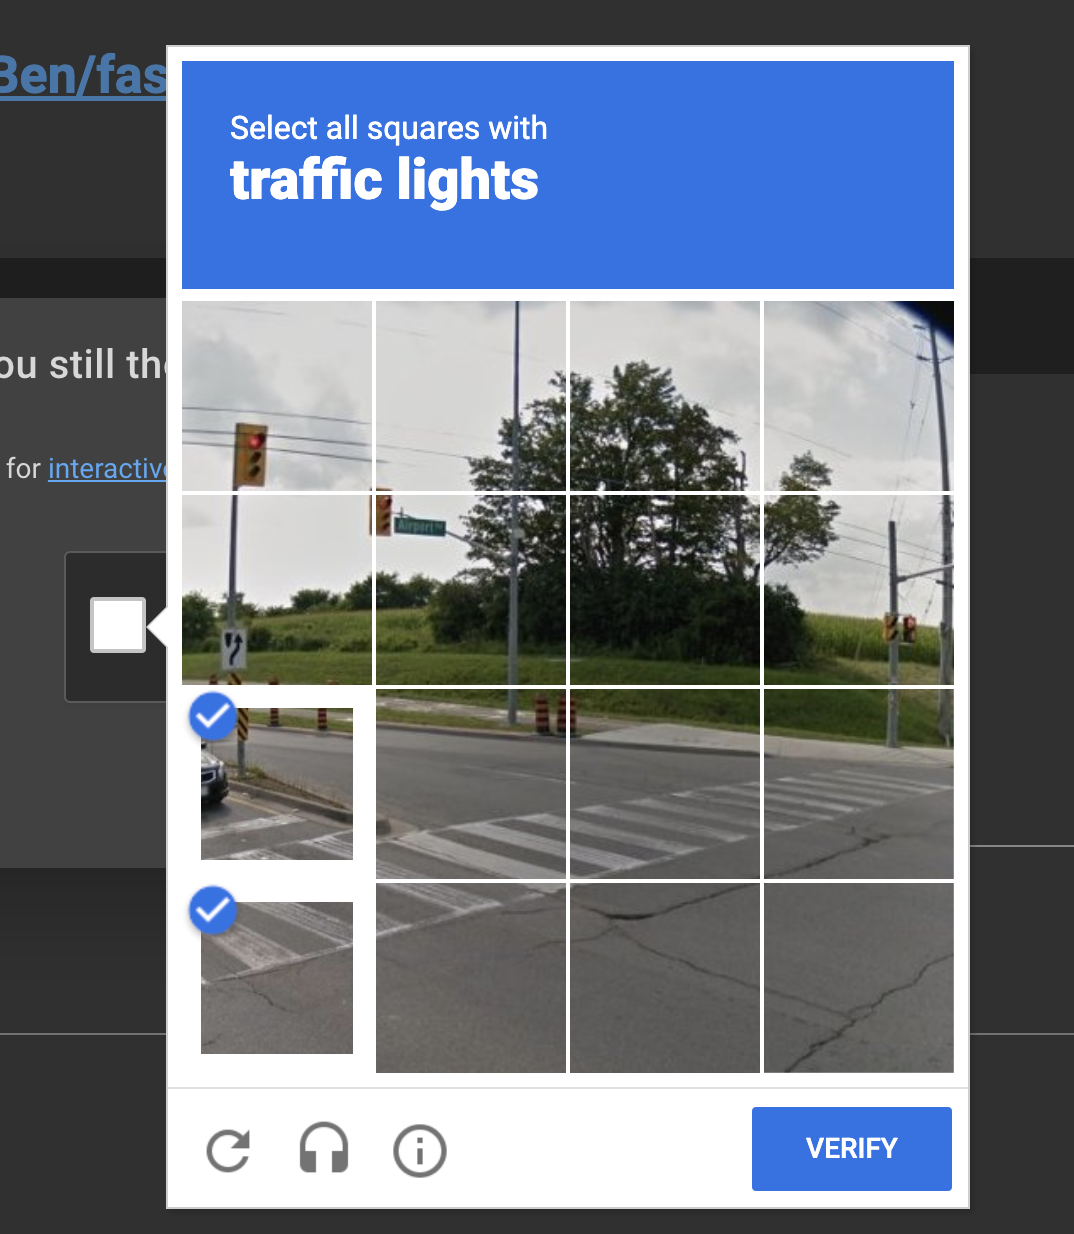
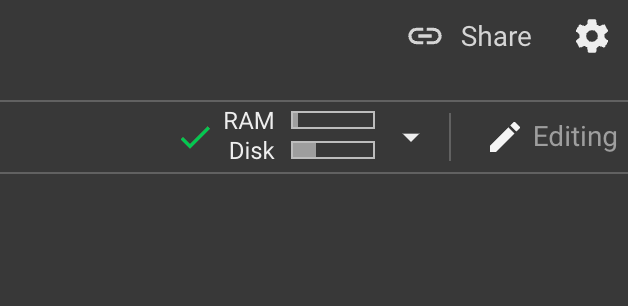
Once you prove that you are human, you will see some RAM and Disk info once the machine is online.
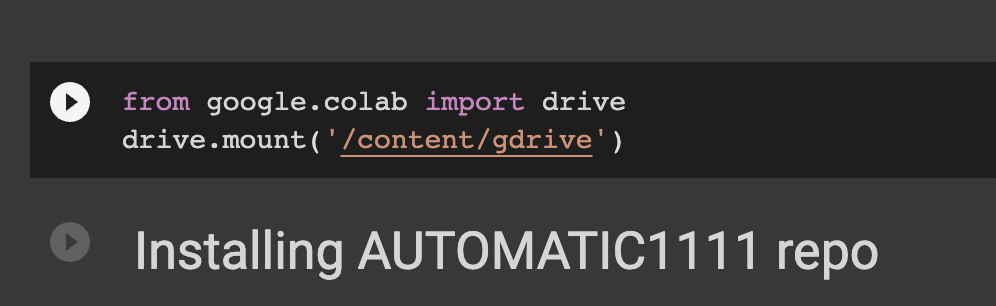
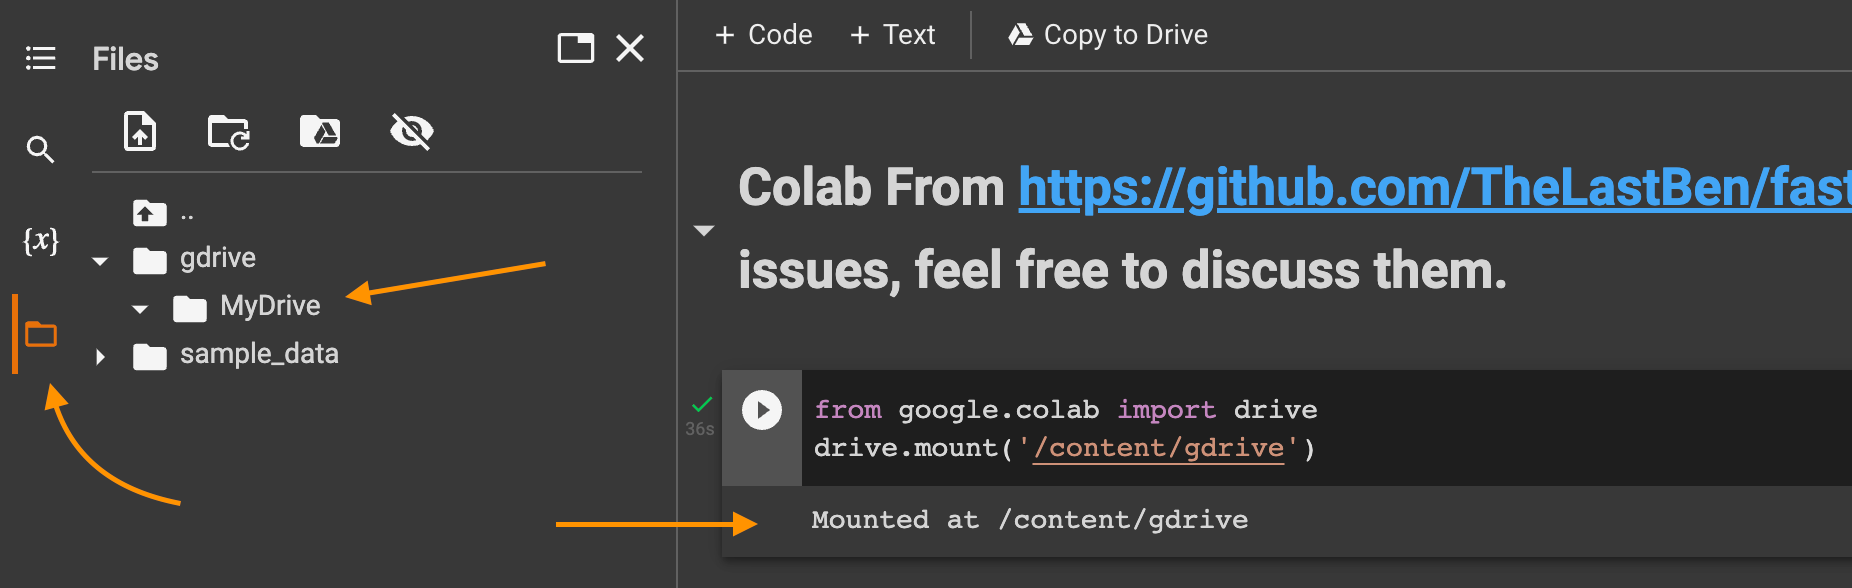
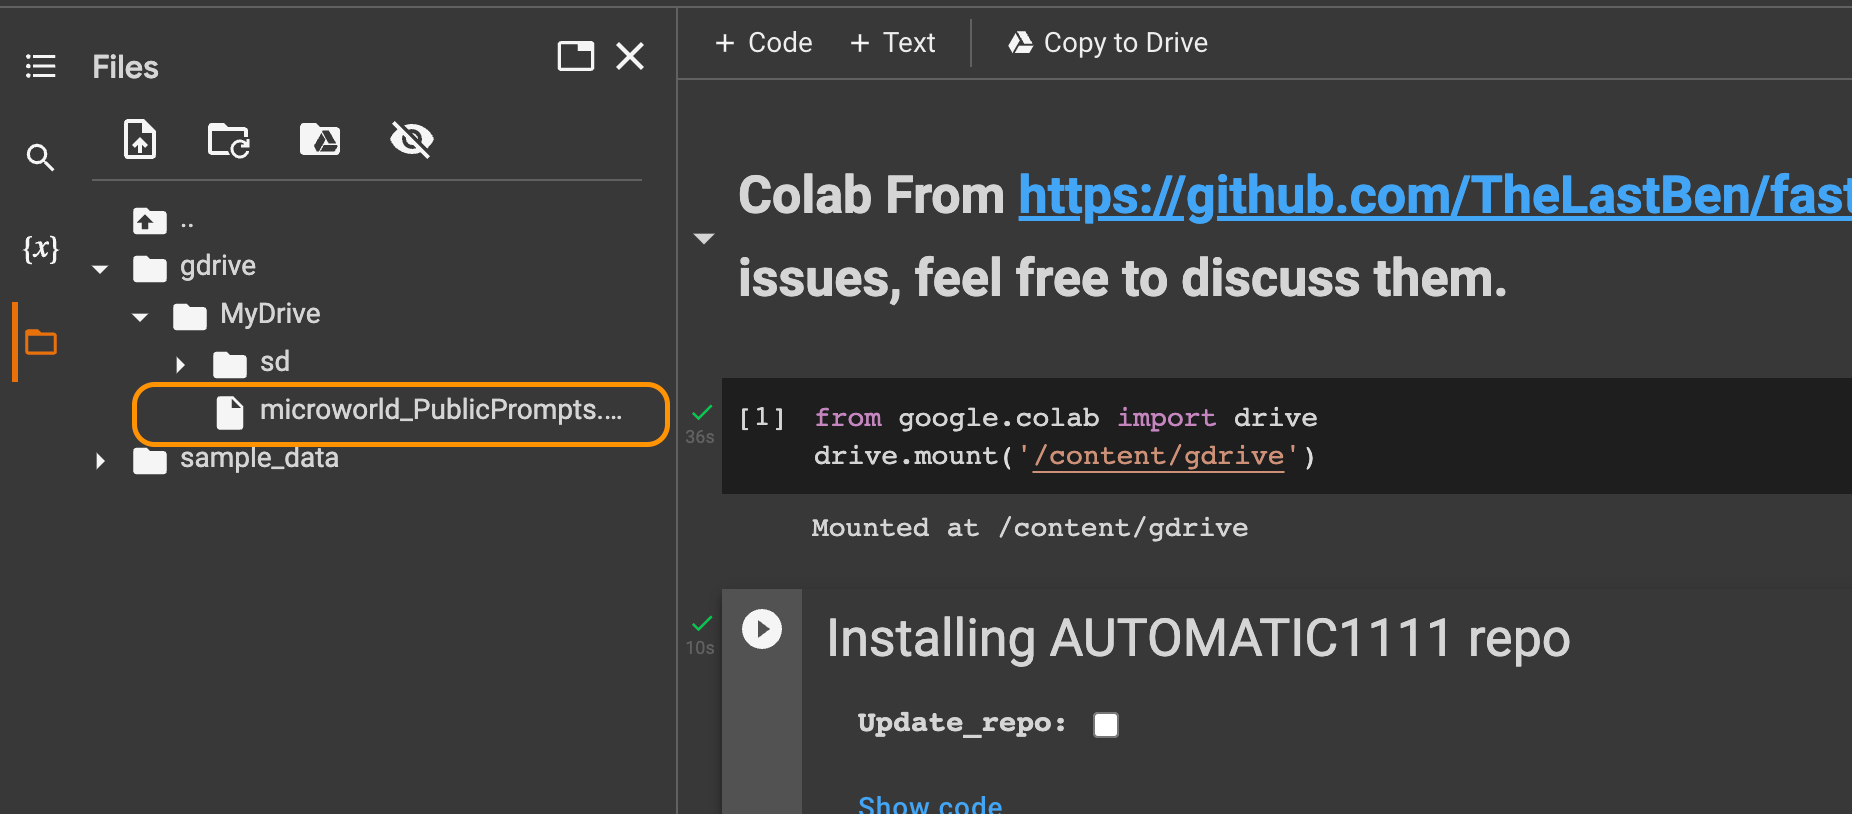
Next we mount the Google Drive as storage so we can get the model in the next step.
In the notebook, click the play button to run the code block.
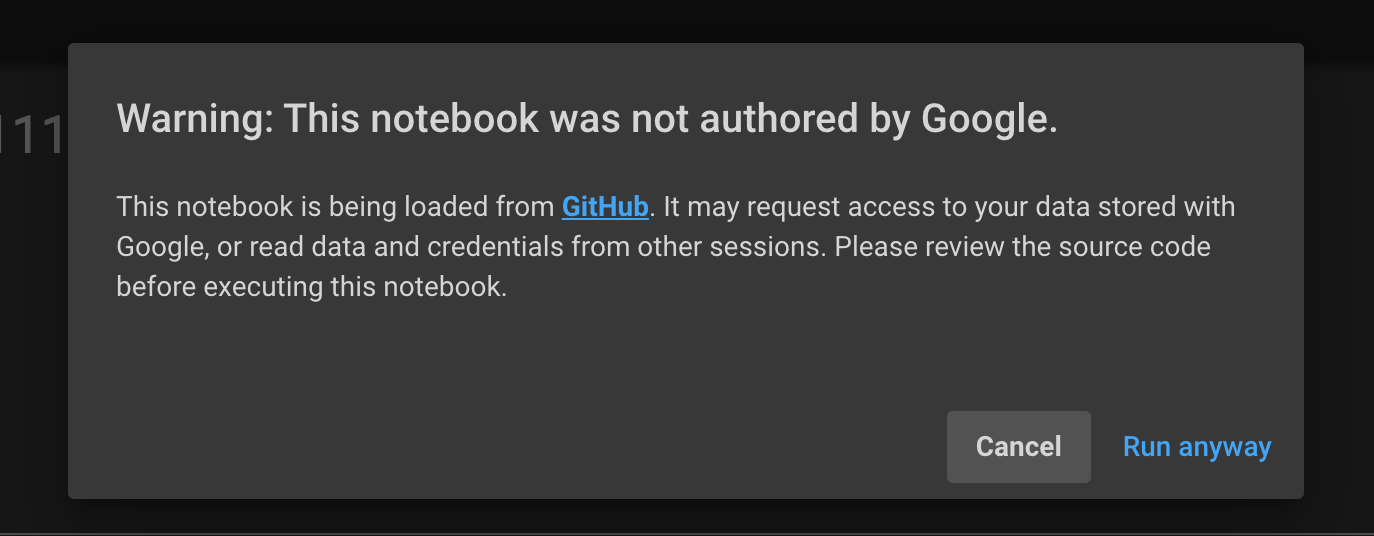
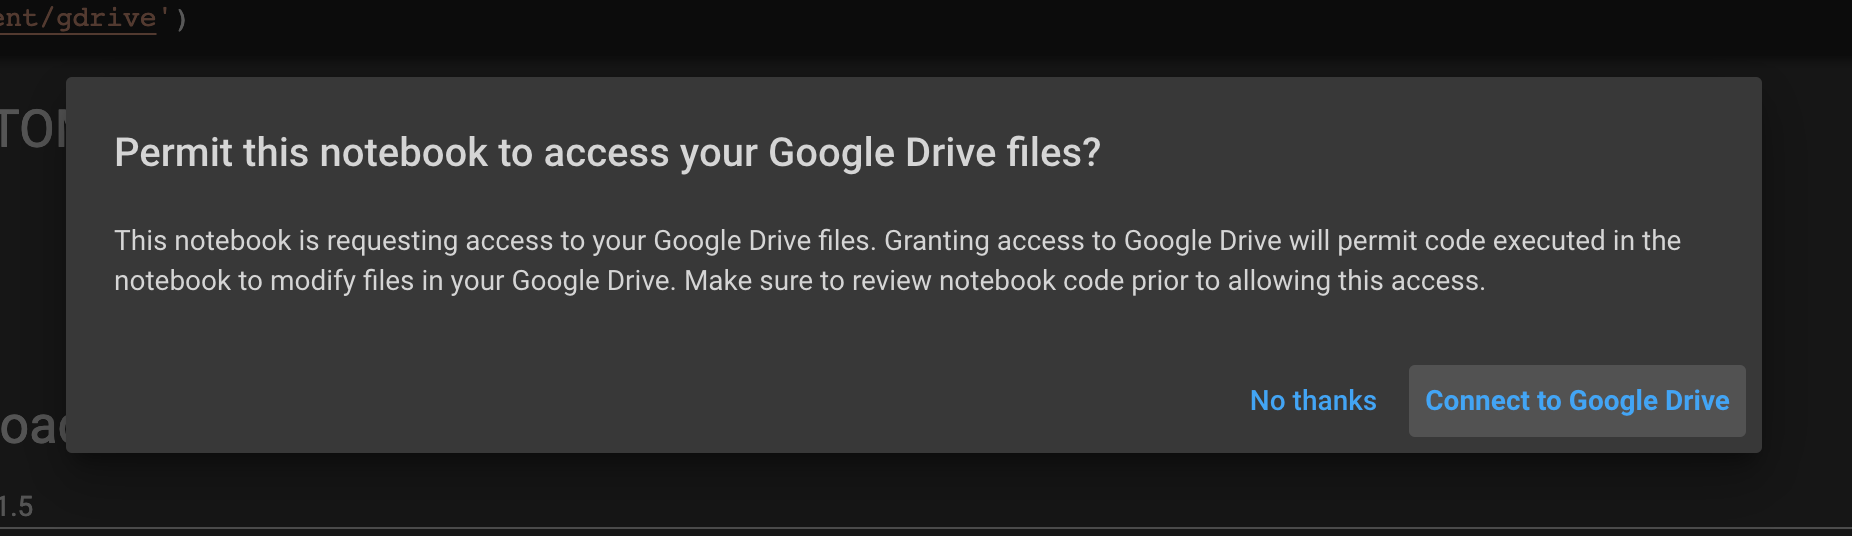
Google will warn you that you are connecting your private Drive to a random machine that can execute code, be careful. We click Run anyway.
Another warning...go through the motions and allow it.
Once it connect and mounts the Drive to the machine, you will see it in the notebook showing mounted at /content/gdrive
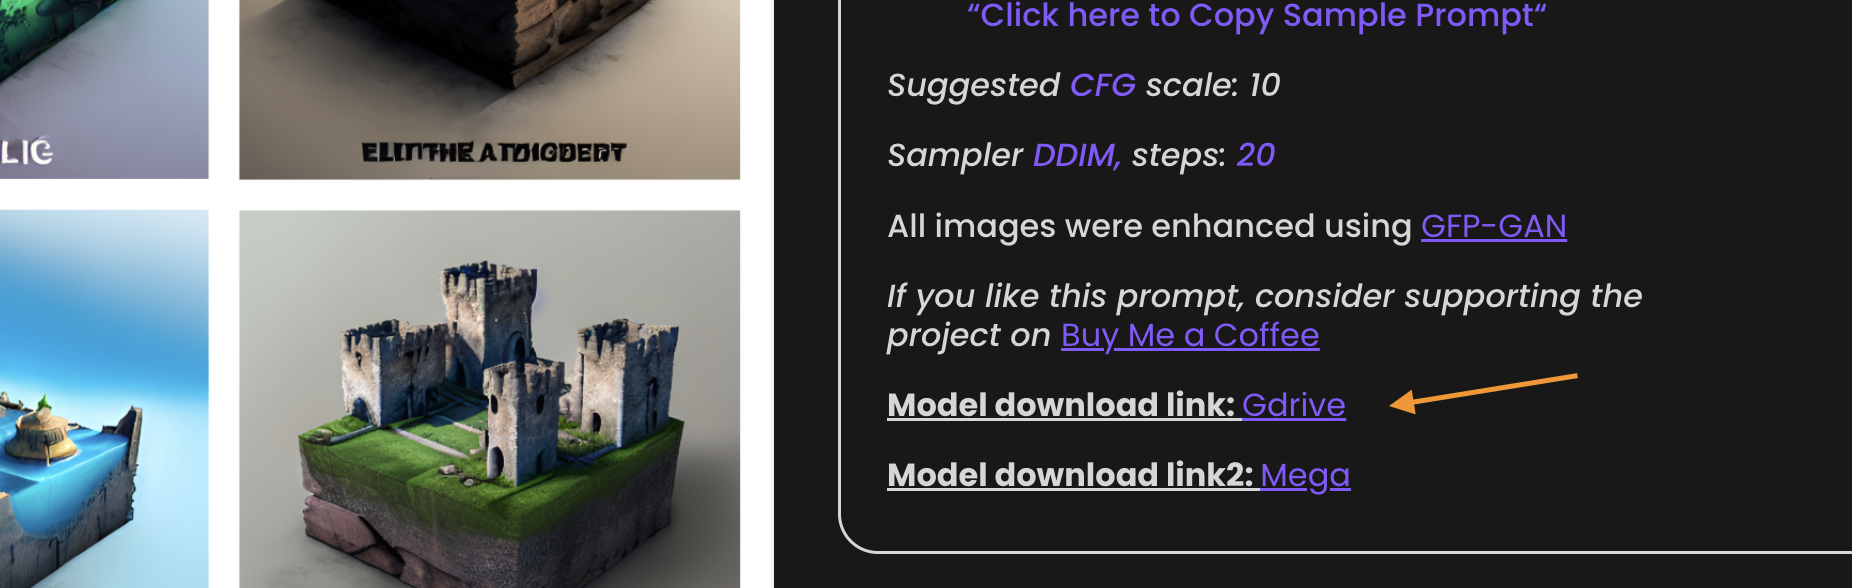
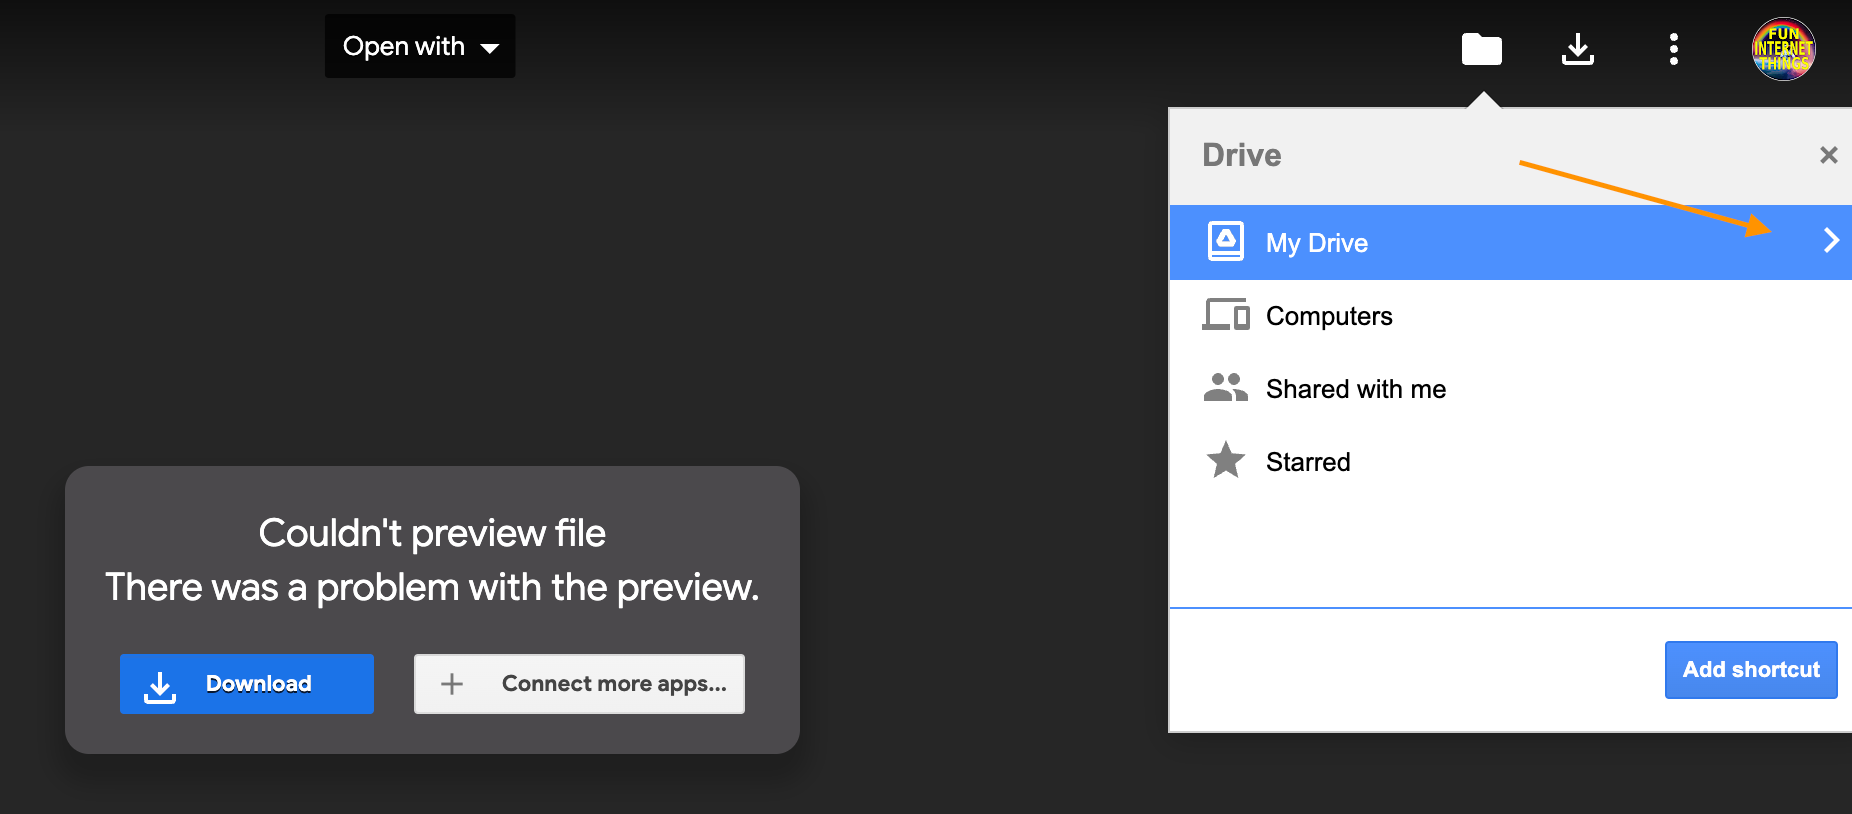
Now, we head over to tho other tab and open the download link for Gdrive
Instead of downloading the file we are going to create a shortcut to the file in the root of our Gdrive by clicking the icon with the plus.
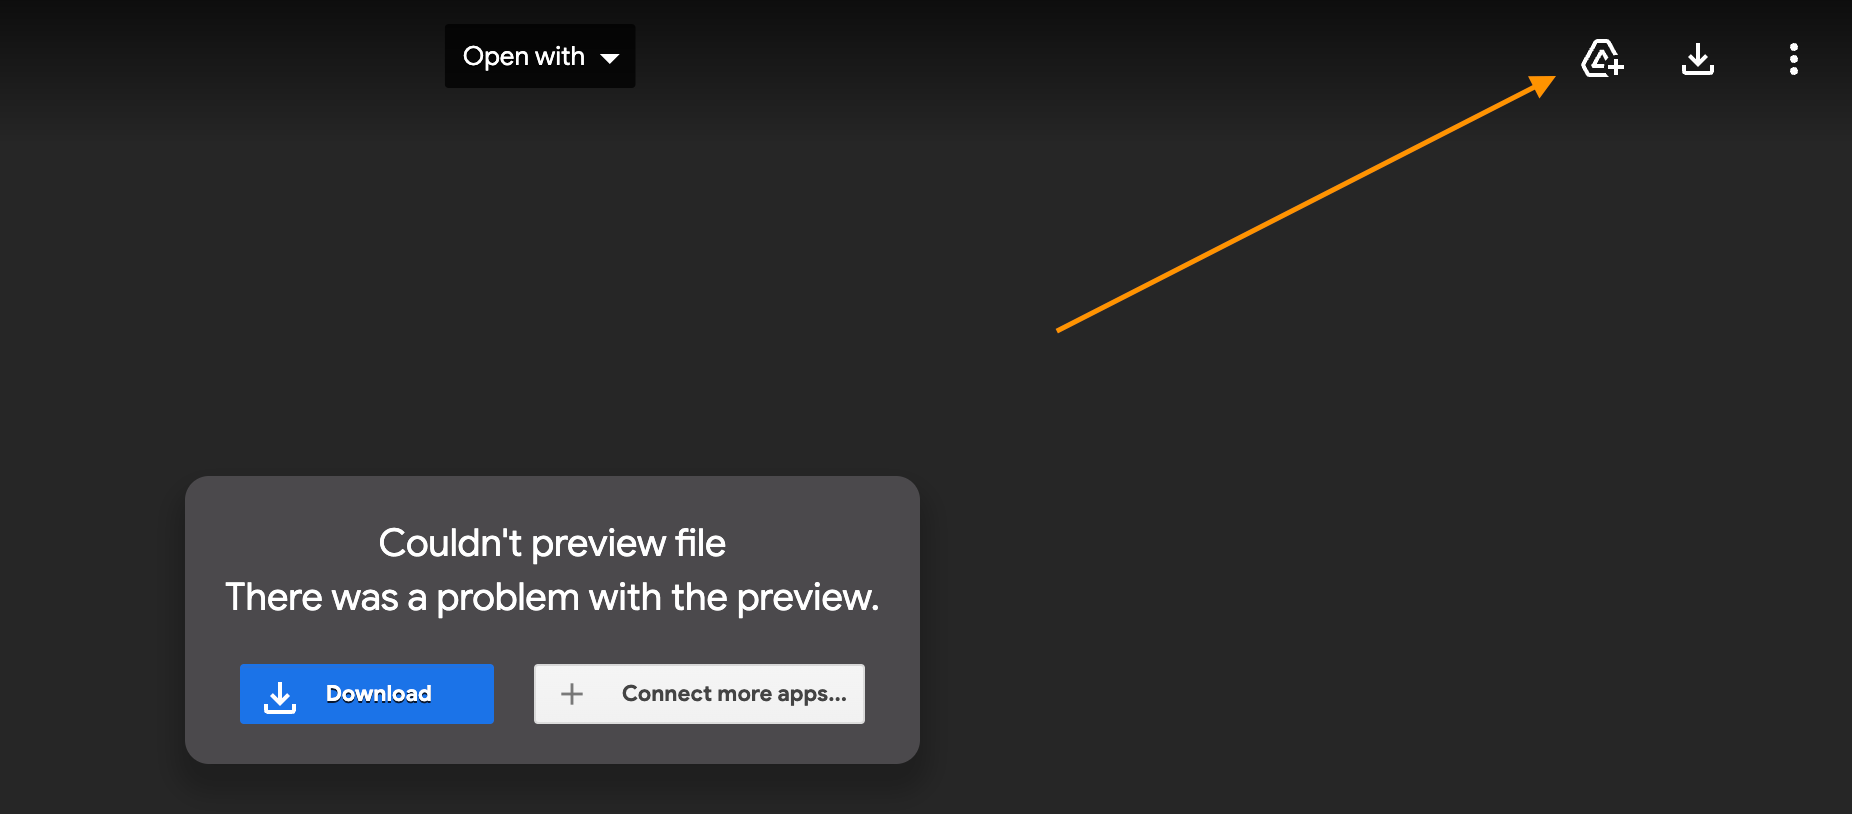
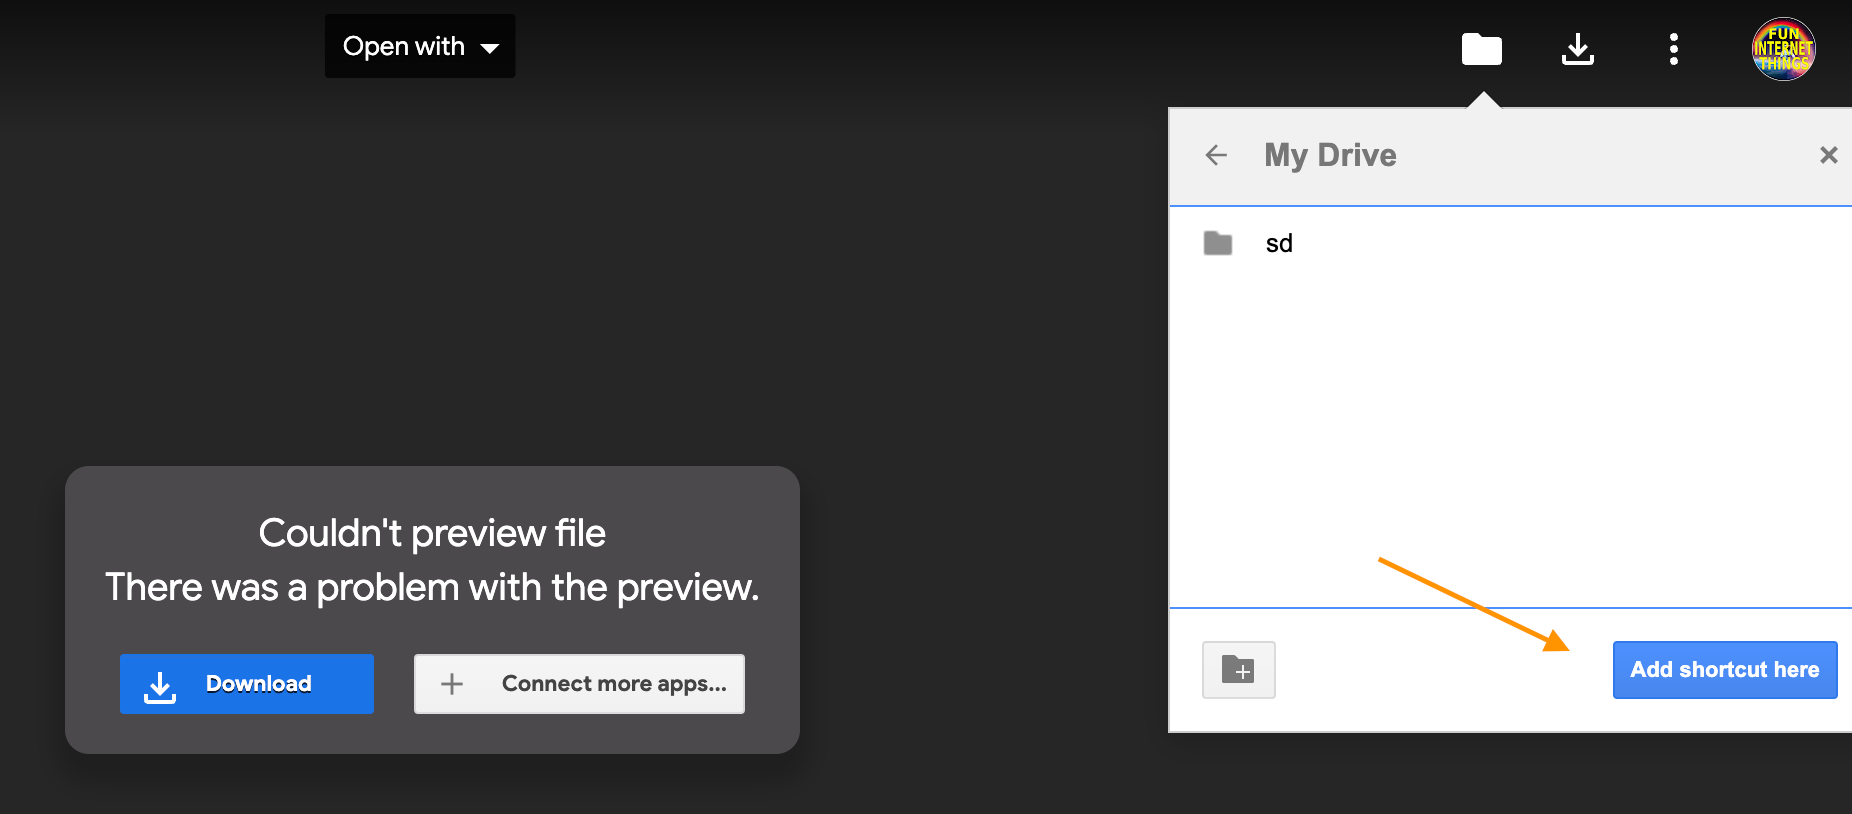
Click the arrow to put it in the root of your drive.
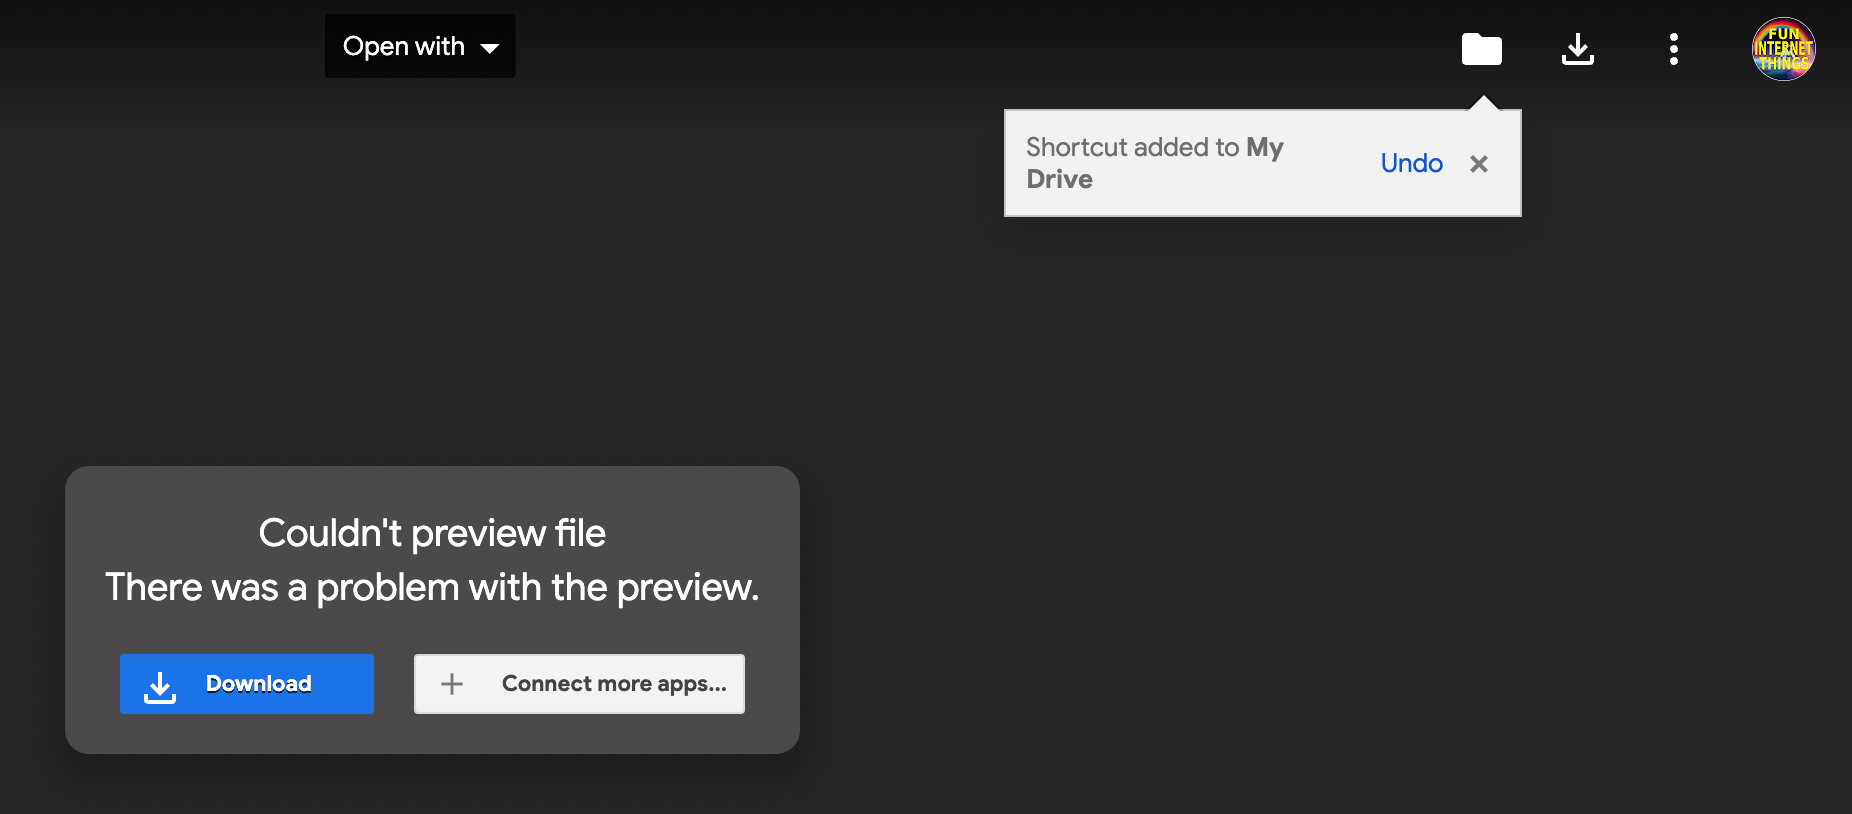
Click add shortcut here button
If it works, the icon will change to a folder.
We can refresh the notebook resources.
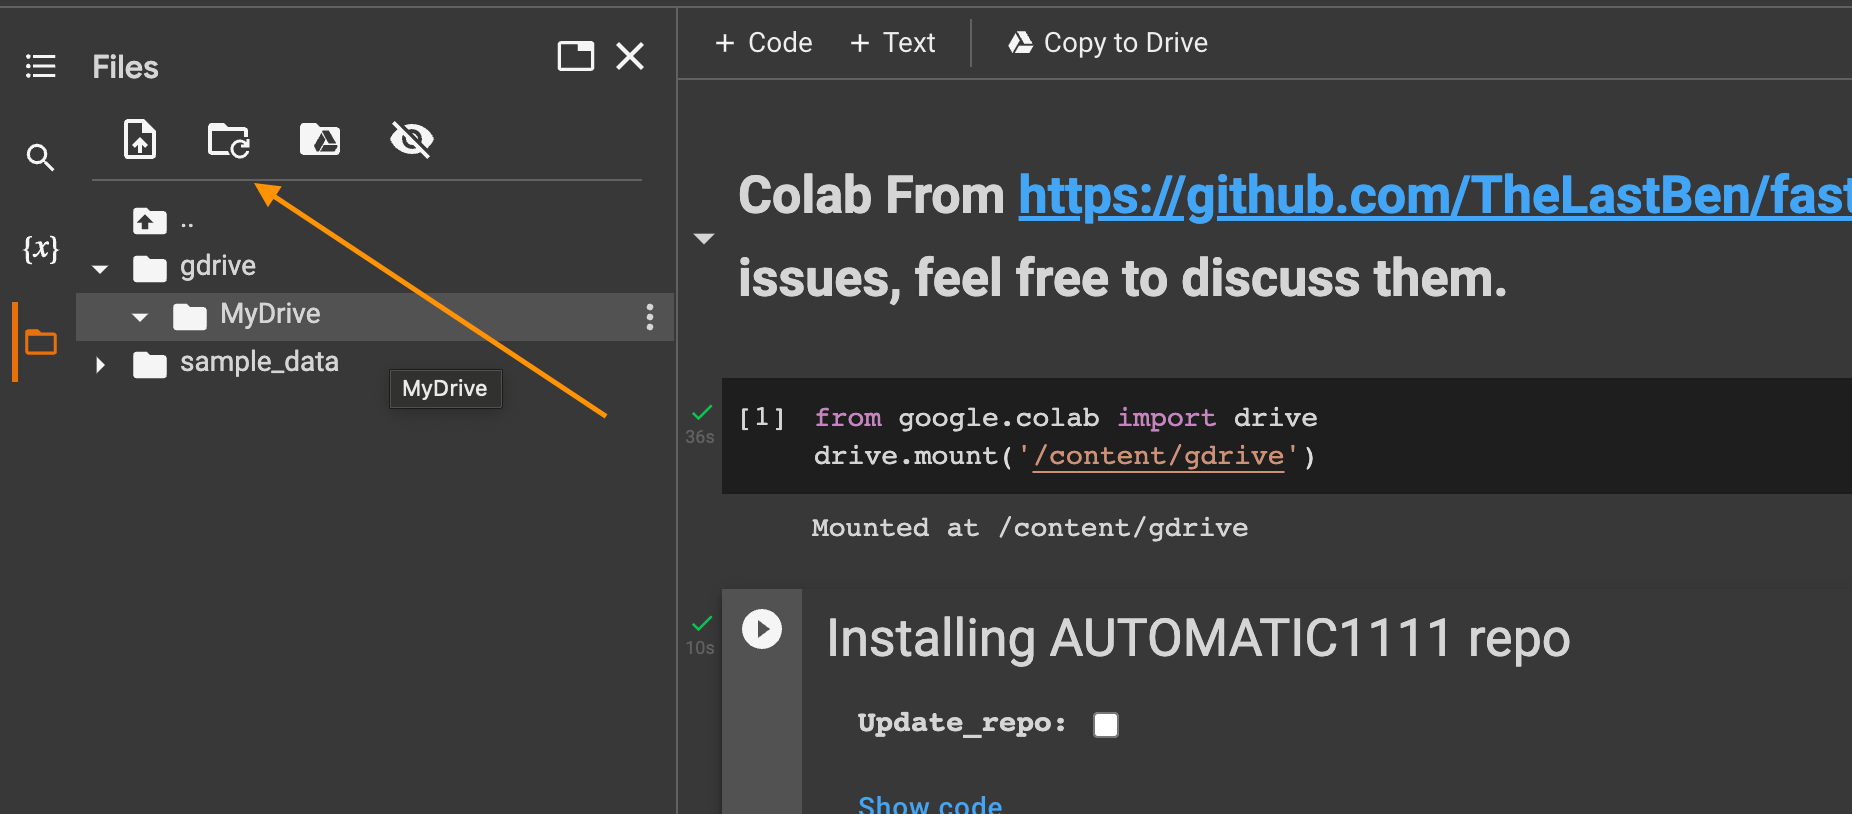
Once refreshed it should show up [mine took a moment.]
Next click the three dots and select Copy path
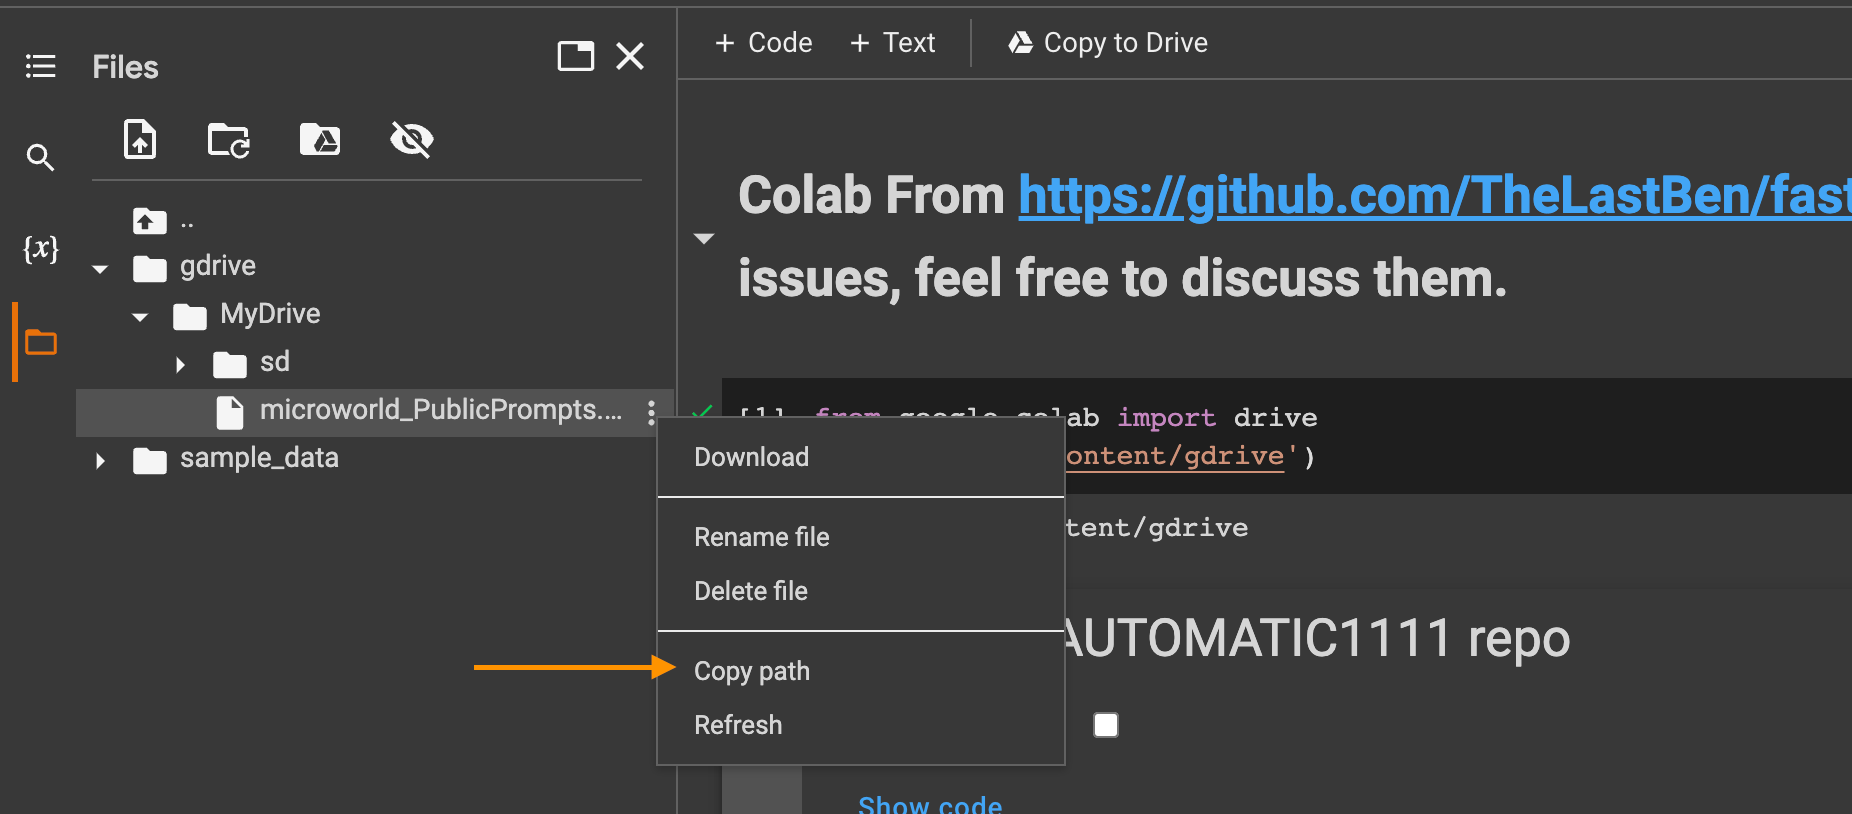
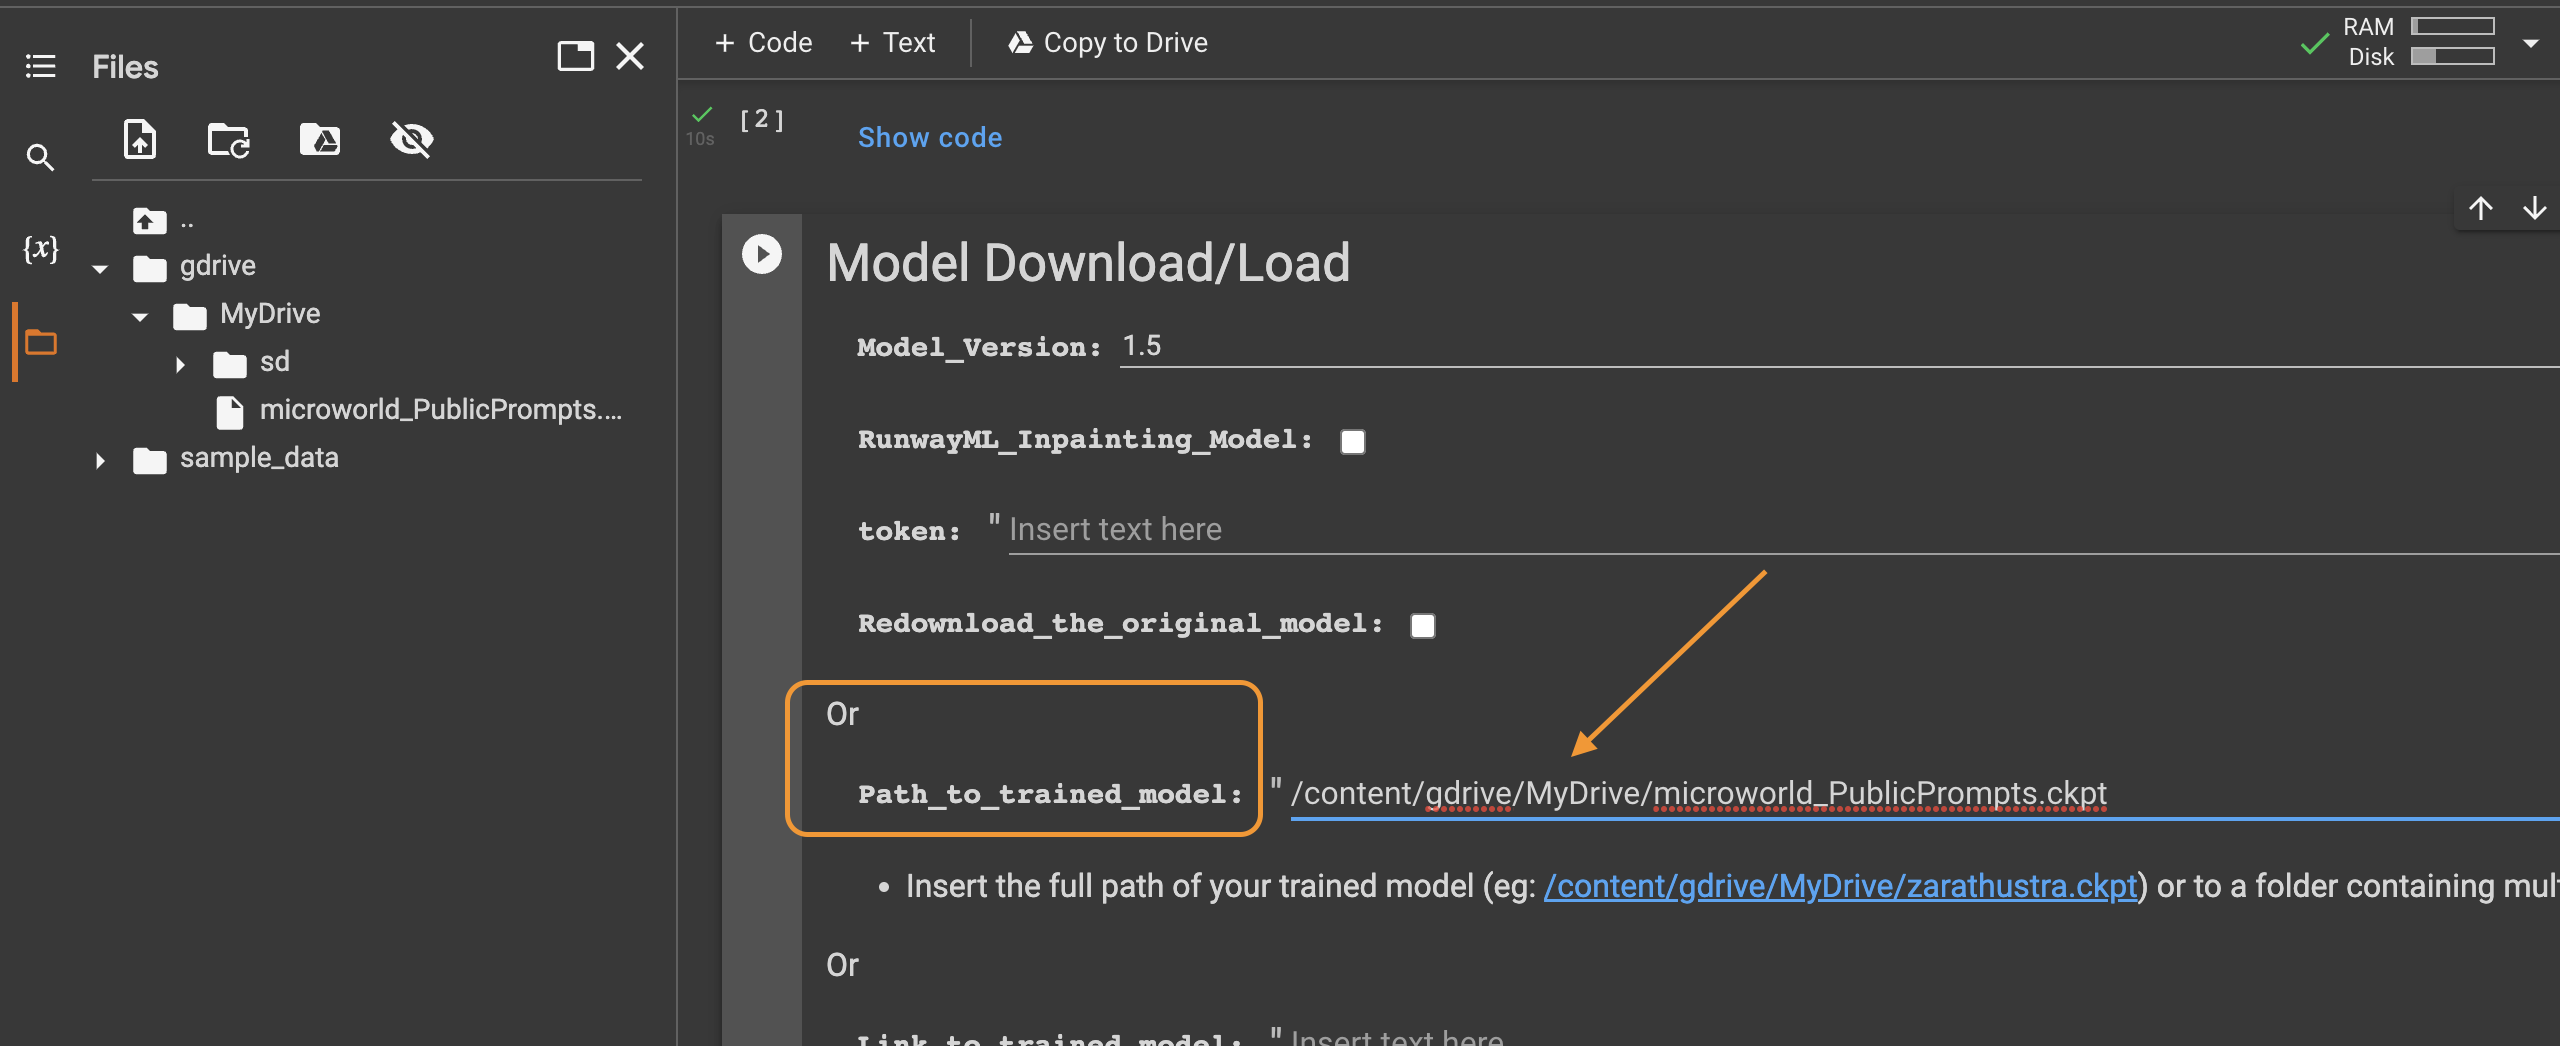
In the form for the text area Path_to_trained_model paste the path.
Here's what mine looked like:
/content/gdrive/MyDrive/microworld_PublicPrompts.ckpt
Click the play button on that block.
Once done, you will see Using the trained model.

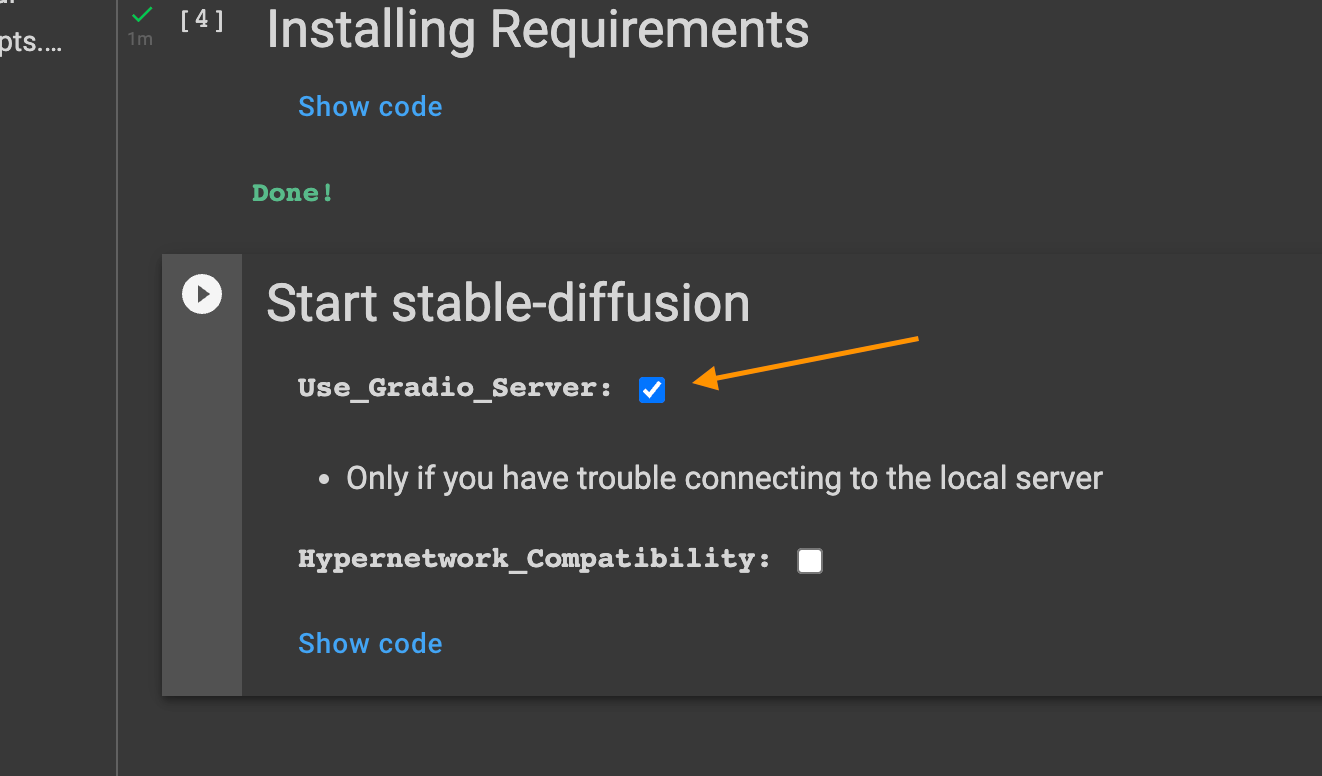
Click the play button for Installing Requirements
Once that is done, in the Start stable-diffusion block check the Use_Gradio_Server checkbox, and hit the play button.
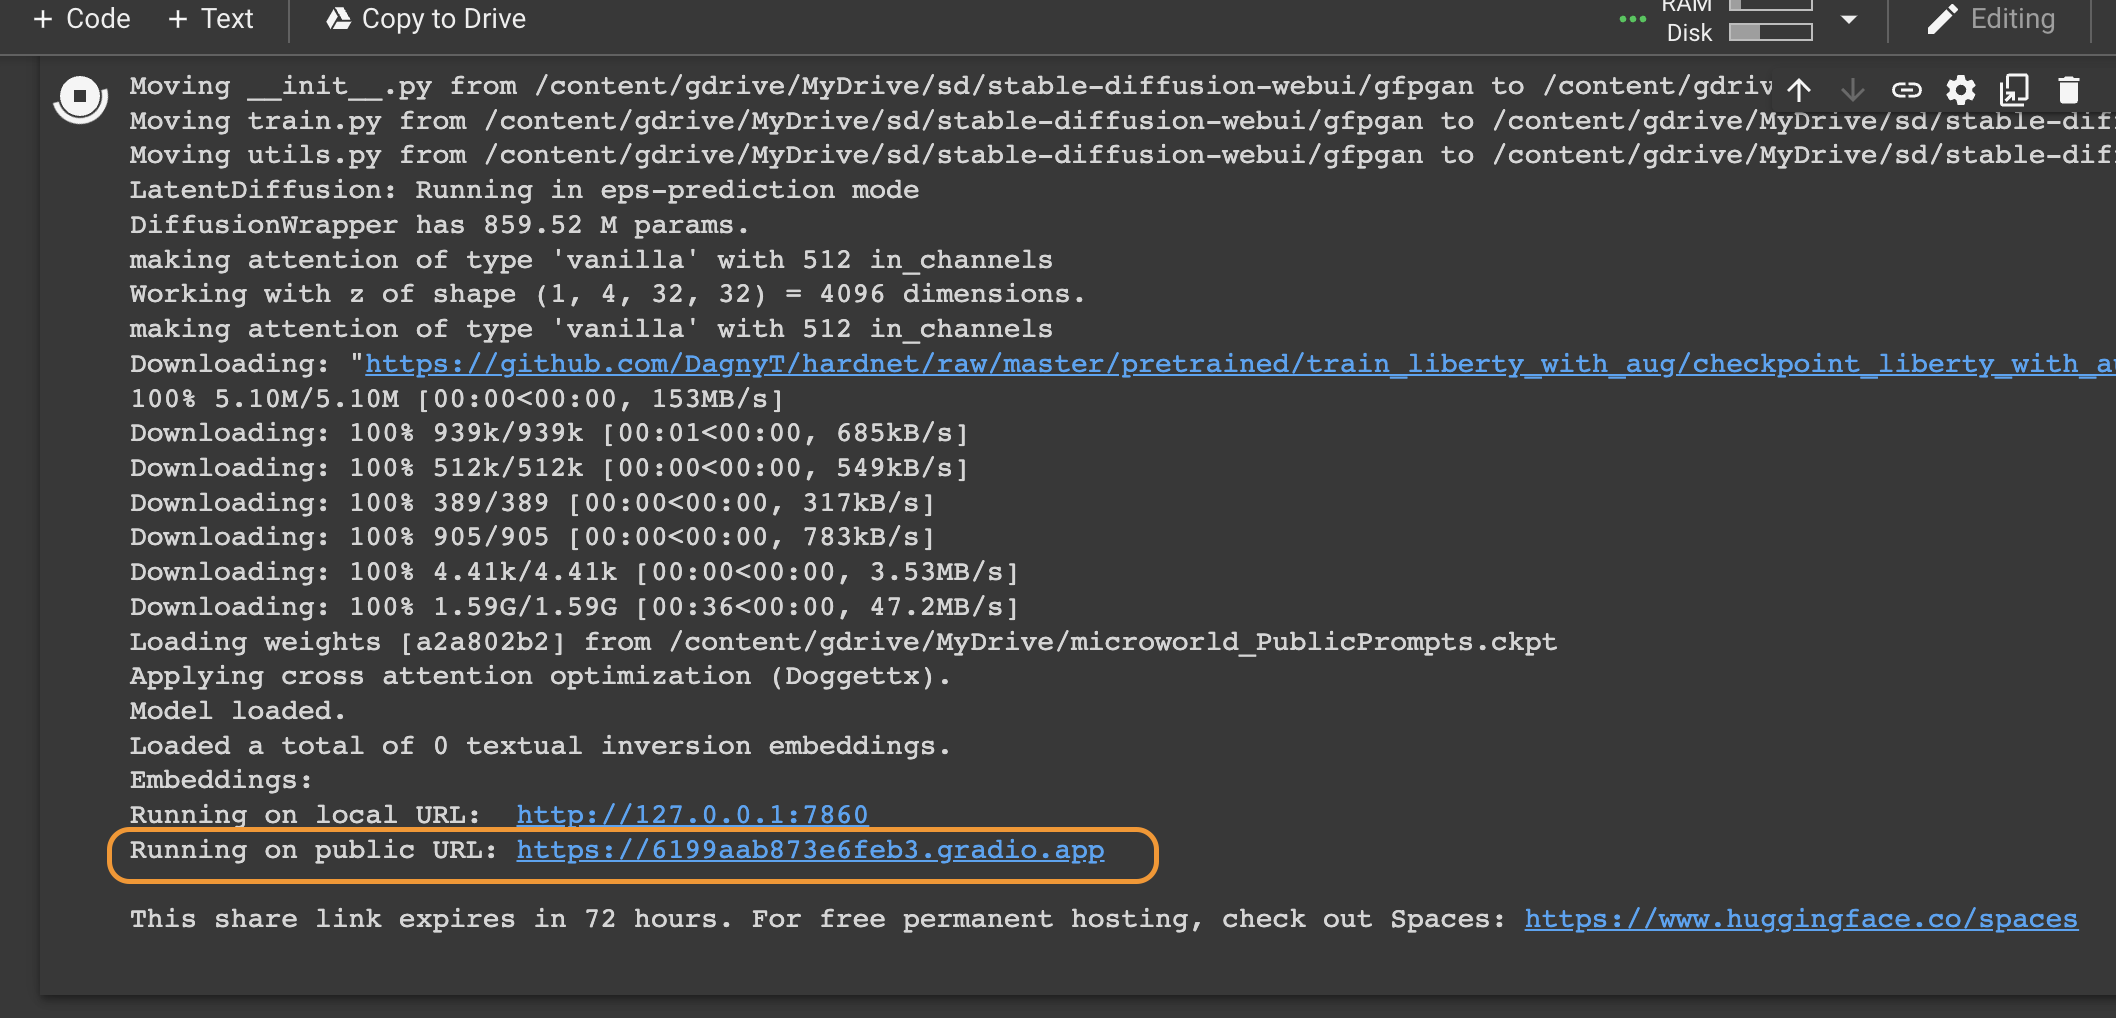
This will take a long time (or it did when I was taking the screenshots).
You will know it is ready when you see Running on public URL:
Click that link, which should open in a new tab.
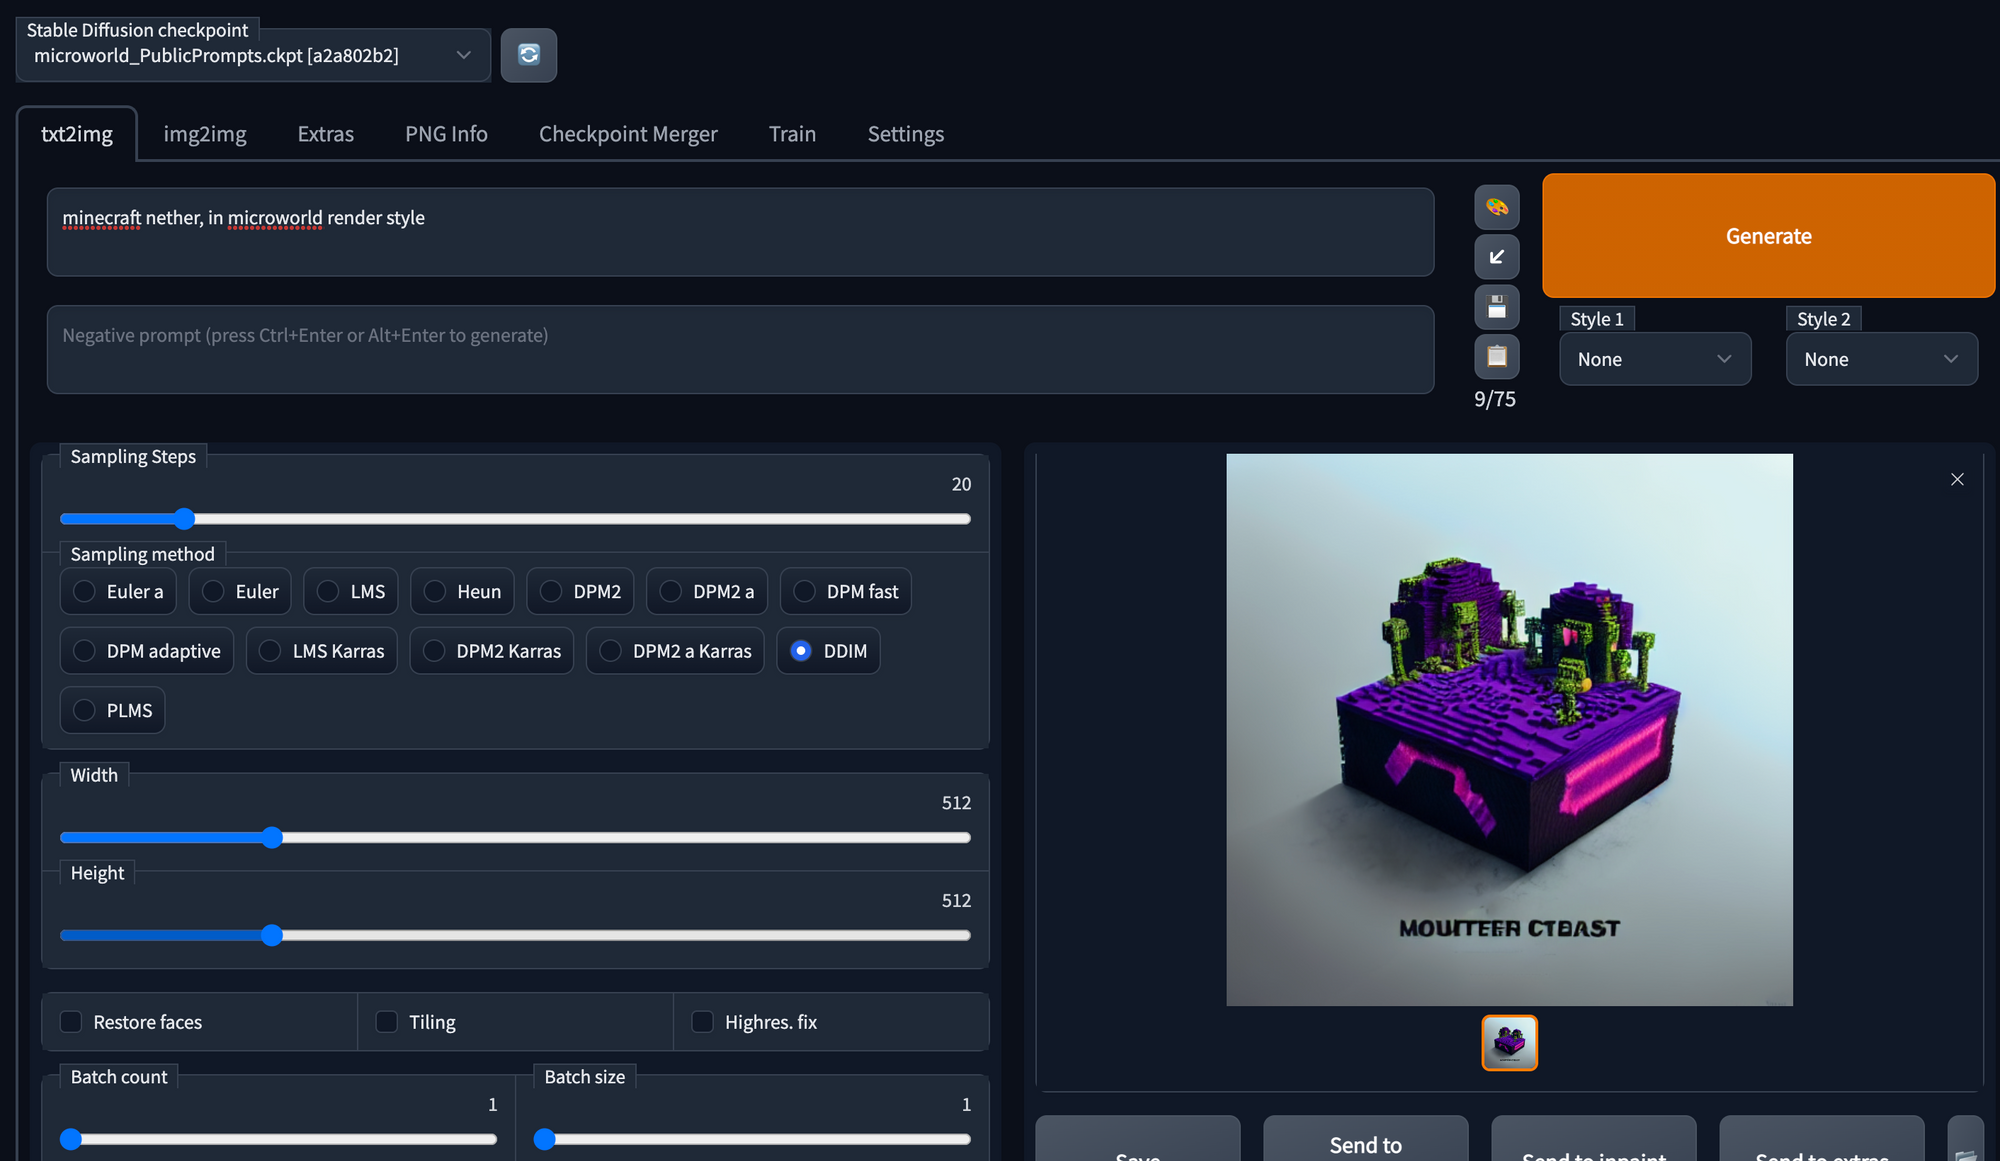
Stable Diffusion is now loaded with the Microworlds model.
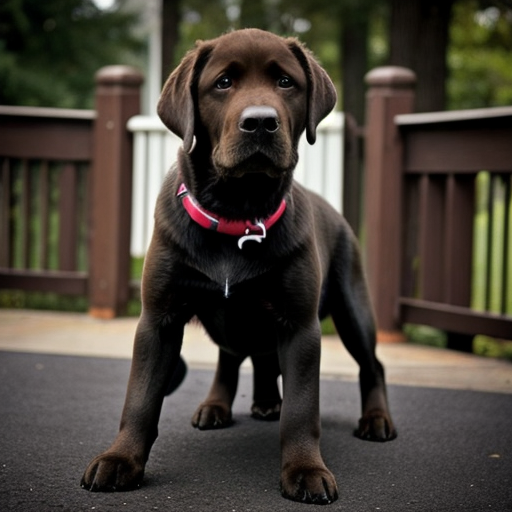
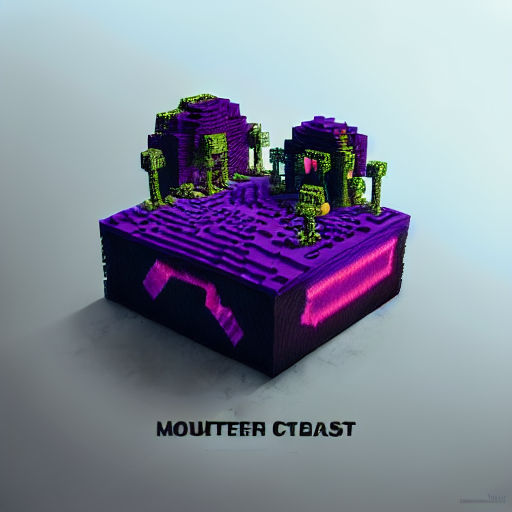
Test by creating a Minecraft microworld:
minecraft nether, in microworld render style
Set the sampling method to DDIM
Set the CFG scale to about 12-13 (above 10 seems nice.)
Click Generate.
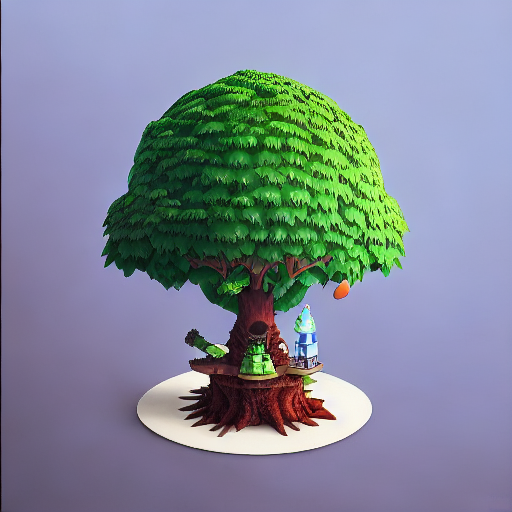
Let's make Totoro's tree while we are here
ghibli tree totoro, in microworld render style
Same settings.
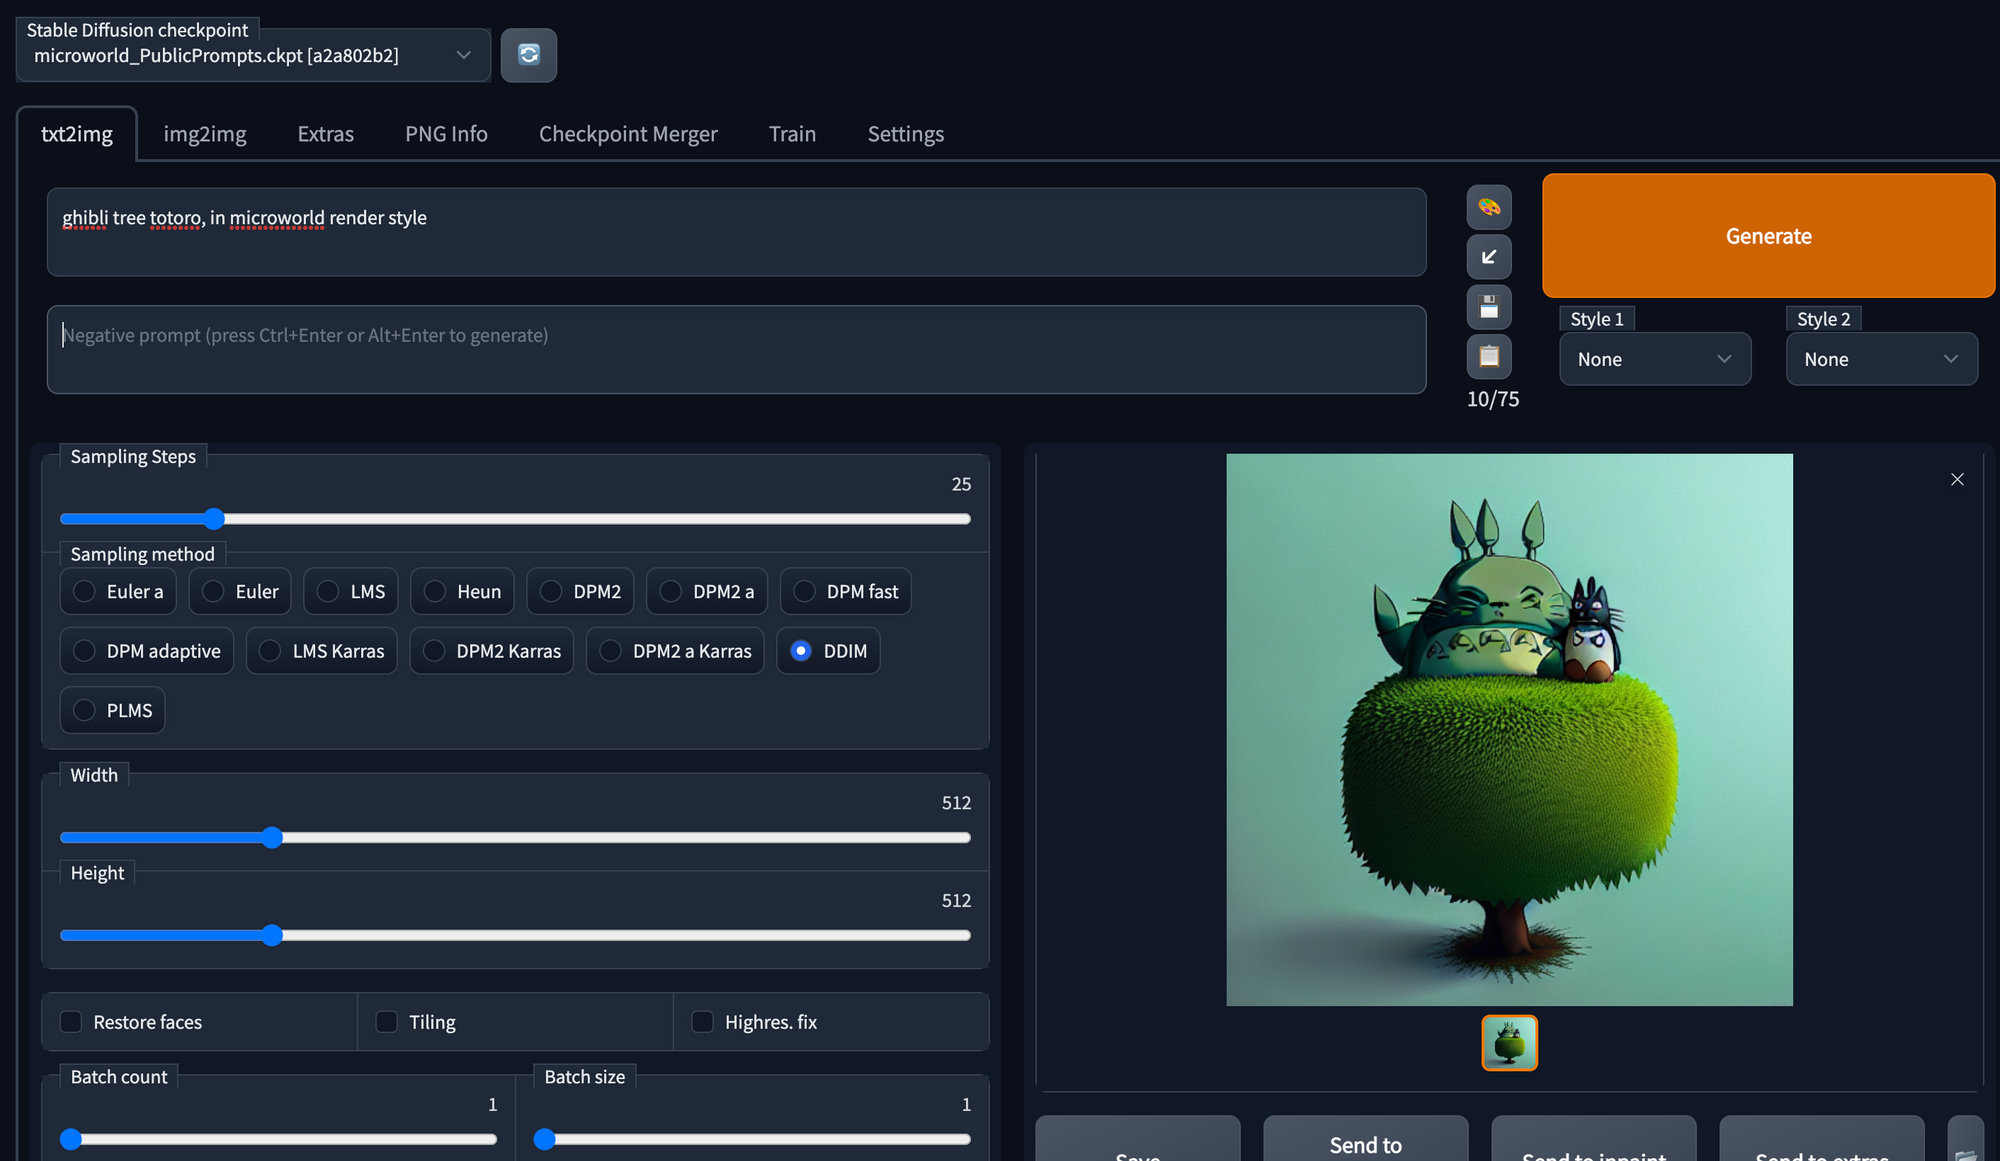
Love that, will need to run it through a few more times, but it works.

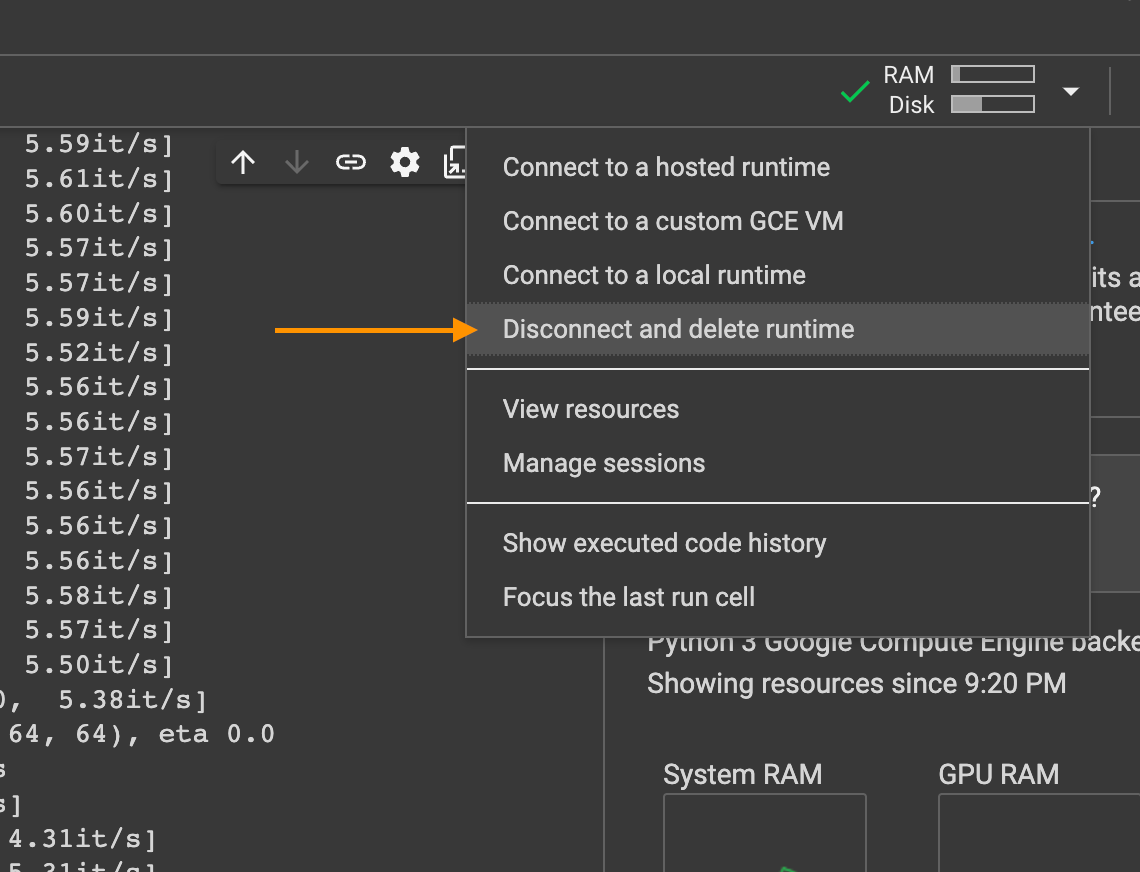
When finished, disconnect and delete your runtime to free up resources for others.
Final Thoughts
Now you have another tool in your art toolbox to go out and make the world a better place. Go have fun!