Crafting Cohesive Characters: Consistency with Stable Diffusion Embeddings
This is the first article of our series: "Consistent Characters"
Understanding Embeddings in the Context of AI Models
Embedding in the context of Stable Diffusion refers to a technique used in machine learning and deep learning models. It involves the transformation of data, such as text or images, in a way that allows these data points to be represented in a new feature space while retaining their essential characteristics. Essentially, it's a method to create a new set of representations for the data without altering the underlying model.
Textual Inversion allows us to define new features or keywords within a model without having to make changes to the model's architecture or structure. This means you can enrich the model's understanding by introducing new concepts, styles, or objects without completely overhauling the model itself.
What sets textual inversion apart from other fine-tuning methods is that it can achieve this enhancement with a relatively small amount of sample data. For instance, it might only require 3 to 5 sample images or examples to teach the model about new concepts. This efficiency in knowledge transfer without requiring extensive retraining is a valuable aspect of embedding through textual inversion, making it a powerful tool for enhancing machine learning models while maintaining their core architecture.
We will be using the textual inversion technique to create an embedding of a character that we will be able to use across different Stable Diffusion models.
GENERAL NUDITY WARNING
The prompts and models tend to get spicy 🌶️ in this tutorial, if you are adverse to seeing nudity, you may want to read a different tutorial.
Here are the steps we will take to produce a good embedding:
- Generating input images
- Filtering input images
- Training an embedding on the input images
- Choosing and validating a particular iteration of the trained embedding
- Saving your embedding
We invite you to join us on this tutorial, you can follow along or generate your own custom character. Tag us on social media @BitsofJeremy, and show us what you made.
Generating Input Images
First we will need to come up with a character name and light description. You are not creating a life story here, just something to describe their attributes. Describe the age and nationality of your character and a likeness.
Character Name:
Kateřina
Short Character description:
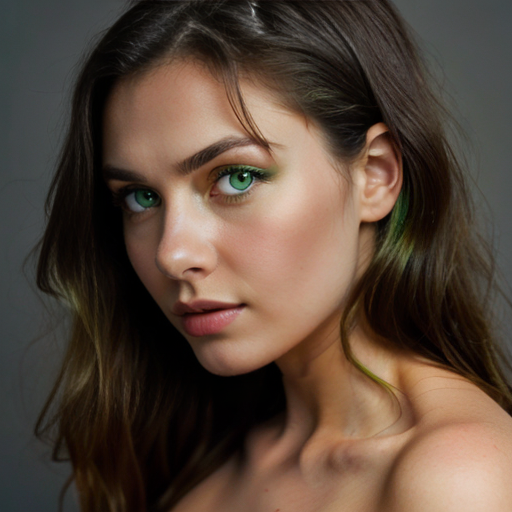
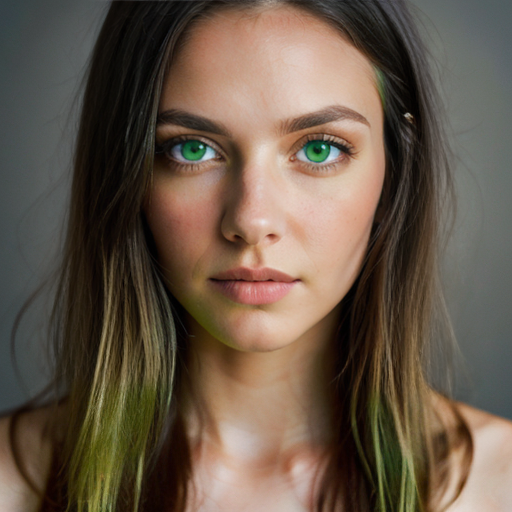
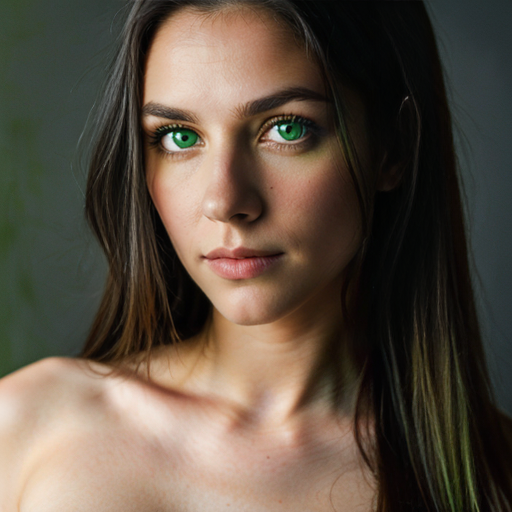
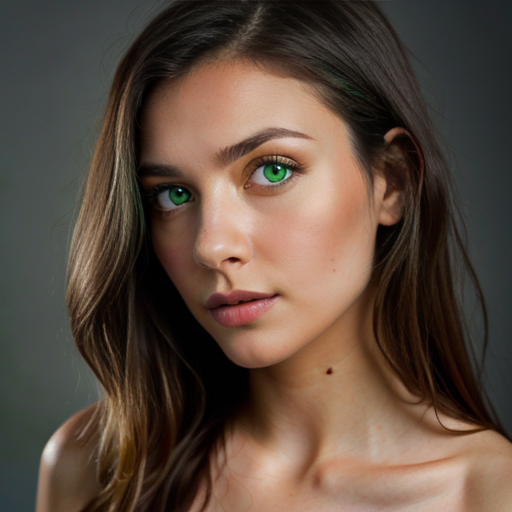
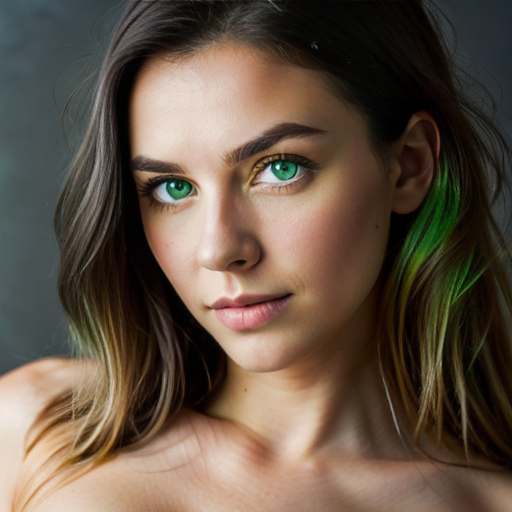
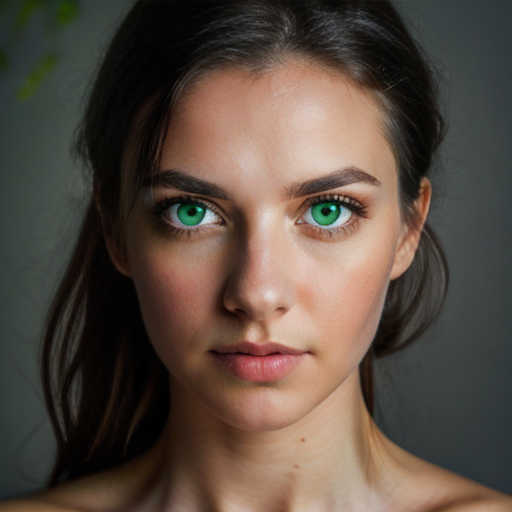
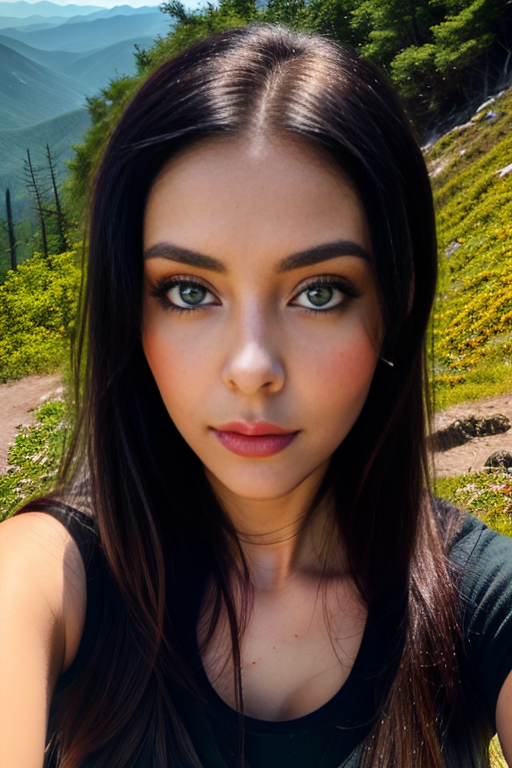
Kateřina is a 28yo Czech woman with long straight black hair, green eyes,above average height, and a strong athletic build
Quick Tip: Using the following URL you can find random names and nationalities. https://www.behindthename.com/random/
GitHub Repository:
We used "TheLastBen Fast Stable Diffusion" Jupyter notebook for all of the heavy hitting actions in this tutorial, you can grab it via the following link: TheLastBen Fast Stable Diffusion.
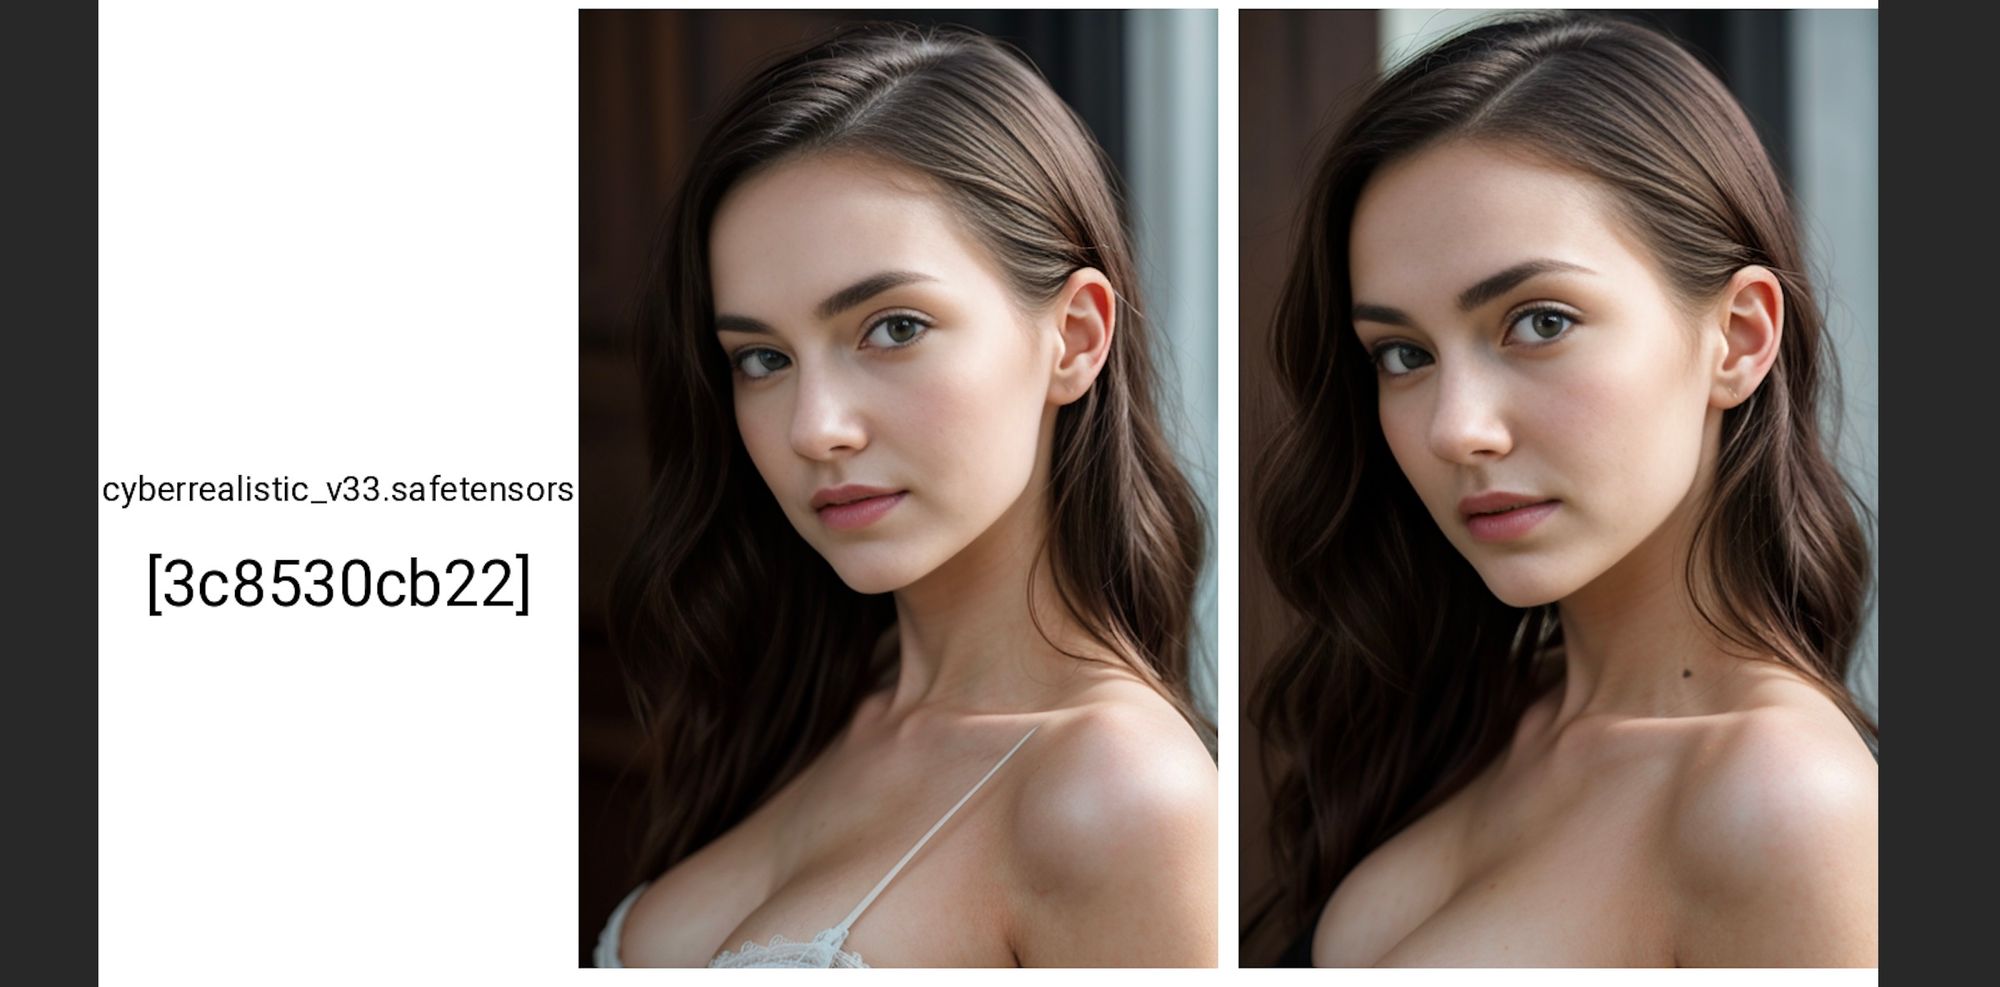
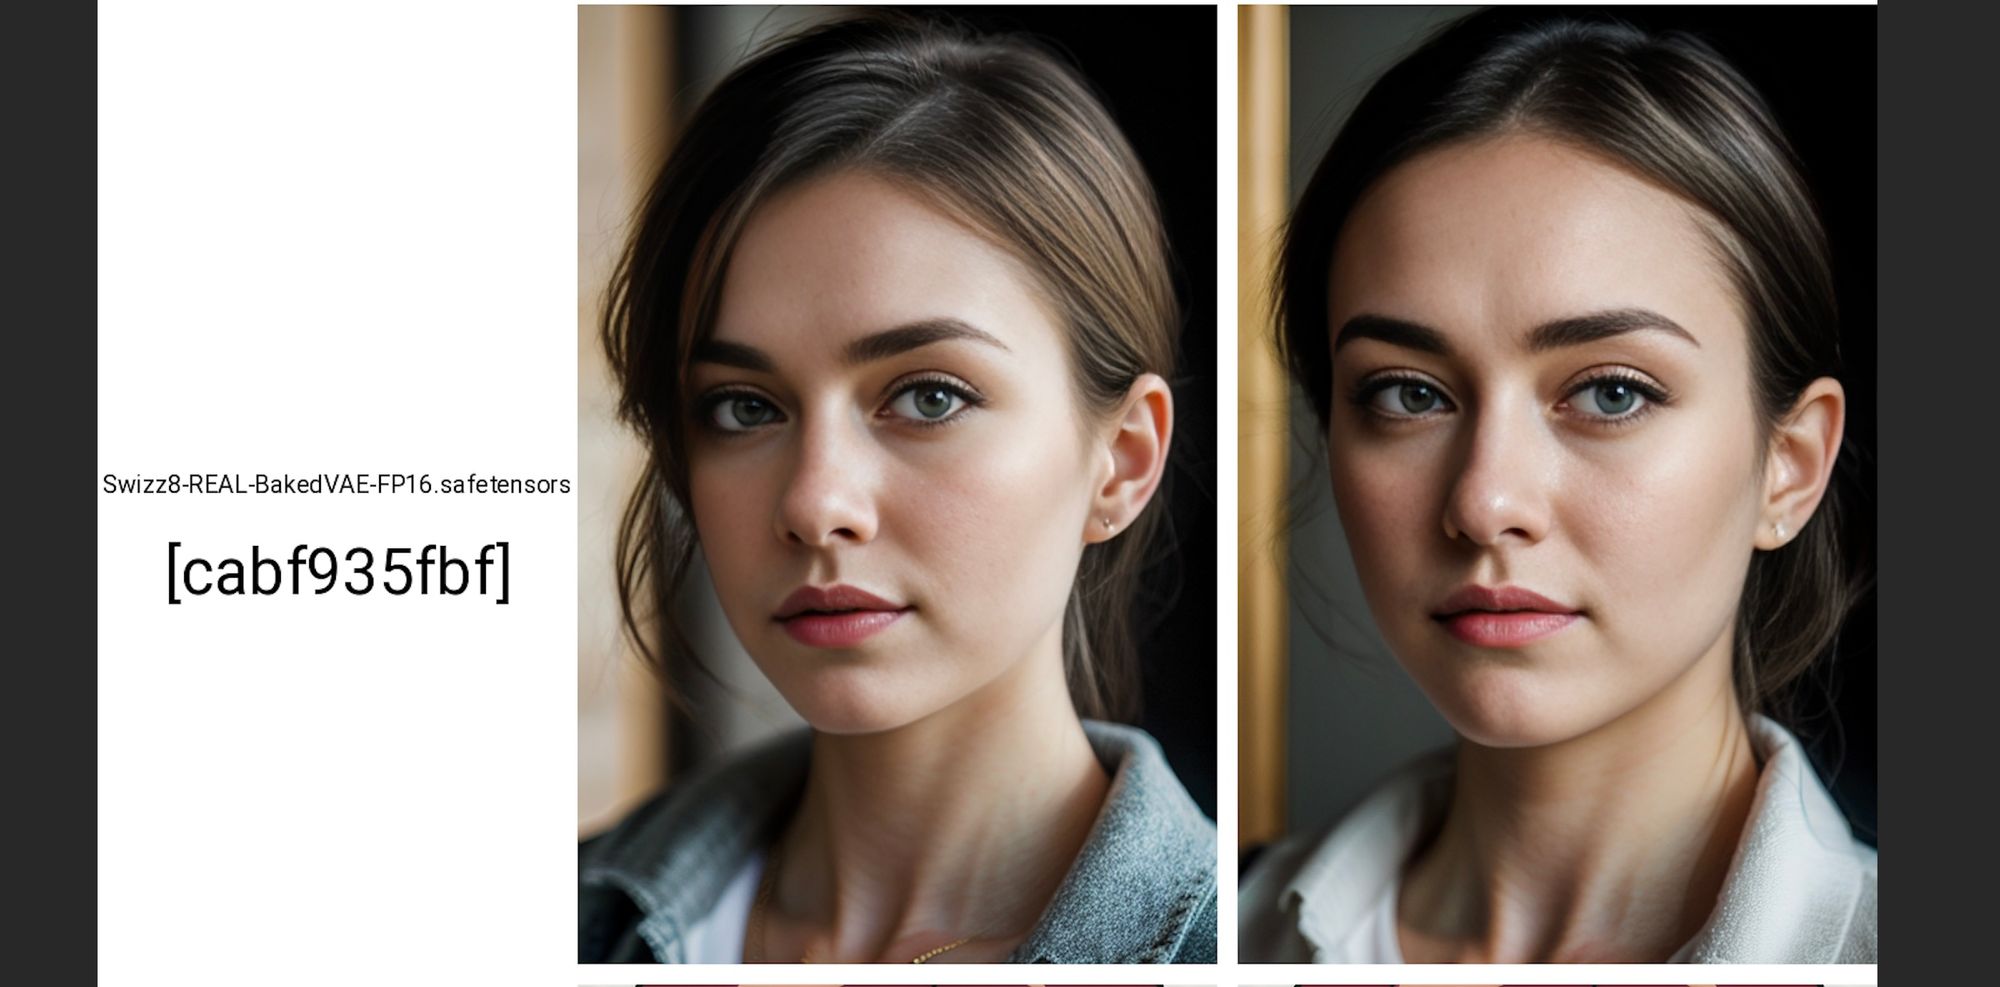
Stable Diffusion Model:
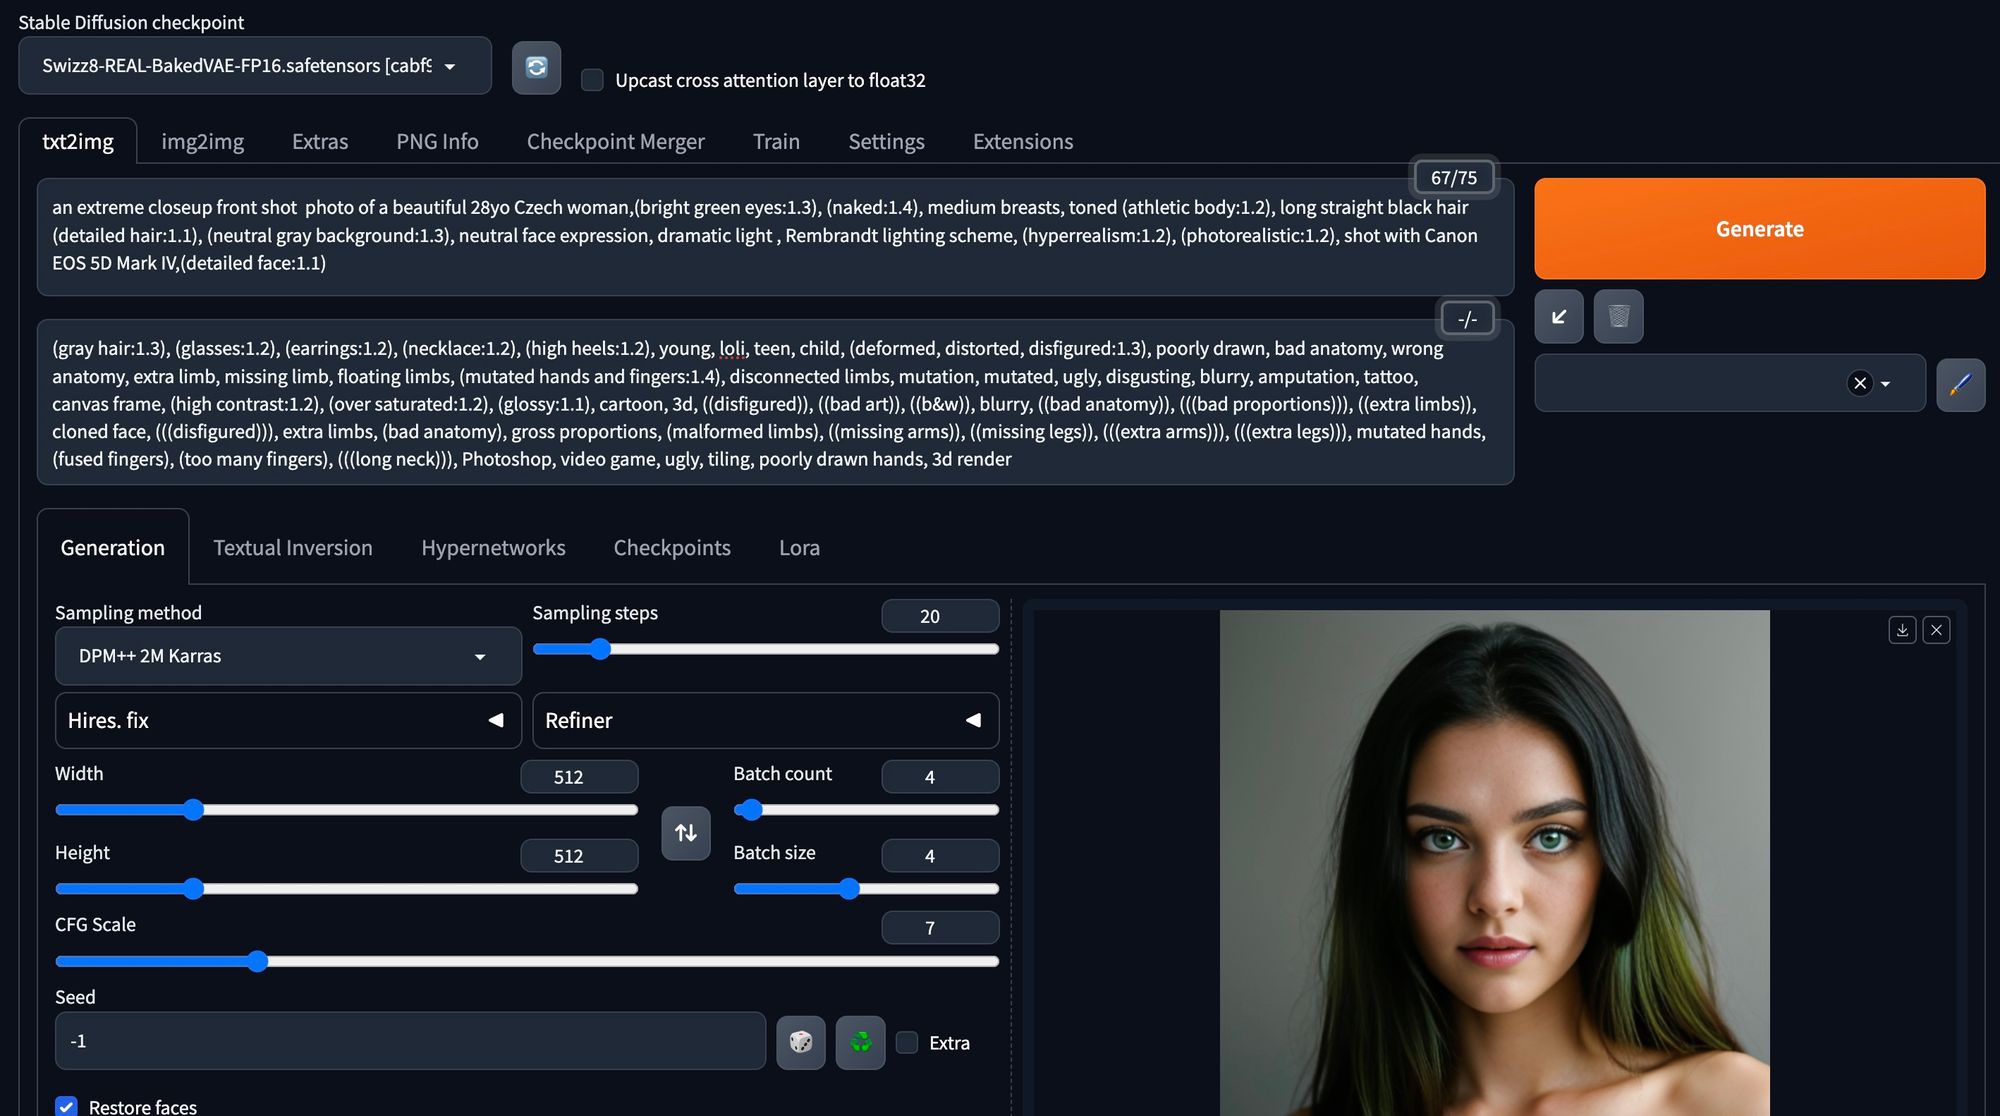
We will be using the model named Swizz8-REAL-BakedVAE-FP16.safetensors from the HuggingFace Swizz8 repo.
[NOTE: It looks like Swizz8 updated the repo Swizz8-XART-BakedVAE-FP16-Pruned.safetensors is only available. We tested and it also will work.]
Extra Extensions:
Next, make sure you have the "After Detailer" extension installed in Automatic1111: https://github.com/Bing-su/adetailer
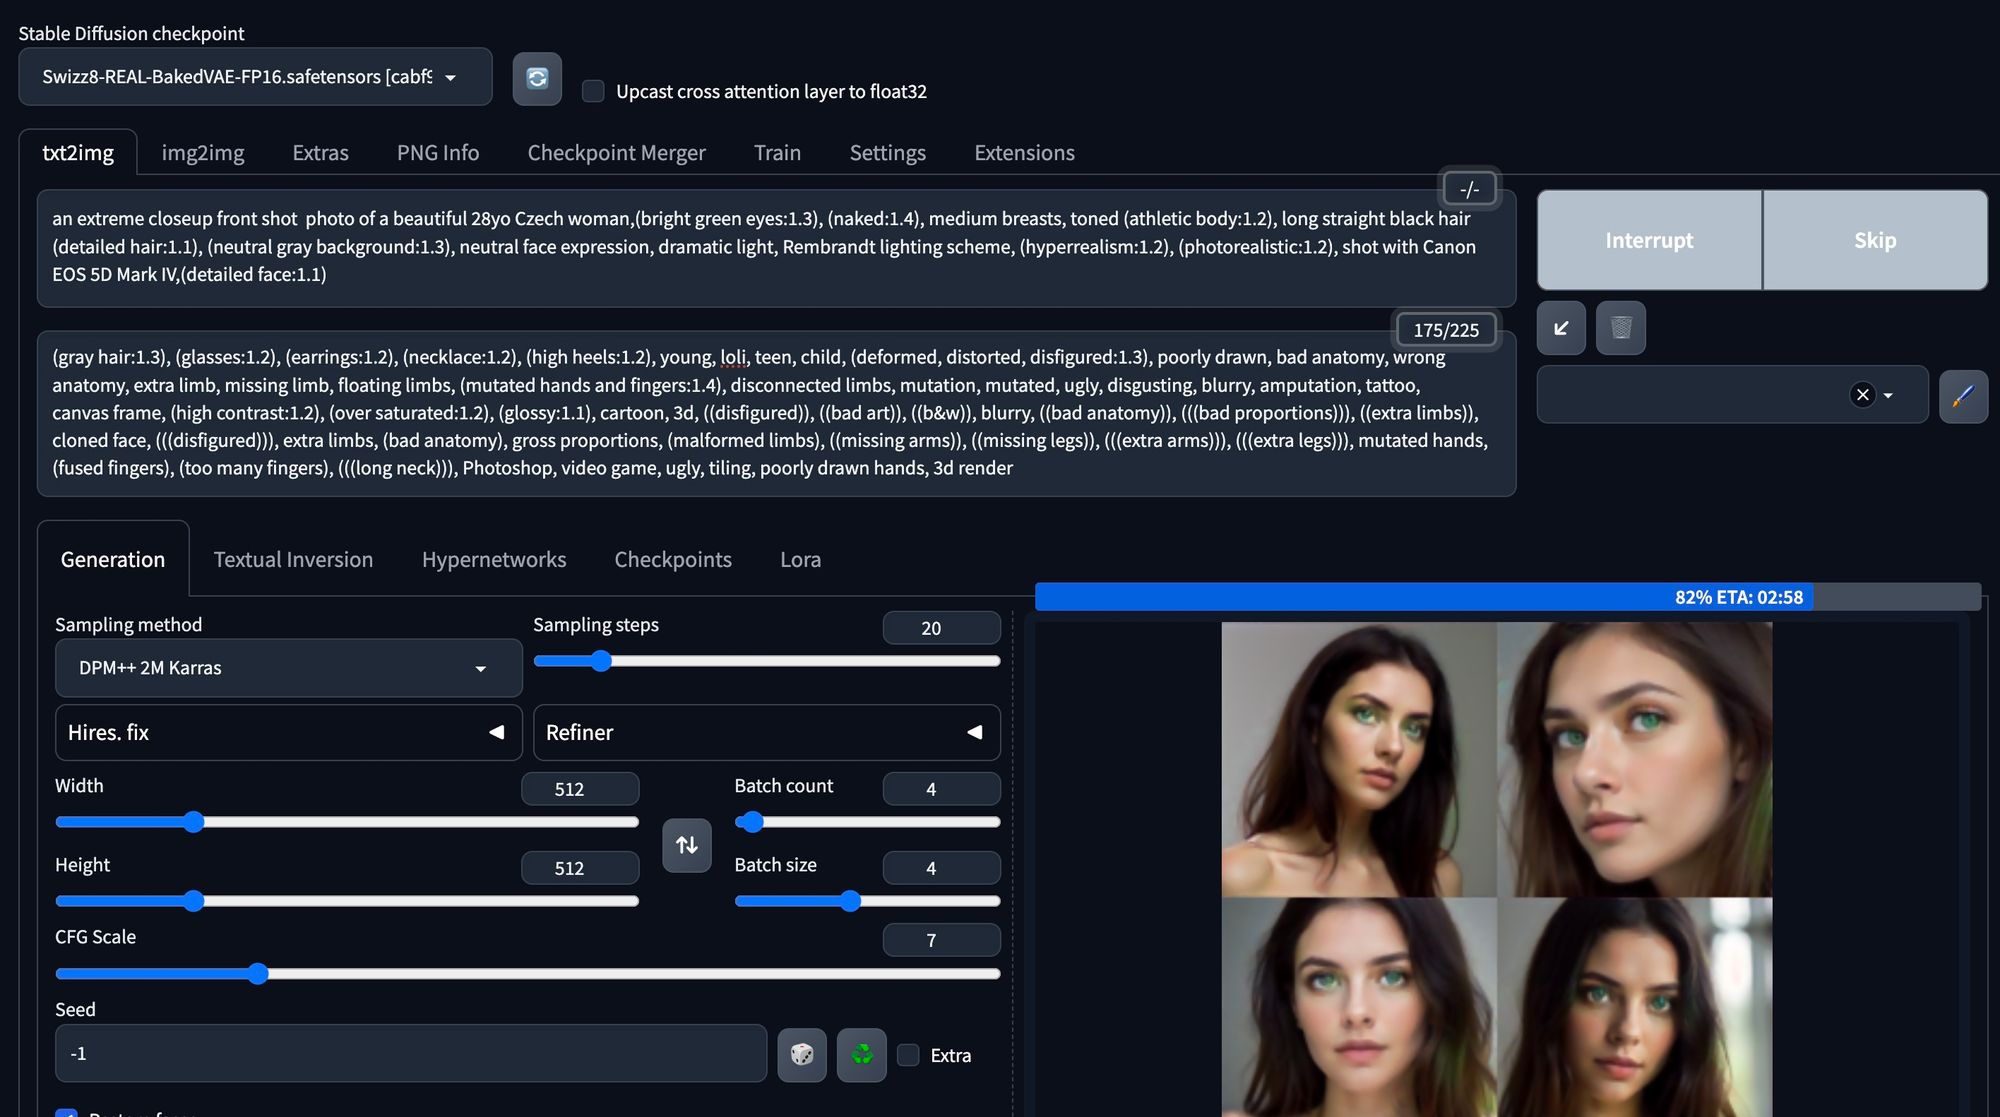
The Main Prompt:
Here is the main prompt and settings we used as a basis for generating images of Kateřina:
an extreme closeup front shot  photo of a beautiful 28yo Czech woman,(bright green eyes:1.3), (naked:1.4), medium breasts, toned (athletic body:1.2), long straight black hair (detailed hair:1.1), (neutral gray background:1.3), neutral face expression, dramatic light, Rembrandt lighting scheme, (hyperrealism:1.2), (photorealistic:1.2), shot with Canon EOS 5D Mark IV,(detailed face:1.1)

Negative prompt:
(gray hair:1.3), (glasses:1.2), (earrings:1.2), (necklace:1.2), (high heels:1.2), young, loli, teen, child, (deformed, distorted, disfigured:1.3), poorly drawn, bad anatomy, wrong anatomy, extra limb, missing limb, floating limbs, (mutated hands and fingers:1.4), disconnected limbs, mutation, mutated, ugly, disgusting, blurry, amputation, tattoo,
canvas frame, (high contrast:1.2), (over saturated:1.2), (glossy:1.1), cartoon, 3d, ((disfigured)), ((bad art)), ((b&w)), blurry, ((bad anatomy)), (((bad proportions))), ((extra limbs)), cloned face, (((disfigured))), extra limbs, (bad anatomy), gross proportions, (malformed limbs), ((missing arms)), ((missing legs)), (((extra arms))), (((extra legs))), mutated hands, (fused fingers), (too many fingers), (((long neck))), Photoshop, video game, ugly, tiling, poorly drawn hands, 3d render

Batch count: 4
BatchSize: 4
Steps: 20,
Sampler: DPM++ SDE Karras,
CFG scale: 7,
Face restoration: CodeFormer,
Size: 512x512,
Model: Swizz8-REAL-BakedVAE-FP16,
Clip skip: 2,
ADetailer model: face_yolov8n.pt, <-- DEFAULTS
ADetailer confidence: 0.3, <-- DEFAULTS
ADetailer dilate/erode: 4, <-- DEFAULTS
ADetailer mask blur: 4, <-- DEFAULTS
ADetailer denoising strength: 0.4, <-- DEFAULTS
ADetailer inpaint only masked: True, <-- DEFAULTS
ADetailer inpaint padding: 32, <-- DEFAULTS
ADetailer version: 23.9.3, <-- DEFAULTS
Version: v1.6.0
You will notice that there is a lot of negative prompts, we needed to add filters for various items and the random gray hair that would pop into our testing. We really need the images to be just the human and the gray background to make it work out well later on.
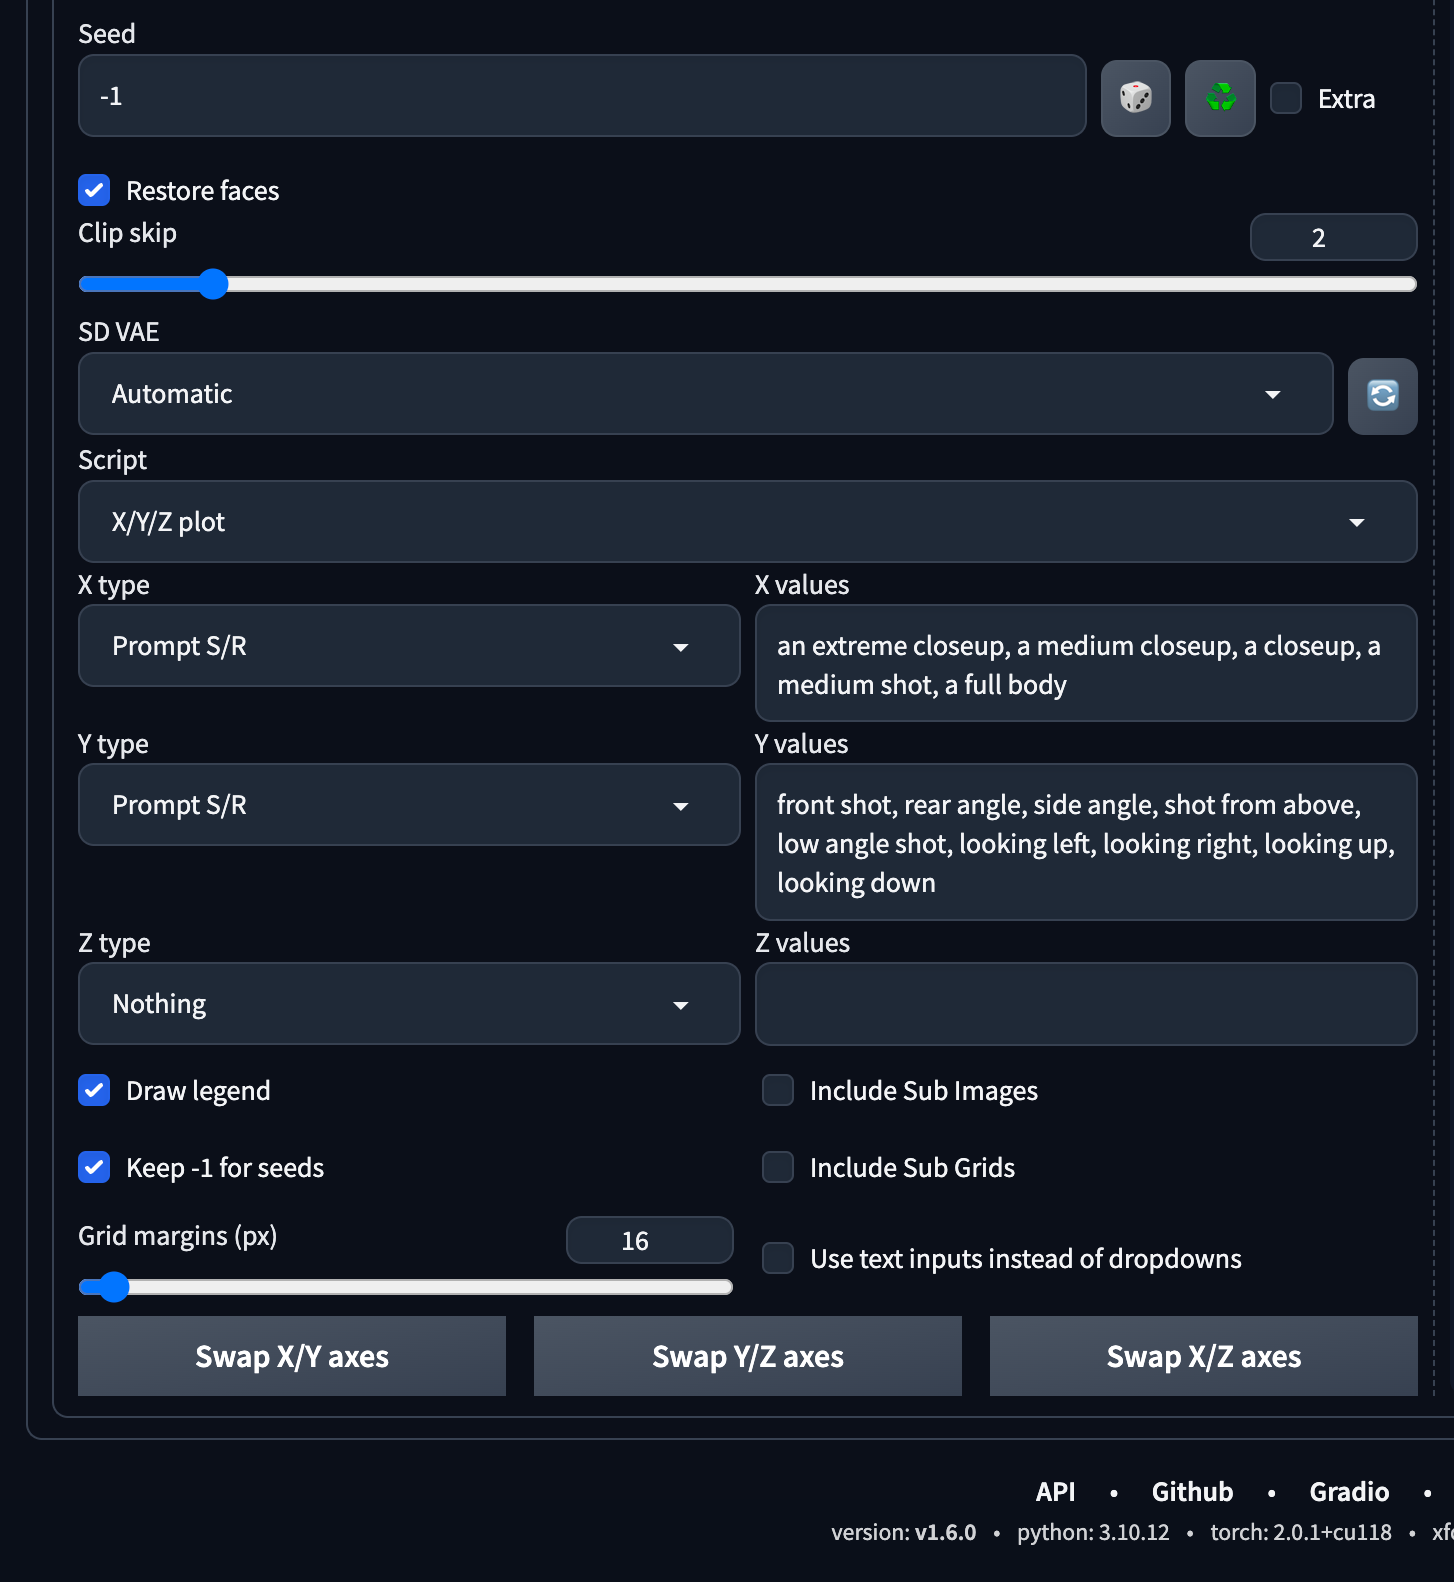
We will be using an X/Y/Z Plot Script to generate various angles and positions to make sure we get enough image variety to filter out later on:
- X Type:
Prompt S/R - X Values:
an extreme closeup, a medium closeup, a closeup, a medium shot, a full body, a full body - Y Type:
Prompt S/R - Y Values:
front shot, rear angle, side angle, shot from above, low angle shot, looking left, looking right, looking up, looking down, looking back
Here's what our X/Y/Z plot looked like:
We set this up in our Google Colab Pro account and this will generate about 860 images in about 15-20 minutes on an A100 GPU. WOW! It burned about 7 minutes of GPU time on our Google Colab Pro account.
For contrast, in about 13 hours our little M1 MacBook Pro generated around 530 images before we gave up and shifted "TO THE CLOUD". Your milage may vary on the hardware you use to generate these images.
After the image generating is done, download your character images to your local machine to save some precious GPU hours as we will be just filtering out the images next, and do not need high powered GPUs to hit the delete key.
Filtering input images
We set up a directory structure to help us be consistent in our filtering. The idea here is to copy [not move] your good images into the next folder. That way if you accidentally delete one, you can go back to the previous phase and grab it.
kat3r1na_gen01:
  raw_generated_images:
    raw:       <- all images from generation go here
    phase-01:  <- copy 1st pass images [they look like the character]
    phase-02:  <- copy 2nd pass images [only copy great generations]
  images_to_train_on: <- copy images from phase-02 to here
We copy the raw images into the raw directory, then make another copy into phase-01 to kick off our filtering.
Phase One Filter
Throughly look at each image and delete the ones that have blemishes, oddities, or just simply do not follow the prompt at all. You can be fairly liberal in this filtering phase as we will only need ~25-50 images overall to create the embedding.
Remember you can always generate more images if needed. That is the beauty of generative AI.
After the first filter, we removed about 200 images.
Phase Two Filter
This step should take you the longest as it is the most important.
Remember: Garbage in == Garbage out!
We used the following Python script to help us move each image into a category directory based on the X axis in our X/Y/Z plot.
Copy the "picture_sort.py" script in the phase-02 directory. Edit the line with base_name = "kat3r1na" to whatever you'd like to name your embedding.
picture_sort.py
import os
import shutil

# Step 1: List all files in the current directory
files = [f for f in os.listdir('.') if os.path.isfile(f)]

# Keywords to search for in file names
keywords = ['a closeup', 'a full body', 'a medium closeup', 'a medium shot', 'an extreme closeup']

# Step 1: File Organization

# List all files in the current directory
files = [f for f in os.listdir('.') if os.path.isfile(f)]

for file in files:
    for keyword in keywords:
        # Check if the file name contains the keyword (case-insensitive)
        if keyword in file.lower():
            # Create the directory if it doesn't exist
            if not os.path.exists(keyword):
                os.makedirs(keyword)

            # Move the file to the appropriate directory
            shutil.move(file, os.path.join(keyword, file))
            break  # Break out of the inner loop once a keyword is found

# Step 2: File Renaming

for keyword in keywords:
    # Check if the directory exists
    if os.path.exists(keyword):
        # List all files in the directory
        files_in_directory = [f for f in os.listdir(keyword) if os.path.isfile(os.path.join(keyword, f))]

        counter = 1  # Initialize the numerical suffix

        for file in files_in_directory:
            # Parse the original name to remove the keyword
            original_name = file.replace(keyword, '').strip()  # Remove the keyword and any extra spaces
            base_name, extension = os.path.splitext(original_name)  # Split the name and extension
            base_name = "kat3r1na"
            # Construct the new name
            new_name = f"{keyword} photo of {base_name} naked, neutral gray background ({counter}){extension}"

            # Rename the file
            os.rename(os.path.join(keyword, file), os.path.join(keyword, new_name))

            counter += 1  # Increment the counter for the next file

# The script will organize and then rename the images based on the specified format.
Note: Since Python install and support is beyond the scope of this tutorial, feel free to reach out if you need help getting this working.
Here is what thephase-02 directory will look like once it is finished:

Next, go into each directory and start filtering images according to your character's appearance, and ensure that they align with the designated camera settings.
Be extremely picky!
Keep these criteria in mind:
- Can you see the knees? If so, it's probably
a full bodyphoto. - Can you see the waist? If so, it's probably
a medium shotphoto. - Can you see the breast area? If so, it's probably
a closeupphoto. - Can you see the neck area? If so, it's probably
a medium closeupphoto. - If none of the above, it's probably
an extreme closeupphoto.
At the end of this phase you should have about 25-100 photos that fully "describe" your character. It is OK to start over and re-generate images if you find you are missing some details.
At the end of this phase we ended up with about 130 images. We then copied those images out to the directory called images_to_train_on. Later on we decided that we needed to do another filter phase to get even more specific. Taking your time in this section will really help you later on so that your training goes smoothly.
Training an embedding on the input images
This is the main event, you will now be training the embedding using the Train tab in Automatic1111. We had GPU hours in our Google Colab Pro account, so we decided to keep using it. You can also train on something like a M1 MacBook Pro, but it just takes longer.
Copy your images_to_train_on directory to your Google Drive, in the root to make it easy to find in the Jupyter notebook.
Preparation Steps
Before jumping full steam into the training process, there are a few preparatory steps to ensure a smooth workflow:
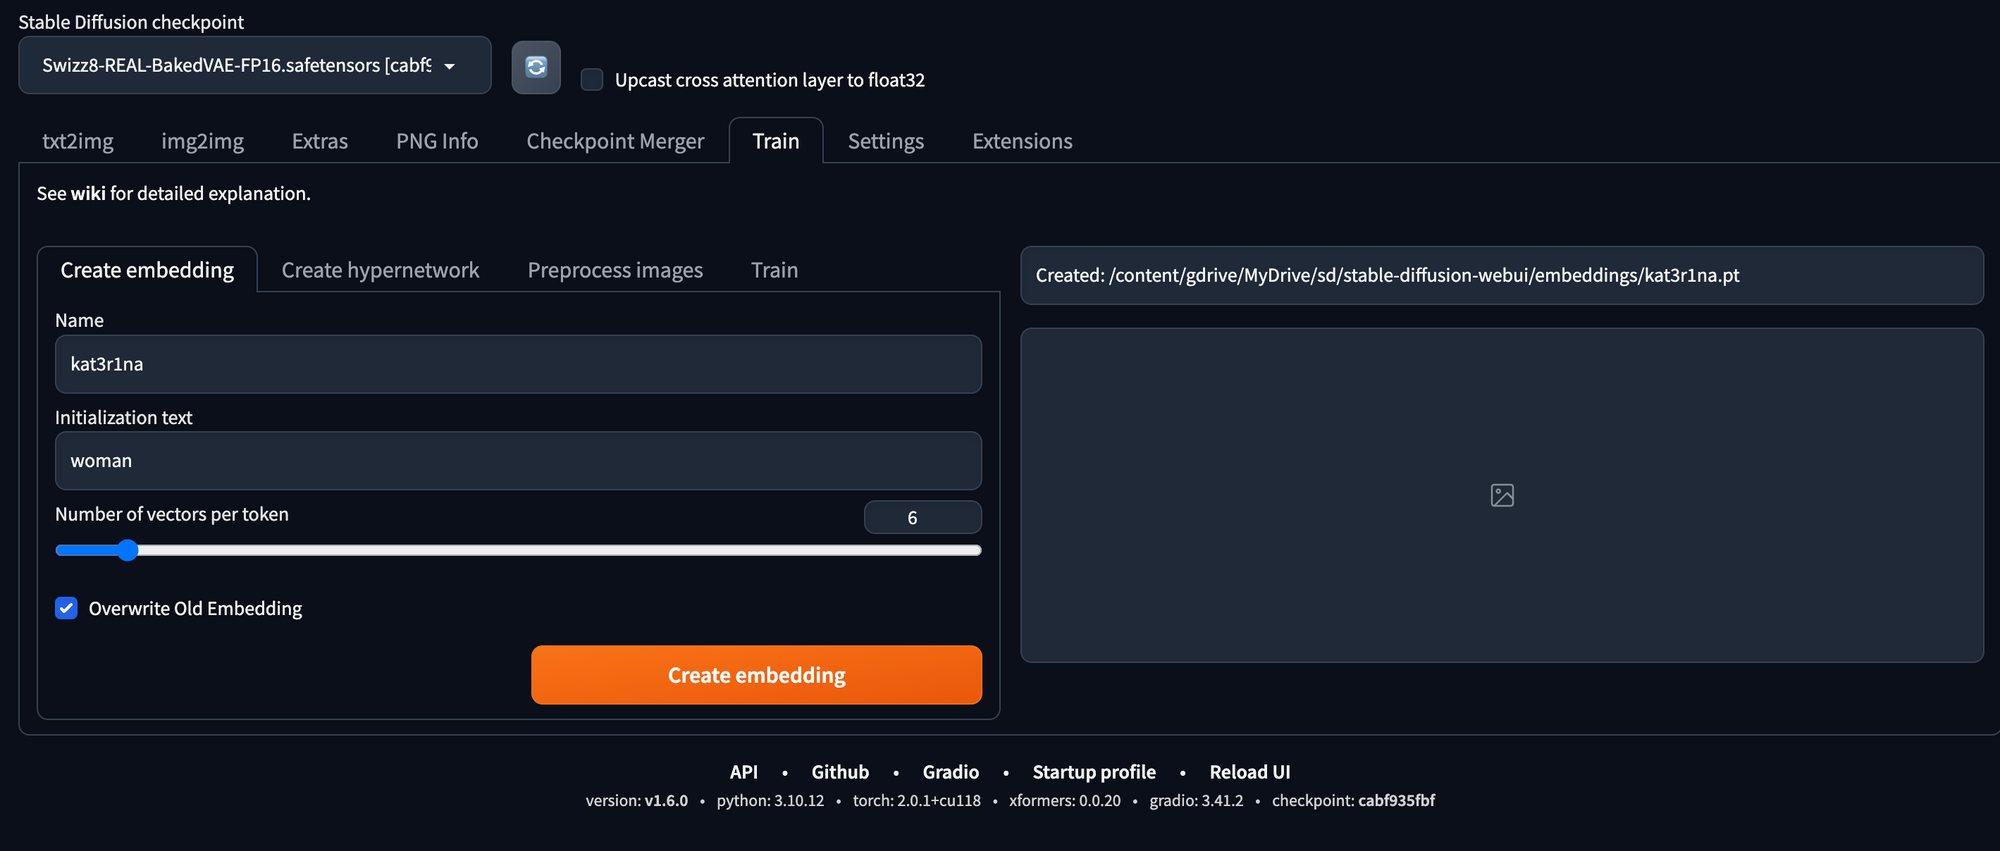
Embedding Name:
Begin by assigning a name to your embedding. In this case, it's kat3r1na. You will need to come up with something that the model does not know of, so generally people use a name or other thing with number to represent their character. If in doubt, put your embedding name in Automatic1111 and try to generate an image to see what you pull out.
Additional Files:
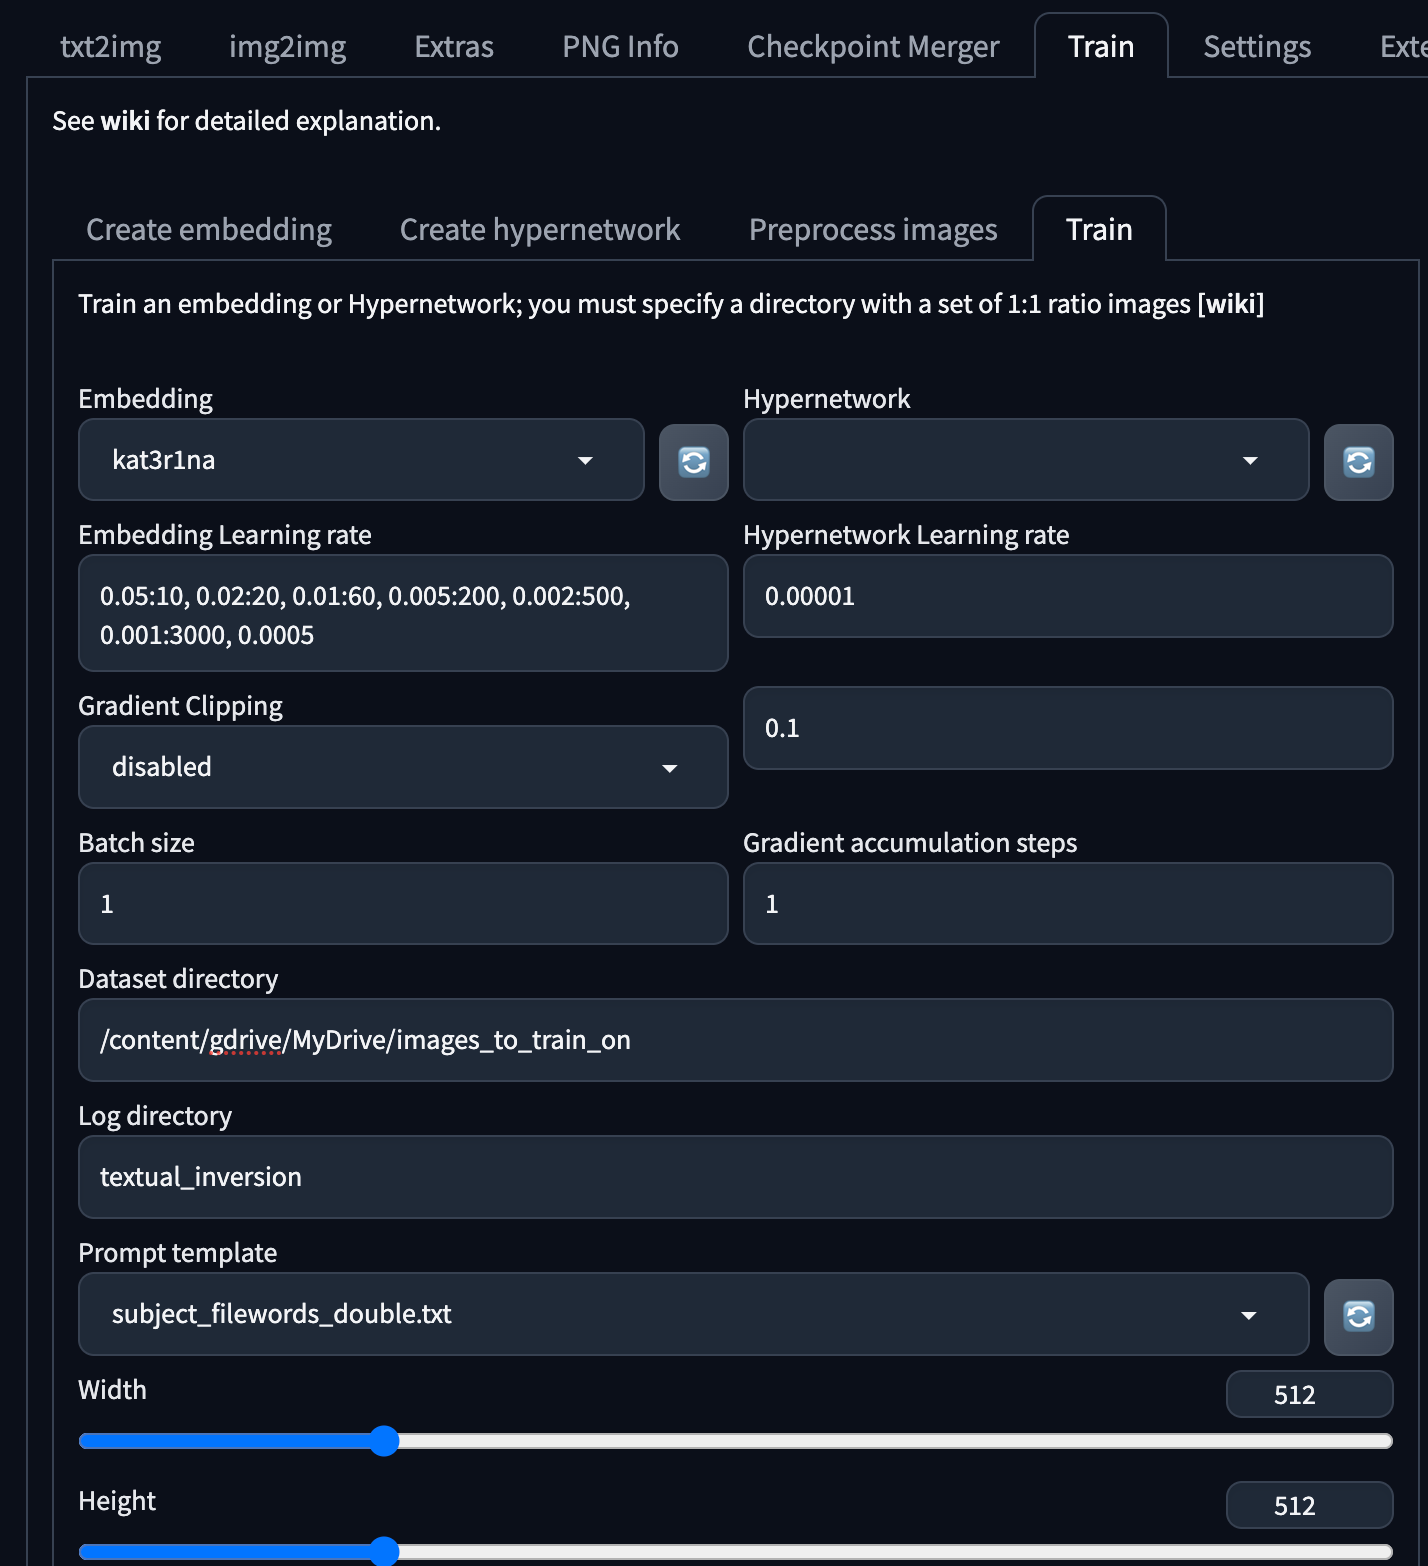
Note that an additional file, "subject_filewords_double," will be required. This will help us train the images based on the file names that the picture_sort.py Python script renamed them to.
subject_filewords_double.txt
Create a text file called subject_filewords_double.txt in your Automatic1111 textual_inversion_templates directory. Copy this line into it and save the text file.
[name], [filewords]
Stable Diffusion Model:
You'll need access to the base Stable Diffusion 1.5 model for this training. It is best to just train on the base model as every other Stable Diffusion model you find will be somewhat based on this one.
We have not tried training an embedding on a derivative model, but that would be an exciting experiment to try later on.
GitHub Repository:
As noted previously, we used "TheLastBen Fast Stable Diffusion" Jupyter notebook for all of the heavy hitting actions in this tutorial, you can grab it via the following link: TheLastBen Fast Stable Diffusion.
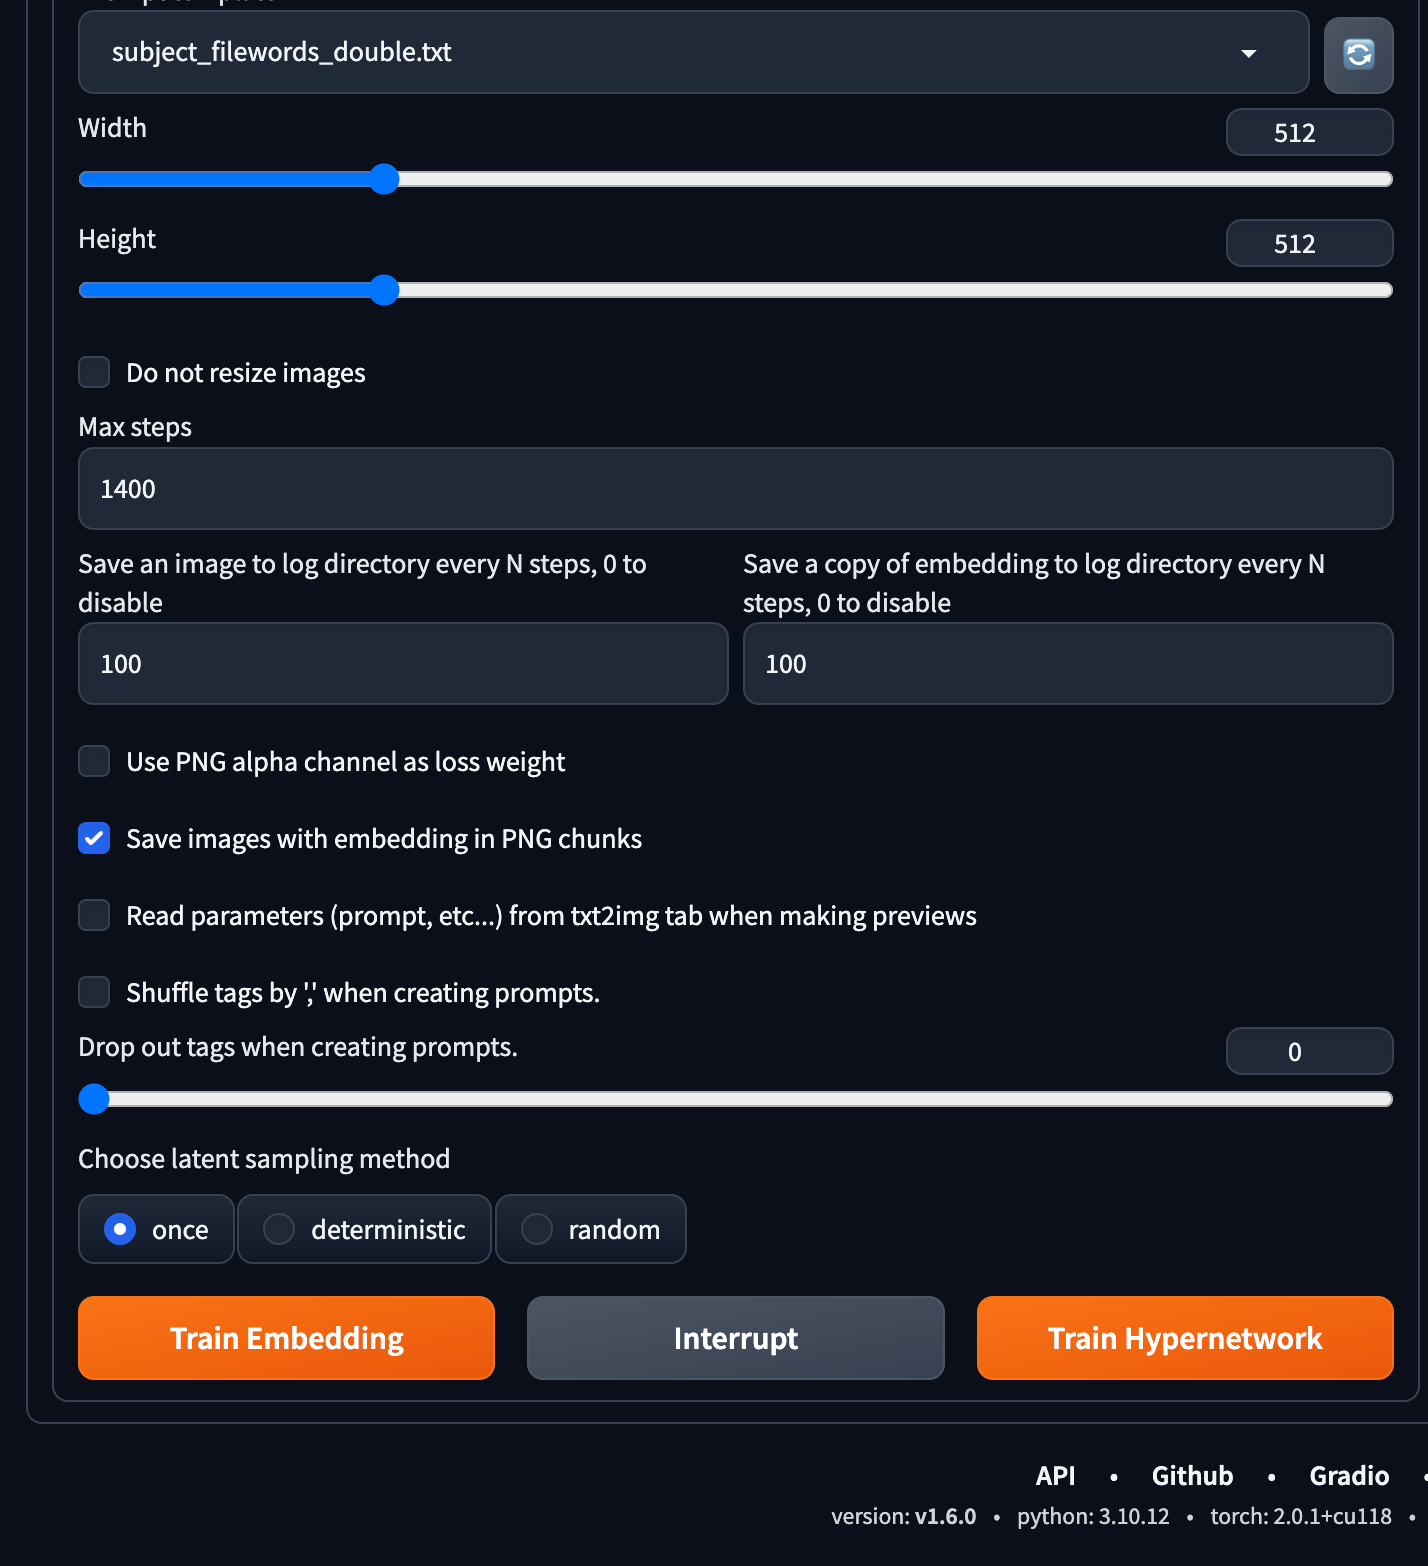
Embedding Creation Settings
In the first tab "Create Embedding" you will need a name for your embedding and the text that will initiate the embedding. The number of vectors can be from 4 to 8 (reading online forums gives you justification for any number, so we randomly chose 6).
In the Train tab, set it up with the following settings:
Note: the odd embedding learning rate. We seemed to as a community figure out that this is best way to do it: 0.05:10, 0.02:20, 0.01:60, 0.005:200, 0.002:500, 0.001:3000, 0.0005
The training process
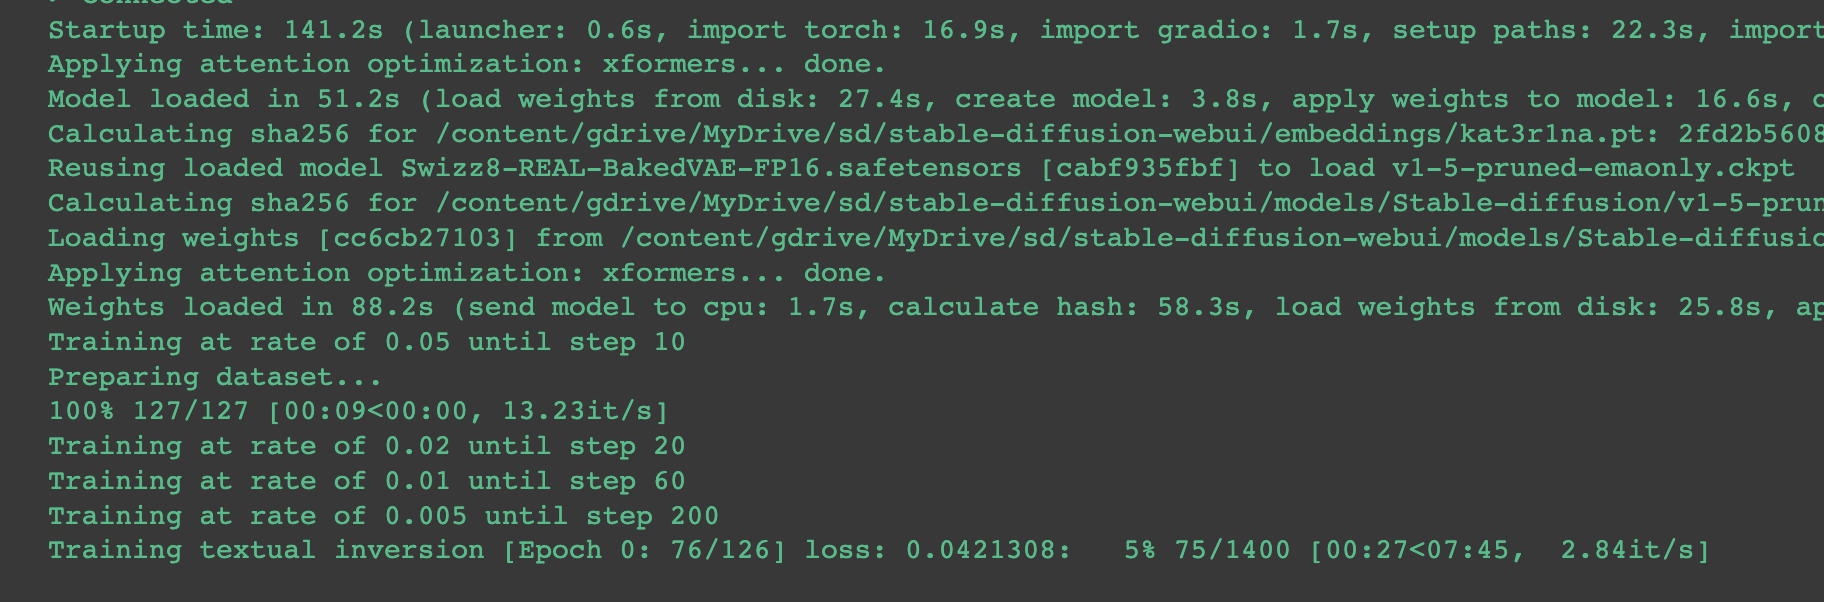
With your settings are in place, initiate the training process and let the algorithm work its magic. On the A100 GPU it took about 15 minutes.

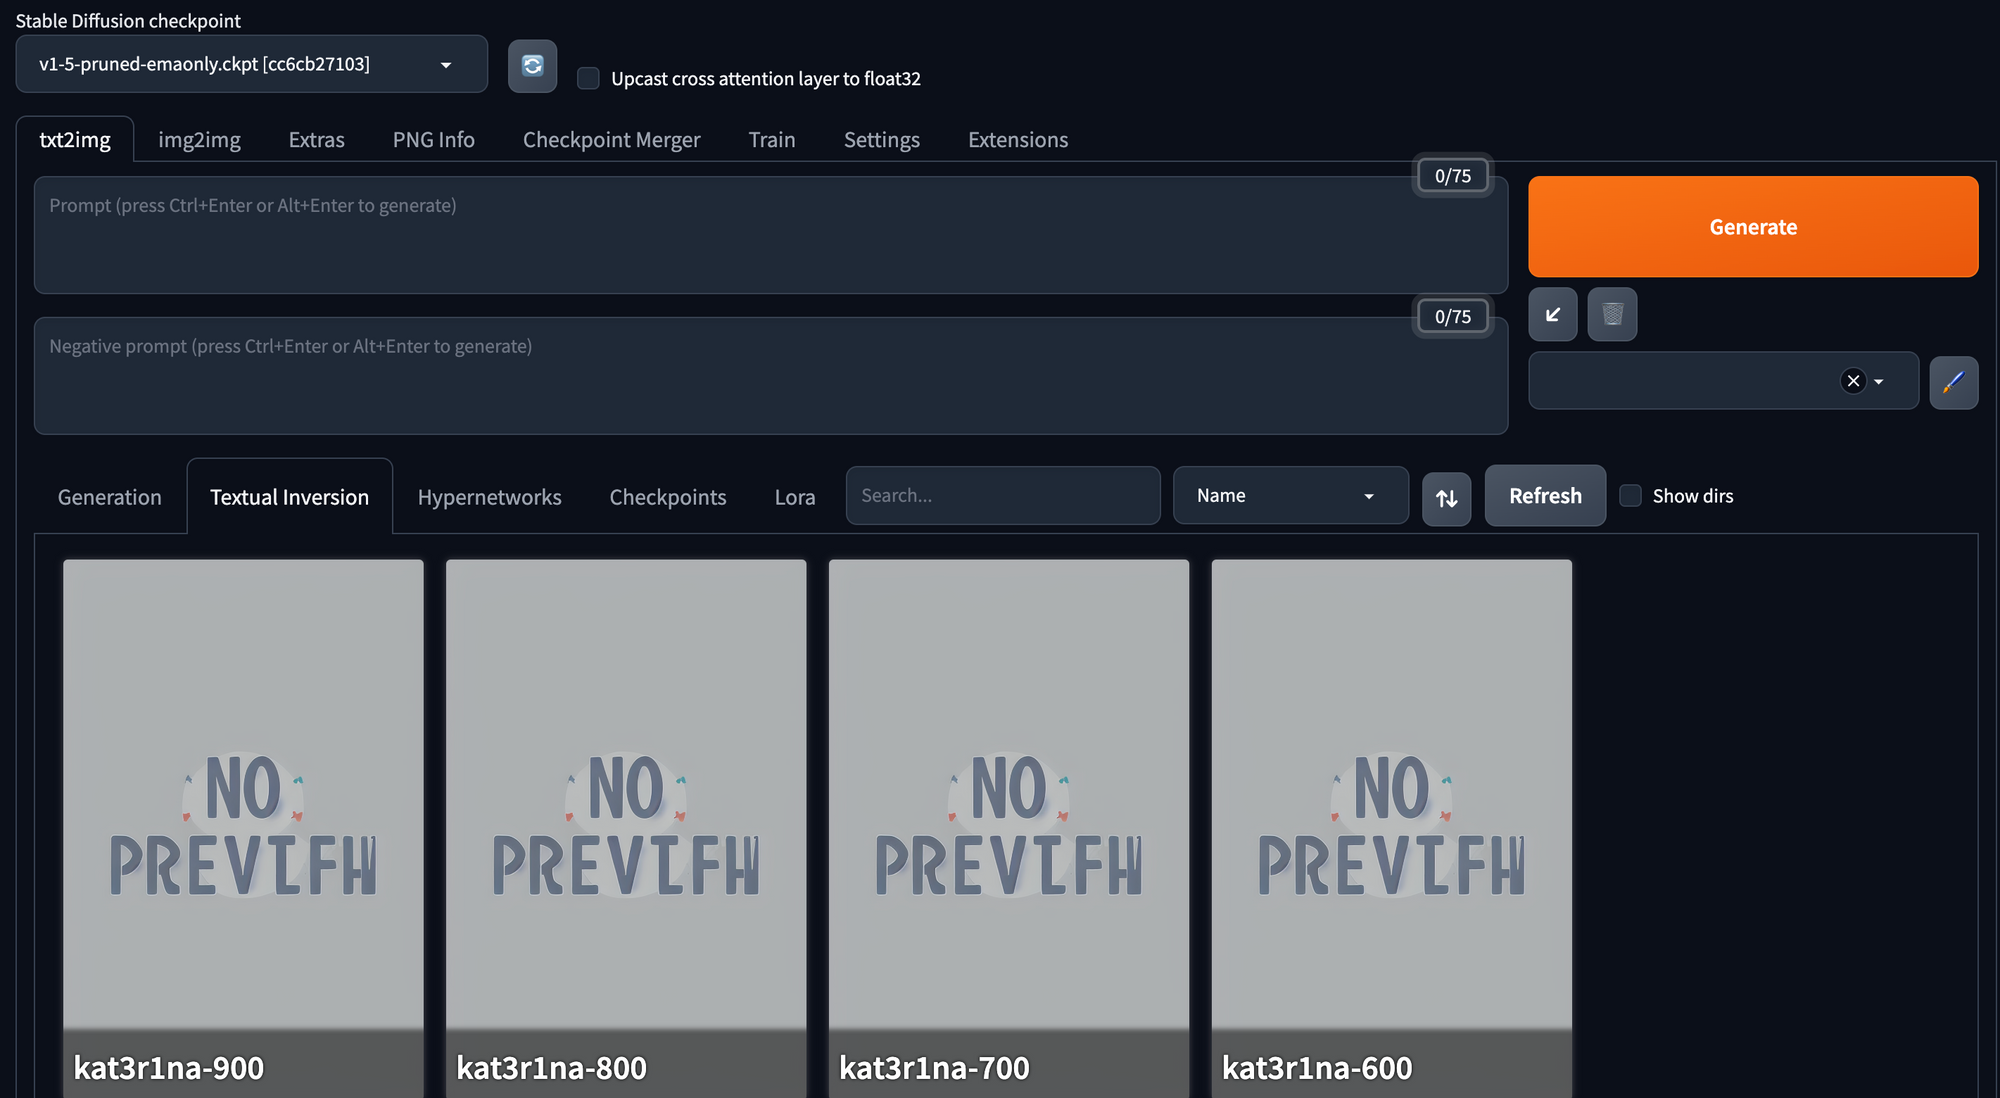
Choosing and Validating a Specific Iteration of the Trained Embedding
In this section we will filter out the embeddings we created in the previous step. In the settings we saved an embedding every 100 steps, so you should have 14 embeddings to play around with, but only 1 or 2 will be viable.
Download the "textual_inversion" Folder
To safeguard your progress, download the "textual_inversion" folder to your laptop's working directory.
Google Colab Setup
In your Google Colab, copy the new embeddings from the textual_inversion directory to the /embeddings directory in the root directory of your Automatic1111 installation. Refresh Automatic1111 to ensure is "sees" the new embeddings.
Embedding Location
The path to where the textual_inversion folder's embeddings were saved is as follows for our testing:
/content/gdrive/MyDrive/sd/stable-diffusion-webui/textual_inversion/2023-09-20/kat3r1na/embeddings

Generating Test Images #1
Like the X/Y/Z Plot for image generating, we will be swapping out words in the prompt with Prompt S/R. This time we will just use the embedding names.
X/Y/Z Plot Script Configuration
Configure the X/Y/Z Plot Script as follows:
Note: We started with embedding labeled 200 [kat3r1na-200] as found that during testing the first few embeddings are useless. We also found that the later embeddings seem to "baked in" so we stopped at 1100 in the screenshot.

Embedding testing prompt configuration
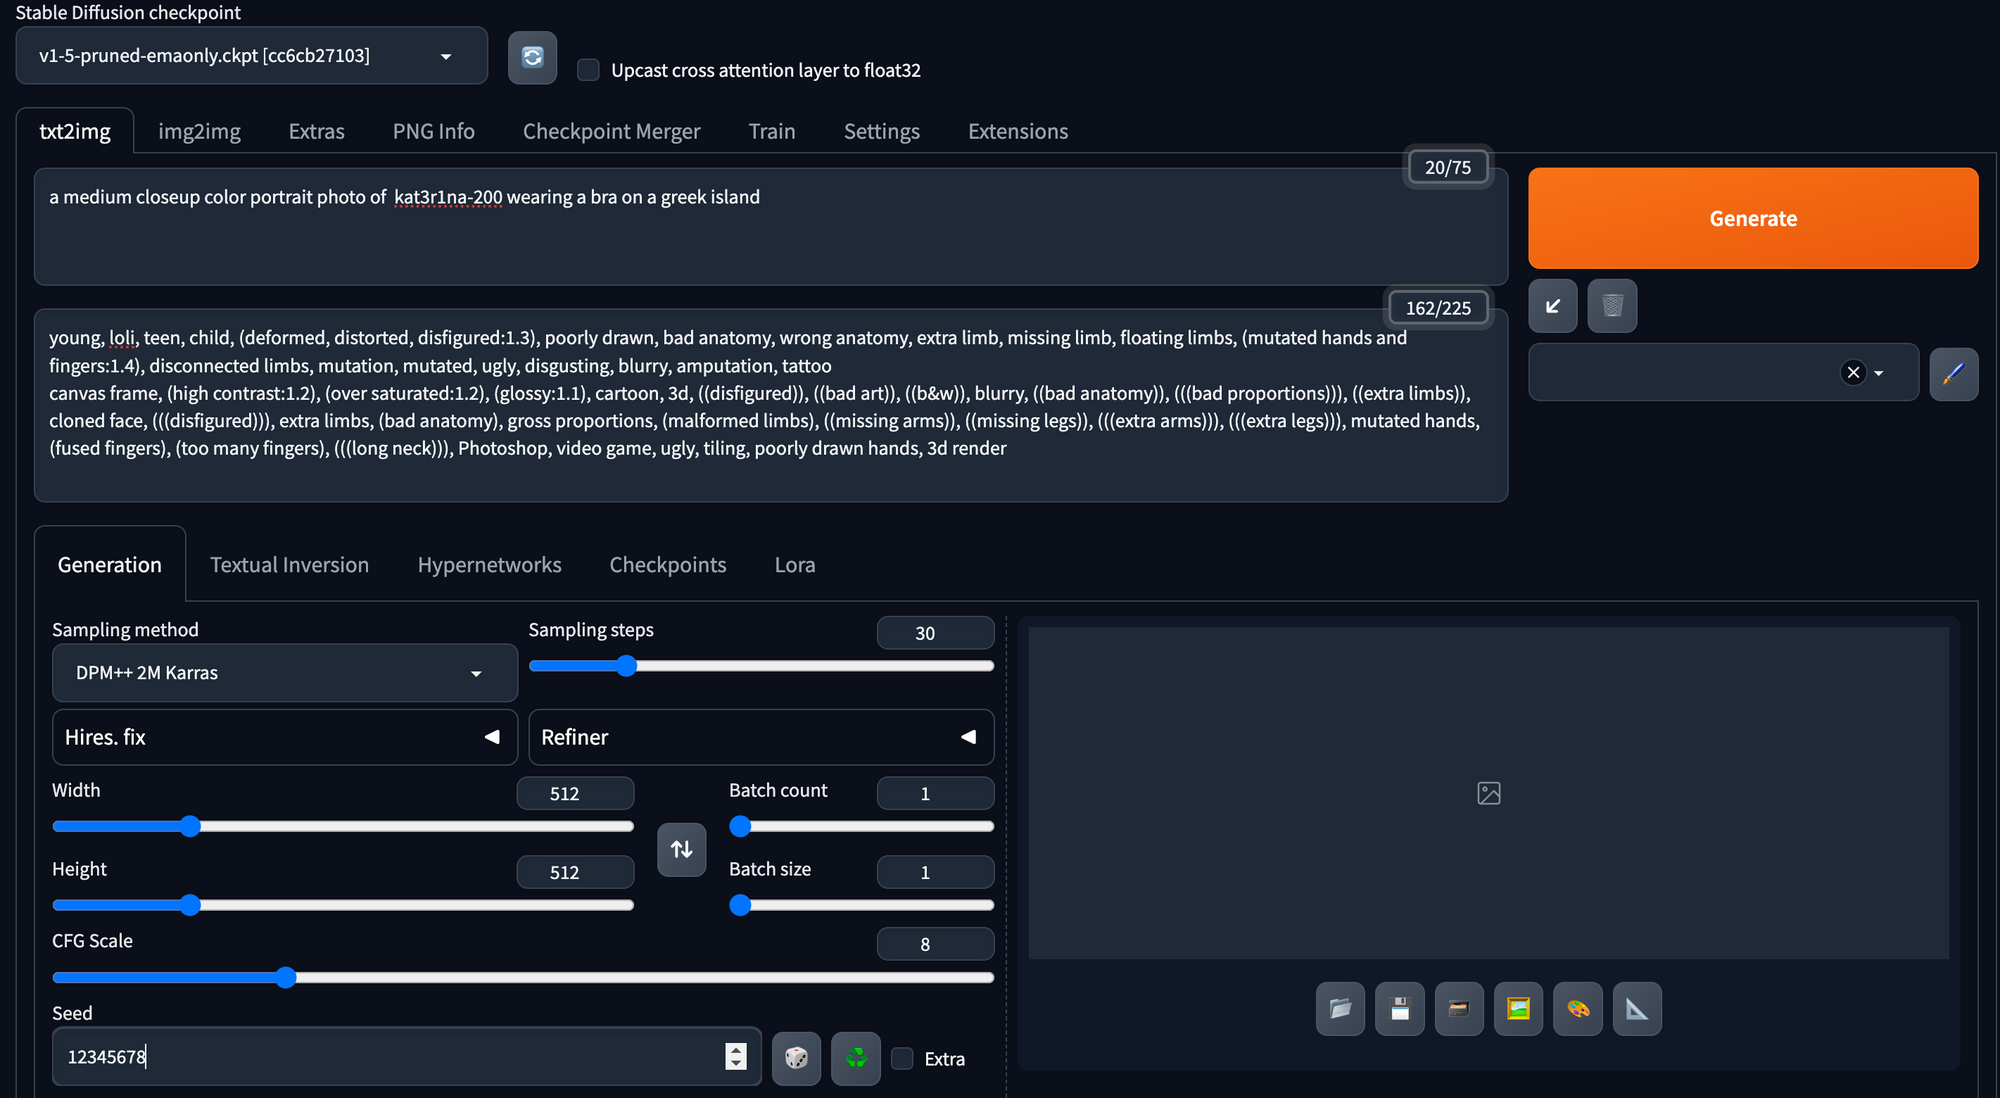
The prompt used for generating test images should resemble the following:
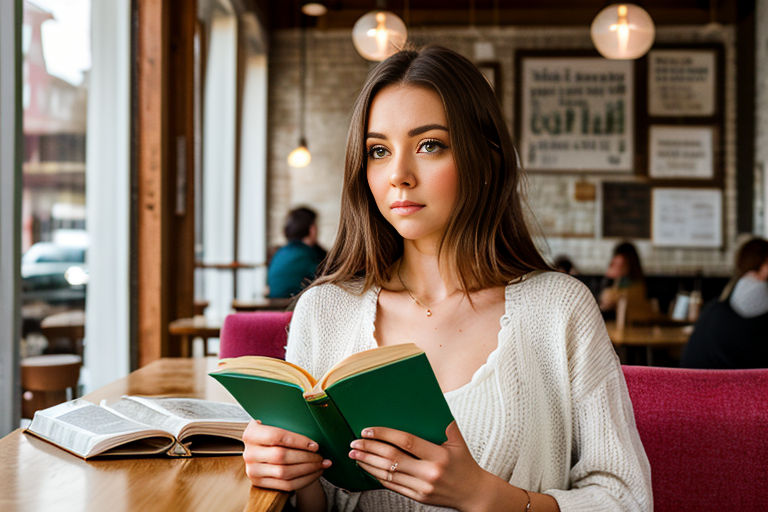
a medium closeup color portrait photo of kat3r1na-200 wearing a bra on a greek island
Note: Add some clothing into this prompt as the embeddings will want to be nude due to our original prompt and source images.
Additional Settings
- Sampling Method: DPM++ 2M Karras
- Sampling Steps: 30
- Restore Faces: Off
- Tiling: Off
- Hires. fix: Off
- Width: 512
- Height: 512
- Batch Count: 1
- Batch Size: 2
- CFG Scale: 8 (Note: This is higher than the default)
- Seed: 1234567890 (Note: This differs from the default -1)
- Grid Margins (px): 16 (Note: This differs from the default, catering to the XYZ plot)
In this configuration, we maintain simplicity in our settings. However, we do increase the CFG Scale and set a memorable Seed value.
Run the batch and see what embedding gets you close to your character's description. During this run, we found that 400, and 500 were good, but we had a hard time choosing the right one.
We also ran the embeddings against other Stable Diffusion models to see how they worked.

Choosing the Right Embedding
In the case of Kateřina, we opted for the embedding kat3r1na-500.pt as it most faithfully represents the character. Sometimes, you might discover two or three embeddings that align with your creative vision—feel free to retain them as well.
We then generated some test images in different situations:

Saving Your Embedding
Now that you have an embedding that you love it is time to save it and document it. Make a copy of your new embedding and rename it to <CHARACTER_NAME>_gen0_sd15 as you would like to remember the Stable Diffusion version you used and the generation of this embedding.
It might take you 5 generations of embeddings to get something you are completely happy with.
For extra credit, attach a photo to the embedding in Automatic1111
Select the textual inversion tab, scroll to your embedding.
Open the settings with the wrench and hammer
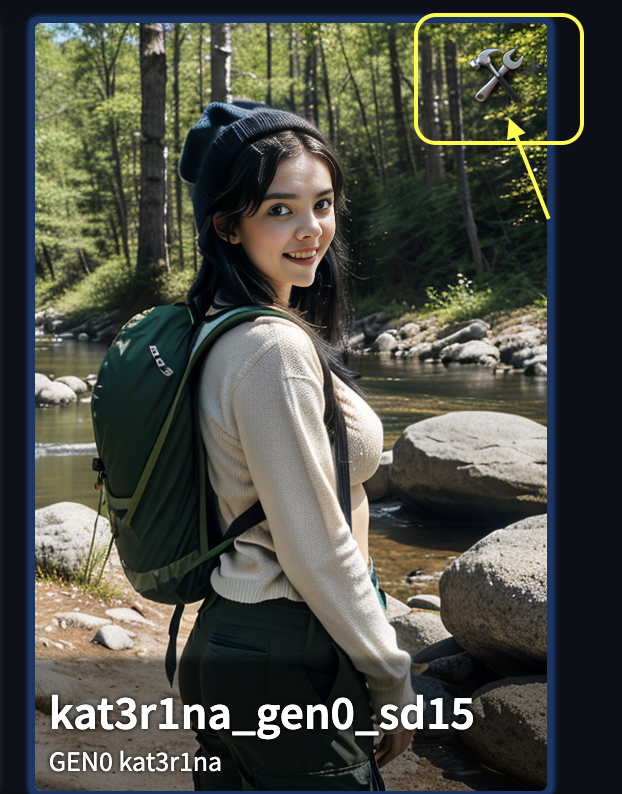
Edit the Description and add some notes. We put the name of the character and the generation.
If you generated an image recently with the embedding, select "Replace Preview" to insert it.

Congratulations on Your Consistent Character Embedding
With these final steps, you've successfully created an embedding that embodies the essence of your character. You'll find that the training process becomes more intuitive and seamless as you create more generations of characters.
We are excited to see your creations, tag us on social media @BitsofJeremy, and show us.
In our next article we will take the same images used for this embedding and create a LoRA.
References:
This is by far the best tutorial for creating an embedding with Stable Diffusion and Automatic1111, we highly recommend reading this as well:
Creating a Consistent Character as a Textual Inversion Embedding with Stable Diffusion
https://github.com/BelieveDiffusion/tutorials/blob/main/consistent_character_embedding/README.md
Another great article here with deeper explanations:
 Andrew