Adding comments to your Ghost blog with Mastodon
Making an Ivory Bridge

Introduction
I’ve wanted to add comments to my various blogs for a few years now. I had this idea for awhile kicking around in my head of linking a Twitter thread, or a matrix.org channel to an article so that folks could comment and then it would display in the article. With all the drama of Twitter that has happened over the last week, I really started to pick up and enjoy using Mastodon for microblogging. I’ve had Fediverse accounts in the past, but never really stuck with it as most of the network effect was not there, it just took a #SpaceKaren to kick us all out in the right direction ;)
In this post I will go over how I built comments into this blog and provide code so that you can also integrate Mastodon with your Ghost blog.
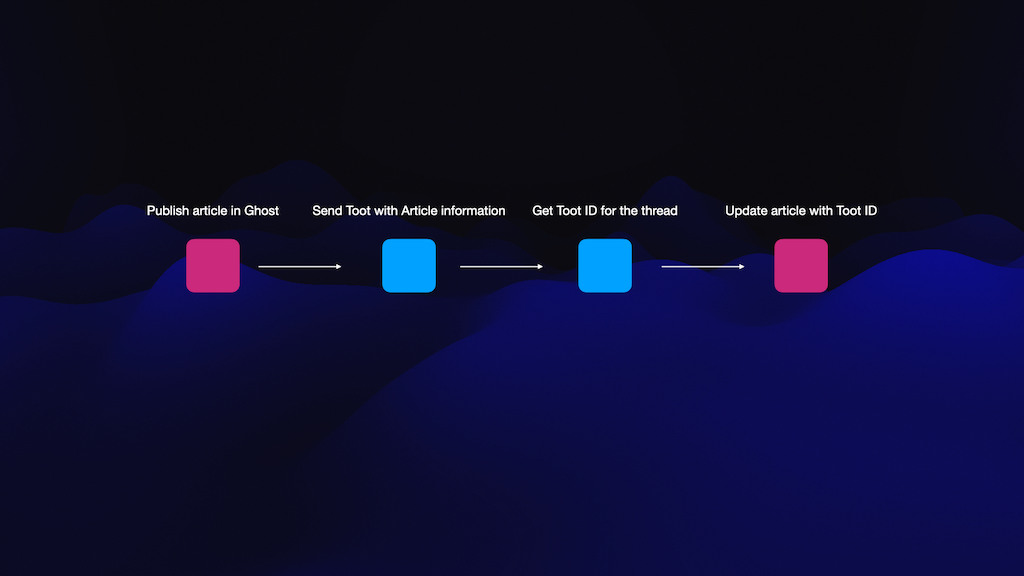
The workflow idea
The workflow requires a middle layer to do the heavy lifting of posting the article to Mastodon, and then updating the article with the thread ID of the Toot.
Working with the Ghost API
In order to accomplish what we need to do with the bridge, we need to setup an integration in Ghost and access the blog’s admin API. The Ghost docs explain it really well, so I’d suggest reading up on it [They have code examples as well].
Admin API docs:

Working with Mastodon.py
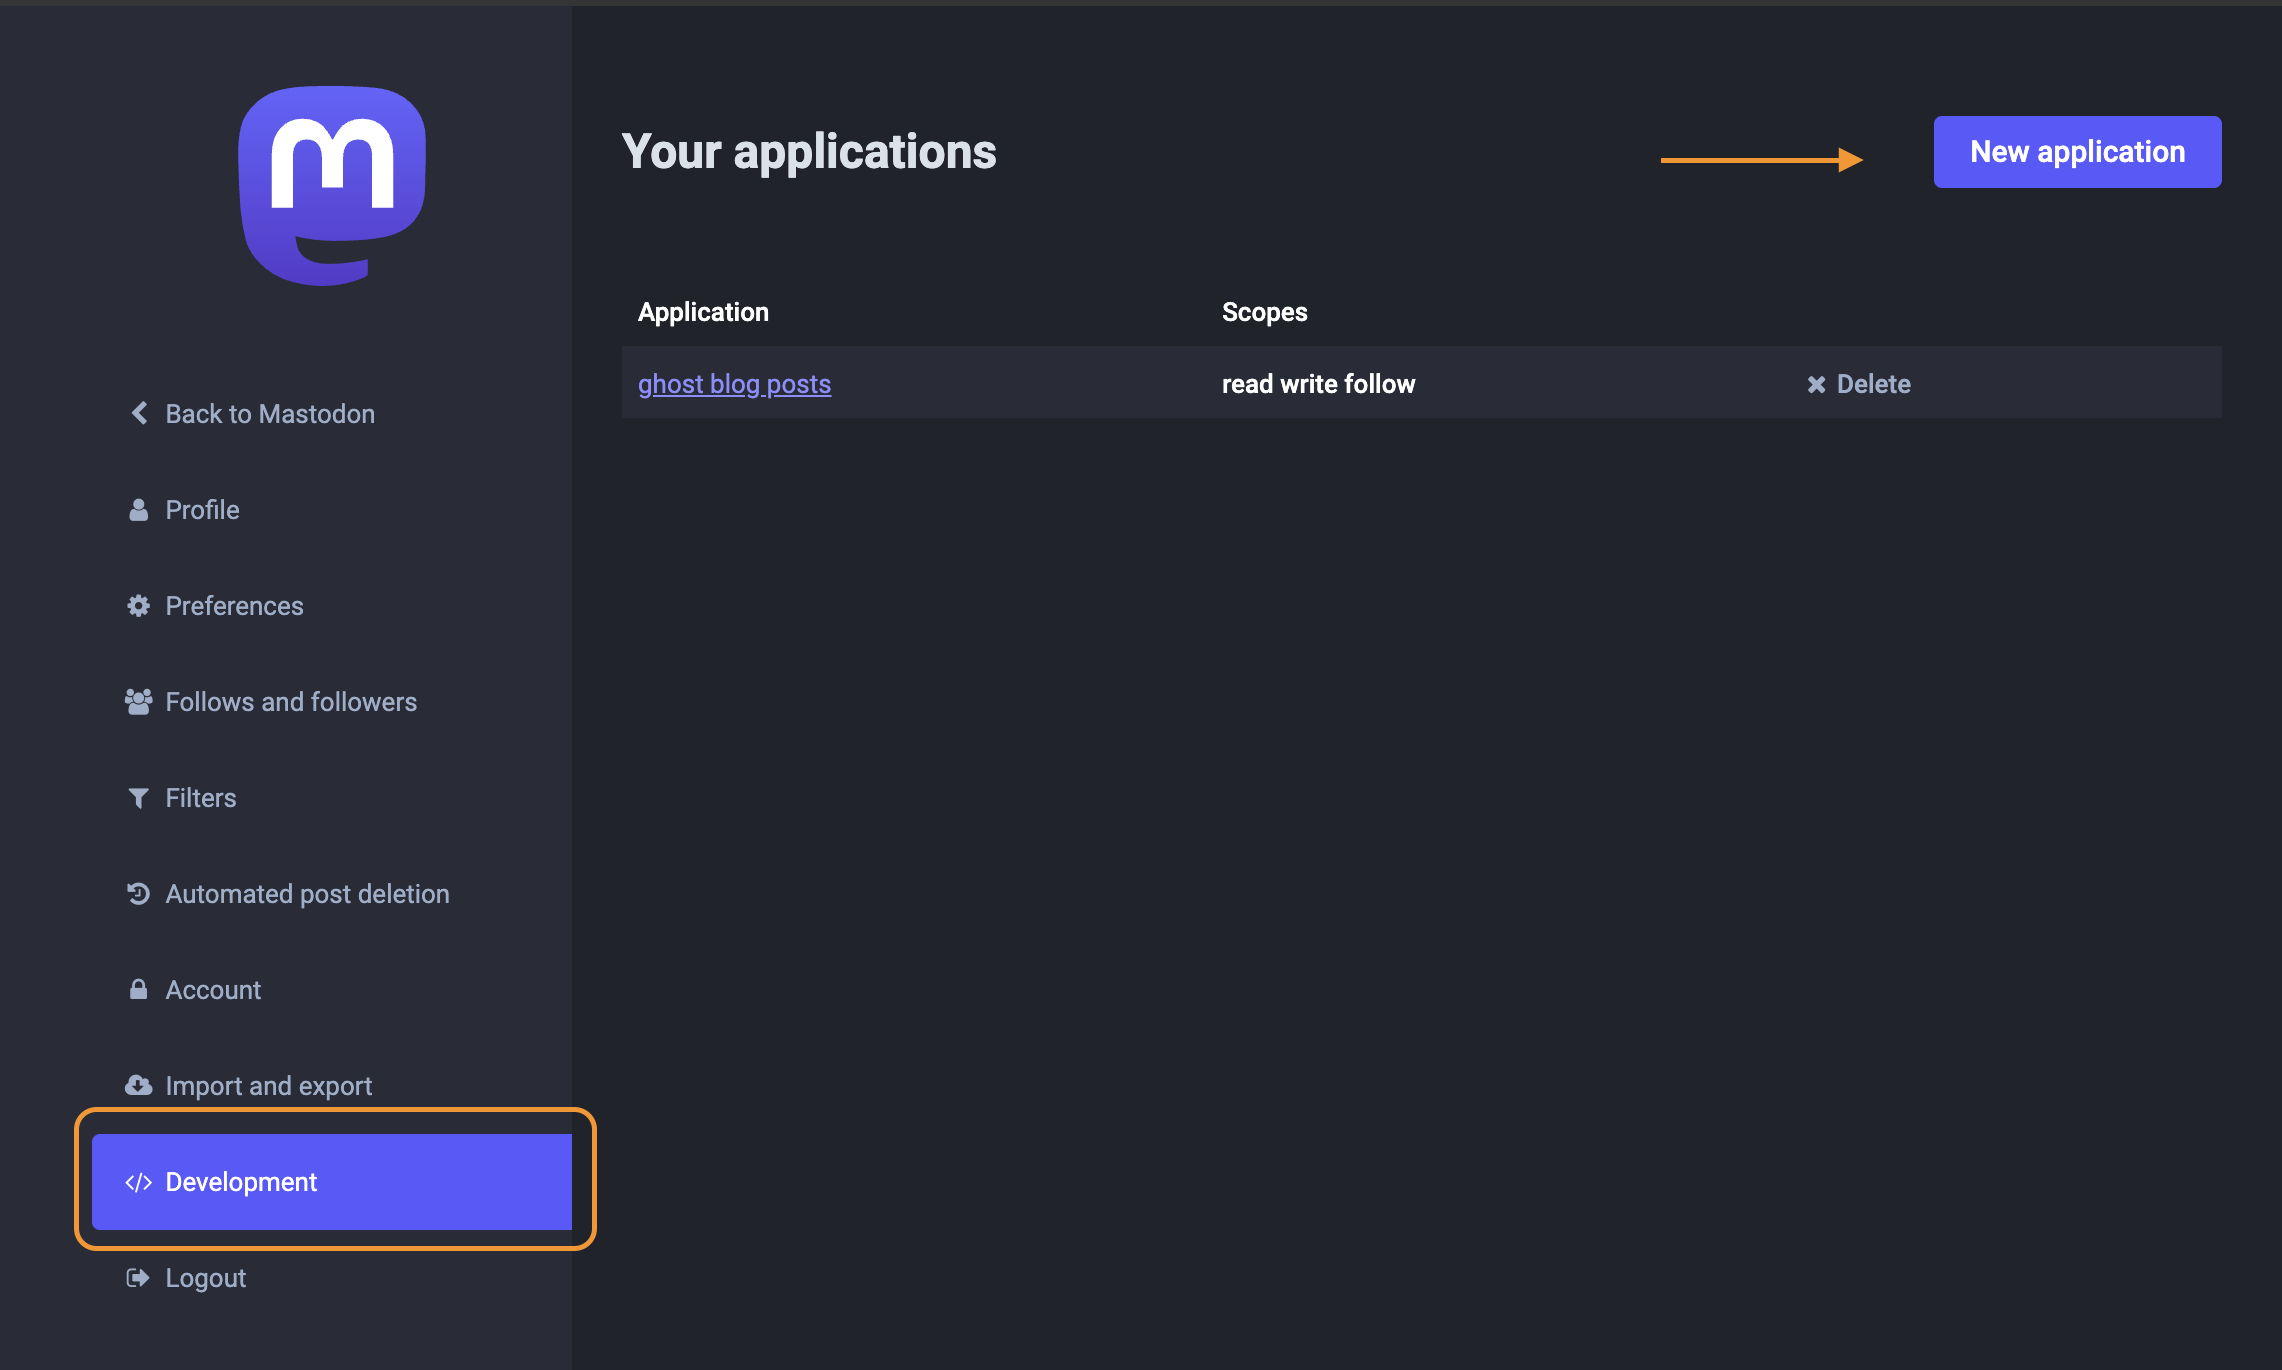
In order to post a Toot and then get the ID back we need to work with the Mastodon API. Luckily there is a nice Python module called Mastodon.py we can work with to get sorted.
You can setup an integration with the module, or manually do it in your user preferences on the instance you belong to. I had already created an integration, so I used that [screenshot]. You will need read and write scopes for this to work.
Mastodon.py docs:
Security considerations [Nginx, JavaScript]
One thing of note, we will need to lockdown somethings in order to make this a bit more secure. I will highlight them here.
Javascript in the theme:
For the text coming back from Mastodon comments, we push it through DOMPurify to “clean” up the text.


Nginx deny access rules
We will setup Nginx to only accept requests from our local server and not the entire web. This locks it down so that only our Ghost blog can “talk” to the web hook.
If you are into computer security and have any other suggestions, please reach out to me on Mastodon as I am always keen to learn more.
The Ivory Bridge
Here is the main component of all this. The bridge accepts posts from Ghost via the integration webhook. It is a Python Flask app that takes the data from the post, formats some text, creates hashtags, and sends a Toot from that info. Once the Toot is sent, it takes the ID, and updates the article with the ID via the Ghost API.
 BitsofJeremy
Setting up Ghost
We need to modify the default post template in the theme to add some code to handle the comments via a bit of Javascript.
I am using the Solo theme for my blog. I copied the post.hbs to custom-mastodon.hbs and added the code below. The folks at Ghost have a good tutorial on how to do that properly if you need more instructions:

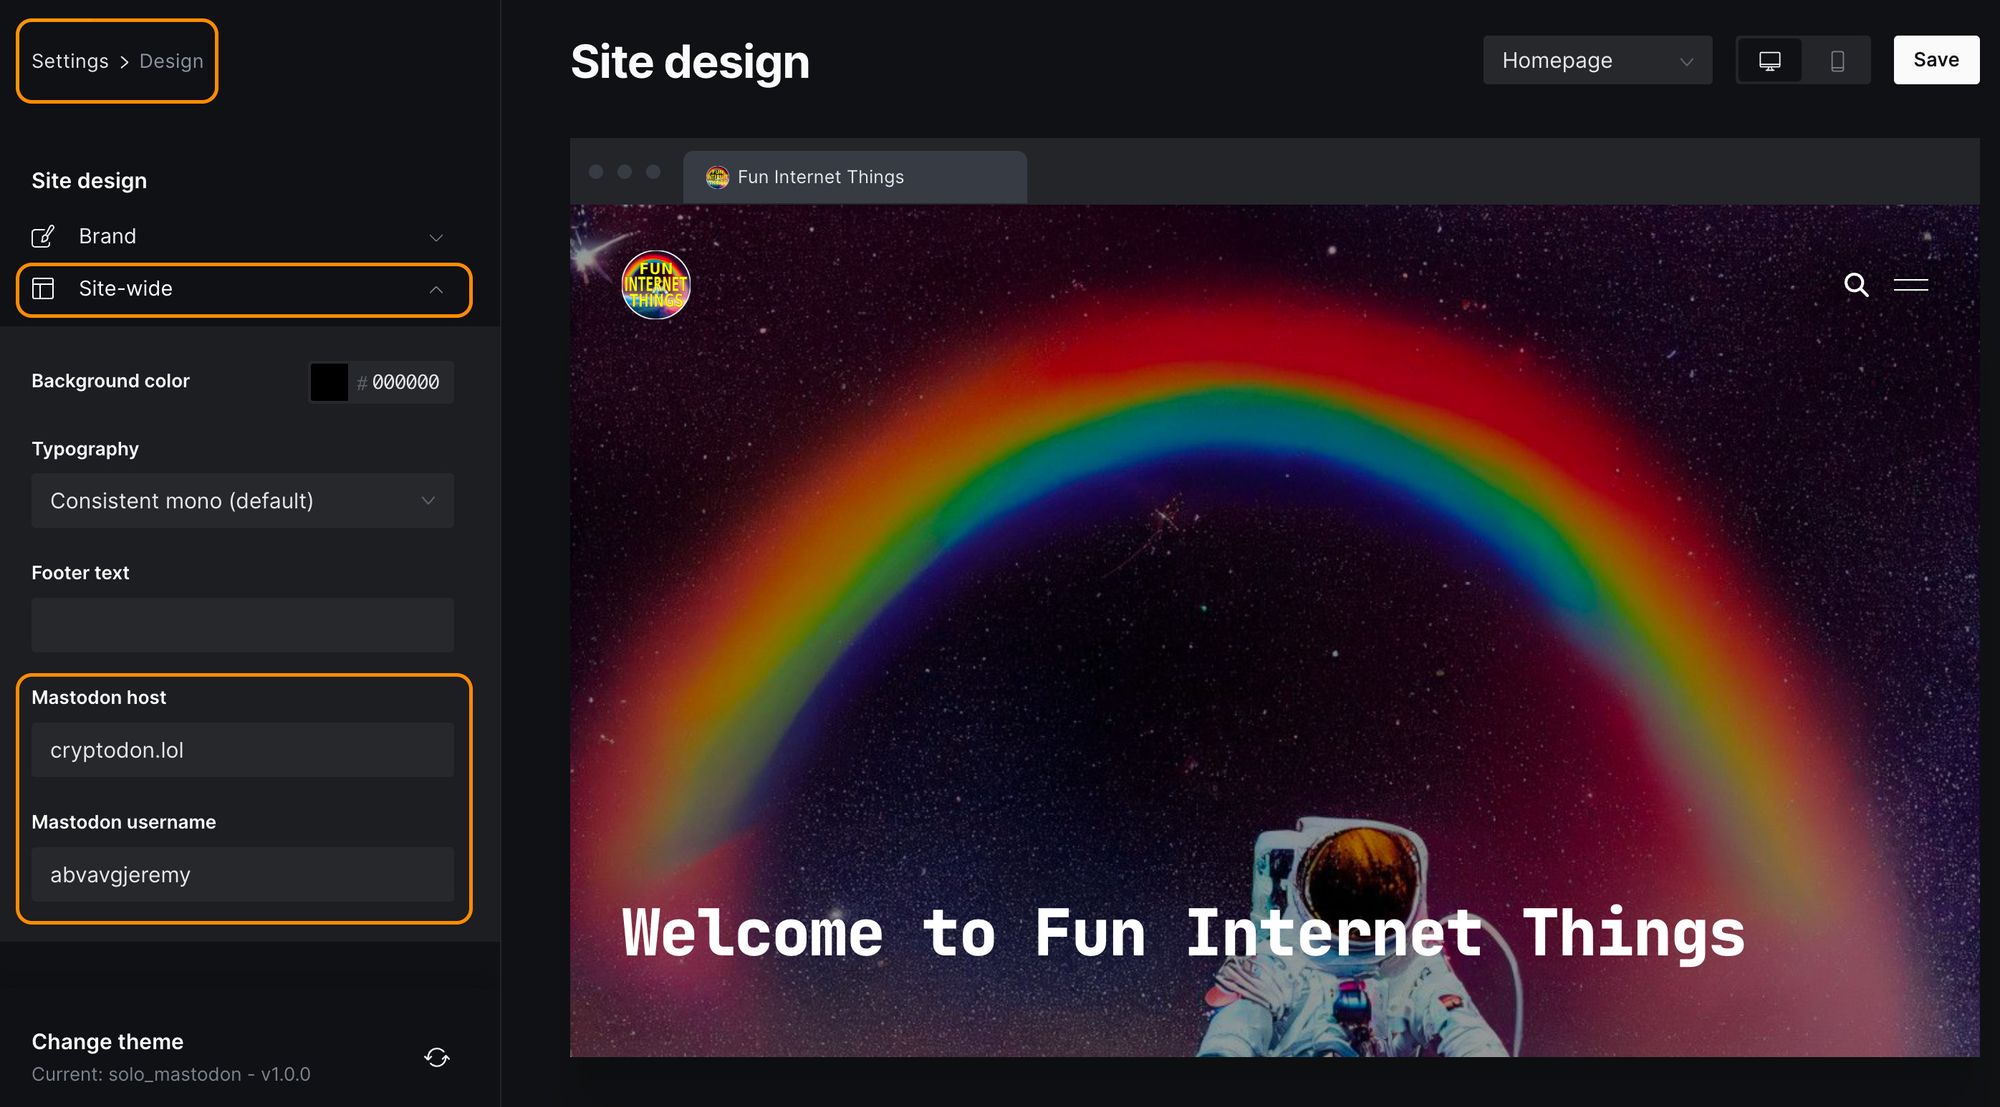
Once we have the theme in place, activate it and update the Mastodon Host and Mastodon Username in Settings > Design > Site-wide
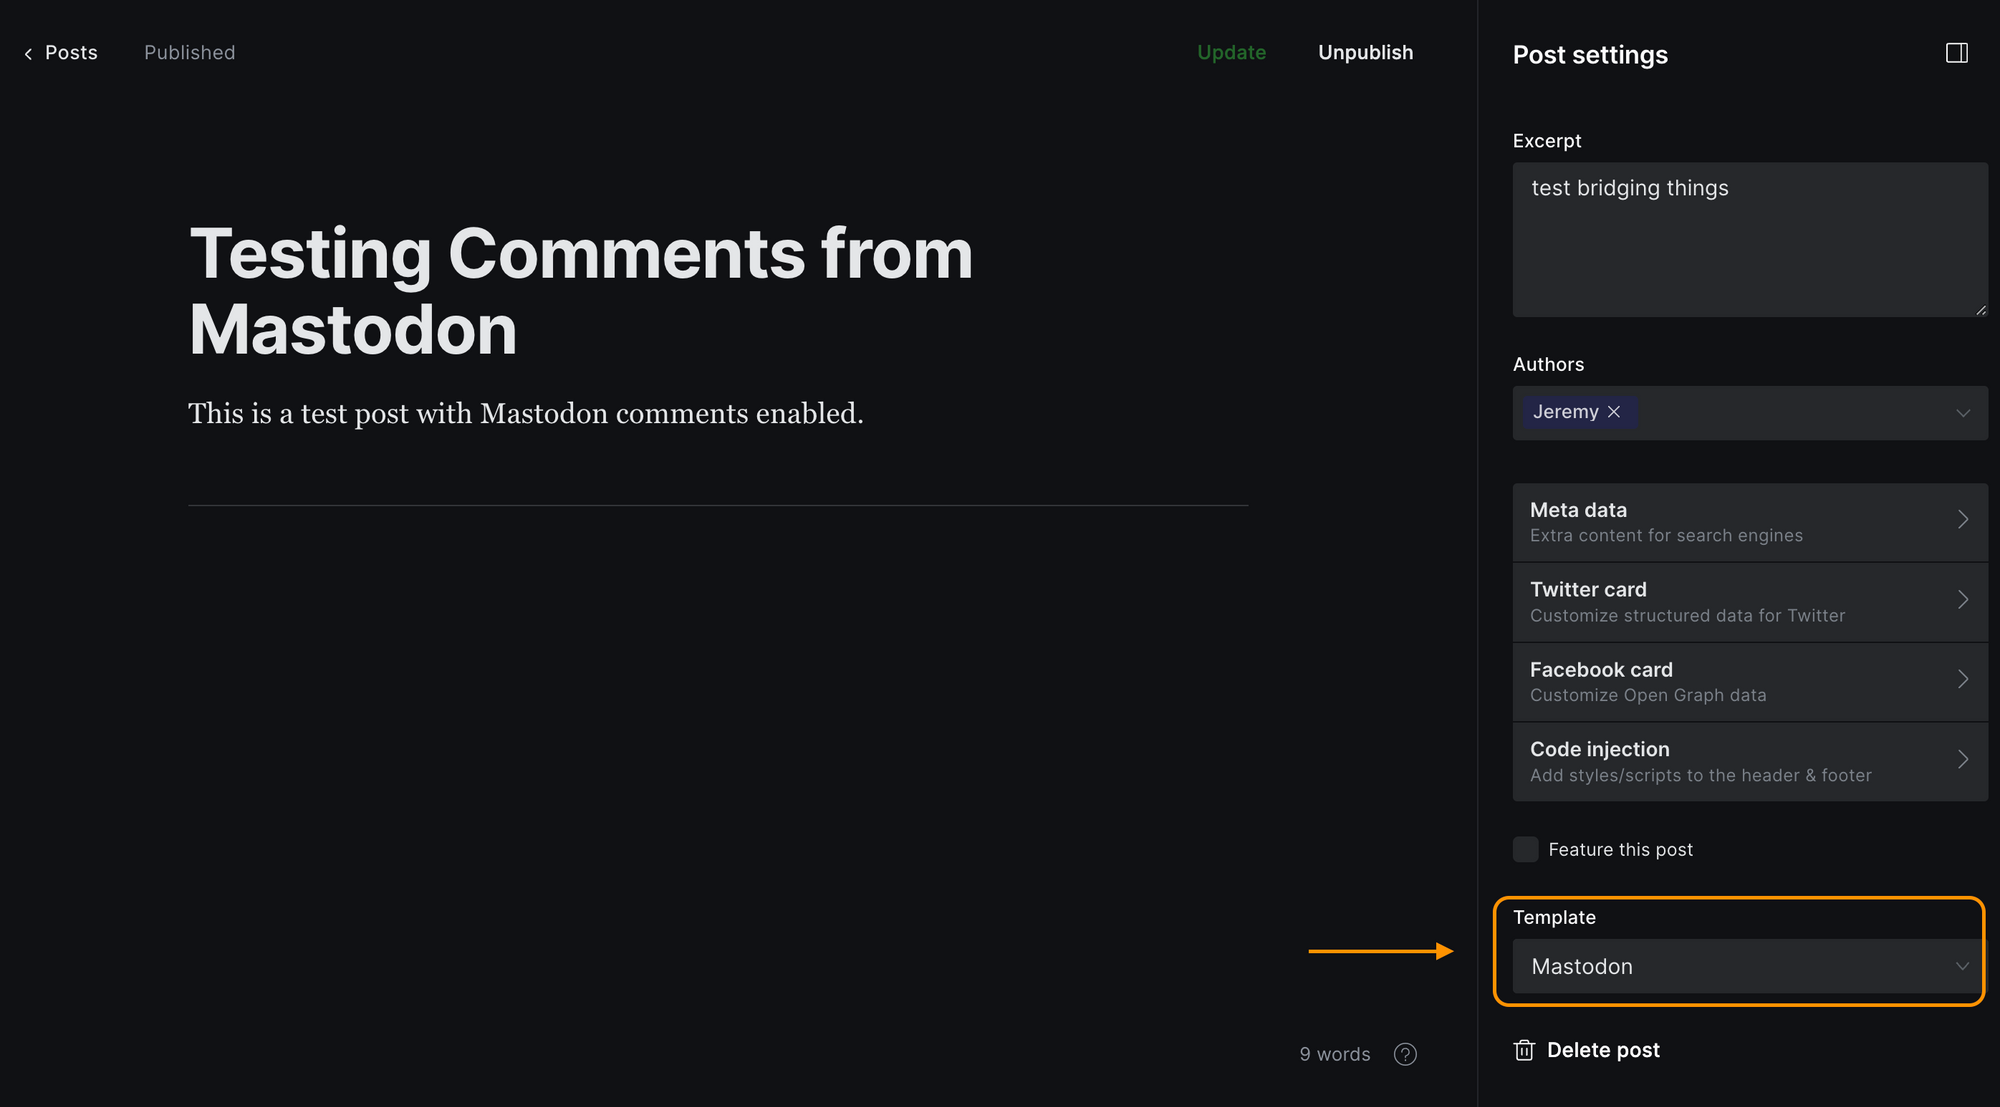
Now that you have the custom theme loaded, when you create a new article, you will need to select the mastodon template in order to see the comments after publishing.
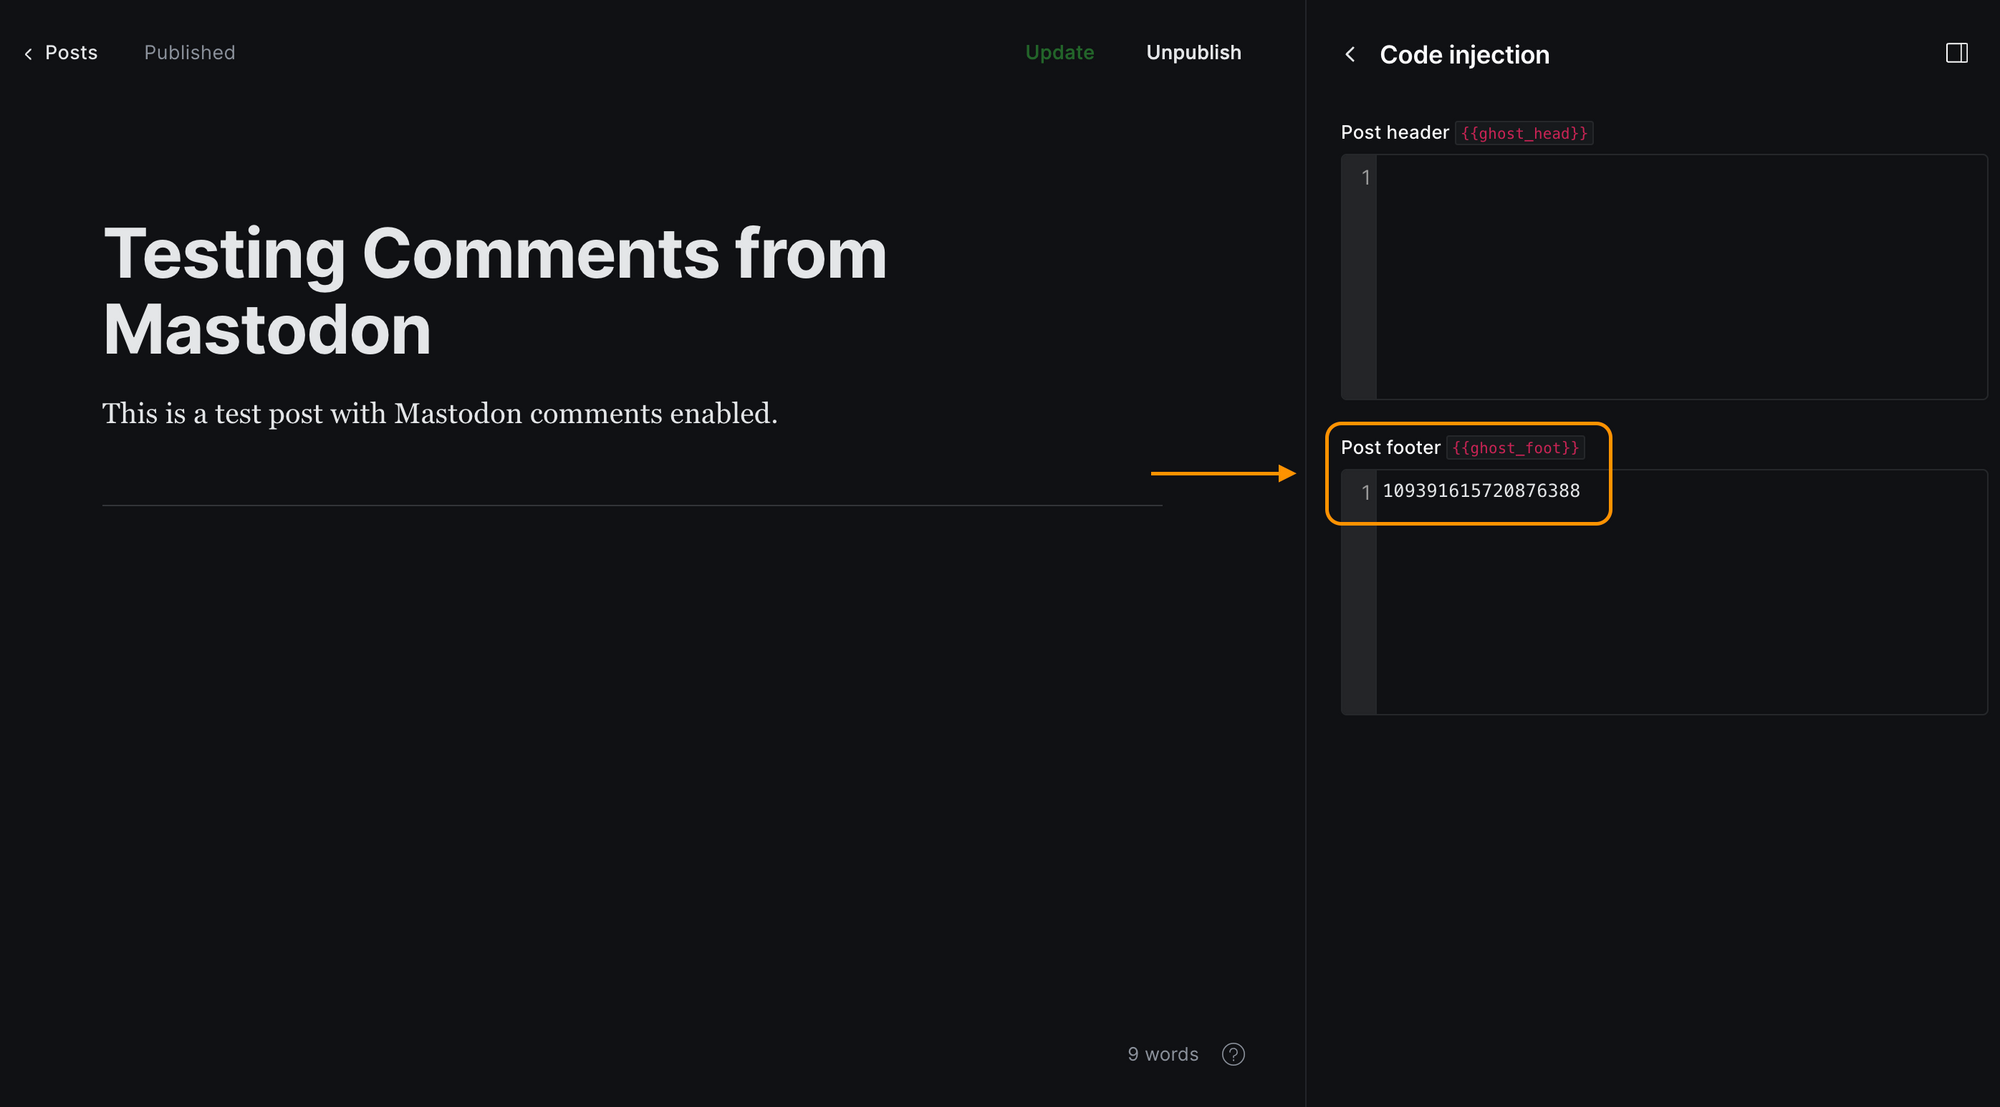
After publishing, Ghost sends the post data to the bridge, the bridge sends a Toot, and then the bridge updates the “Code Injection” post footer field with the Toot ID. The Javascript we added to the post template uses that information to create the comments section correctly.
Custom-mastodon.hbs code
Code to replace the default post's comments section
<section class="gh-comments gh-canvas">
<h2>Comments</h2>
<p>You can use your Mastodon account to reply to this <a class="link" href="https://{{ @custom.mastodon_host }}/@{{ @custom.mastodon_username }}/{{ codeinjection_foot }}">post</a>.</p>
<p><a class="button" href="https://{{ @custom.mastodon_host }}/@{{ @custom.mastodon_username }}/{{ codeinjection_foot }}?type=reply">Reply</a></p>
<p id="mastodon-comments-list"><button id="load-comment">Load comments</button></p>
<noscript><p>You need JavaScript to view the comments.</p></noscript>
<script src="https://cdnjs.cloudflare.com/ajax/libs/dompurify/2.0.12/purify.min.js"></script>
<script type="text/javascript">
function escapeHtml(unsafe) {
return unsafe
.replace(/&/g, "&")
.replace(/</g, "<")
.replace(/>/g, ">")
.replace(/"/g, """)
.replace(/'/g, "'");
}
// Using codeinjection_foot as it is easy to update via Ghost API
document.getElementById("load-comment").addEventListener("click", function() {
document.getElementById("load-comment").innerHTML = "Loading";
fetch('https://{{ @custom.mastodon_host }}/api/v1/statuses/{{ codeinjection_foot }}/context')
.then(function(response) {
return response.json();
})
.then(function(data) {
if(data['descendants'] &&
Array.isArray(data['descendants']) &&
data['descendants'].length > 0) {
document.getElementById('mastodon-comments-list').innerHTML = "";
data['descendants'].forEach(function(reply) {
reply.account.display_name = escapeHtml(reply.account.display_name);
reply.account.emojis.forEach(emoji => {
reply.account.display_name = reply.account.display_name.replace(`:${emoji.shortcode}:`,
`<img src="${escapeHtml(emoji.static_url)}" alt="Emoji ${emoji.shortcode}" height="20" width="20" />`);
});
mastodonComment =
`<div class="mastodon-comment">
<div class="avatar">
<img src="${escapeHtml(reply.account.avatar_static)}" height=60 width=60 alt="">
</div>
<div class="content">
<div class="author">
<a href="${reply.account.url}" rel="nofollow">
<span>${reply.account.display_name}</span>
</a>
<a class="gh-article-date" href="${reply.uri}" rel="nofollow">
${reply.created_at.substr(0, 10)}
</a>
</div>
<div class="mastodon-comment-content">${reply.content}</div>
</div>
</div>`;
document.getElementById('mastodon-comments-list').appendChild(DOMPurify.sanitize(mastodonComment, {'RETURN_DOM_FRAGMENT': true}));
});
} else {
document.getElementById('mastodon-comments-list').innerHTML = "<p>Not comments found</p>";
}
});
});
</script>
</section>
Deploying the bridge to a VPS
I have been using this Ansible playbook for years now to deploy Flask web sites. I highly recommend reading the article that accompanies the code repo.
I used it to deploy the ivory bridge to my VPS.
 Kwpolska
Article to read:
Final thoughts
So now with all that written and deployed, comments are available in future posts on this blog.
References
Using Mastodon for comments on a static blog
https://lottalinuxlinks.com/using-mastodon-for-comments-on-a-static-blog/
Adding comments to your static blog with Mastodon
https://carlschwan.eu/2020/12/29/adding-comments-to-your-static-blog-with-mastodon/
Add comments to static website build with Jekyll
https://blog.xmgz.eu/jekyll-mastodon-comment/

Art prompt [Midjourney]:
Surreal, bridge made of ivory with three cute elephants walking across it, bridge between the worlds, fairy magnificent, elegant, ebony black and shining like glass, sweeping arches, cinematic lighting, awe inspiring, octane render, high definition, trending artstation, digital art, by studio ghibli, brom, jordan grimmer, greg rutkowski --v 4